KataGo's Bad Shape Move Again –
Flying Below the Radar of Area Scoring (2019)
|
KataGo – like all Go playing programs, which are based on Artificial Intelligence – uses area scoring (typical for Chinese rules) for the determination of a game's result, because this kind of scoring is much easier to implement than territory scoring (typical for Japanese rules).
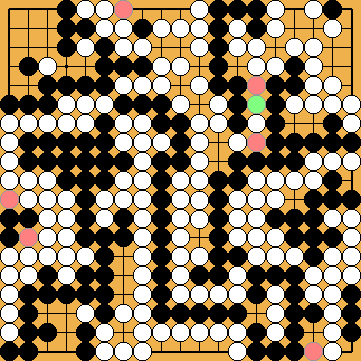
The problem's starting position contains 71 White, but only 70 Black stones, which will be interpreted by area scoring that White (and not Black) started the game. So, for example, a result of White + 2 (area scoring) is equivalent to either
This equivalence is valid in all games that do not contain any surprising (and rare) endgame positions like special kinds of seki or a final ko that can be deferred until all neutral points have been filled. We can safely assume that these "exotic" shapes will not emerge in Igo Hatsuyōron 120. Therefore, we must keep in mind that KataGo is NOT able to distinguish between e.g. "White + 2" and "White + 1" under territory scoring. This implies that it is easily possible that KataGo is having Black play a line that is slack by ONE point by territory scoring, because such a line would still be exactly identical in score and so just as "optimal" under area scoring. Whilst further analysing variations after KataGo's new bad shape move at the left, we accidentically stumbled across a corresponding application case, which we explain below. | |
| Joachim's Tesuji in the Bamboo Joint After Black's Tenuki |  1093f 1093f |
| Too Much Noise for KataGo? | 1093f |
| We ask for your kind understanding that we have not been able to adjust the structure of our website according to the new correct order of moves, but only added a corresponding note in the affected variations. |
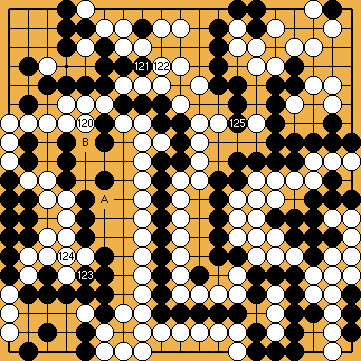
 is gote locally, so Black – after inserting some forcing moves – might play tenuki with
  , instead of choosing one of his local options at
  and at
  .
. and
and  makes sure that White will choose the Capture Variation.
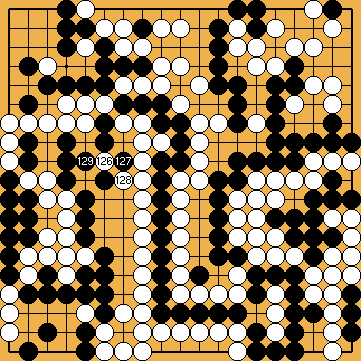
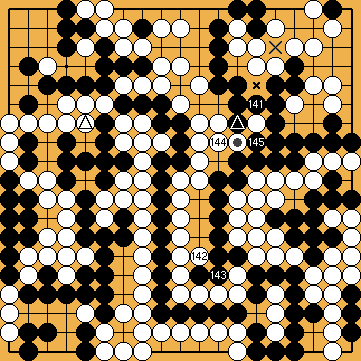
 is best.
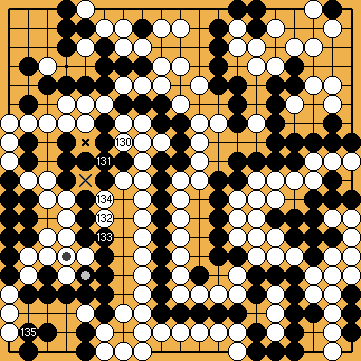
 , and created an additional approach-move liberty at
  .
. for
for  that was inserted before.
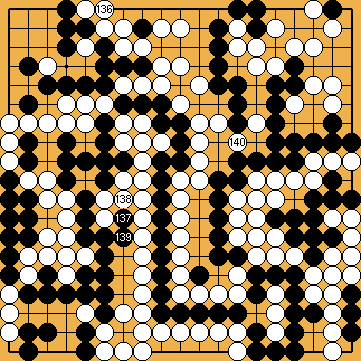
 and Black
  are miai.
 .
.
 might be the reply that comes to mind first (it is also KataGo's preferred move in this situation), but the subsequent sequence will not change the final score.
 here.
here. .
. lost a move in the Main Semeai (it did not occupy one of White's liberties at the left, which is the reason that this move must not be played in Our Solution; otherwise, Black will fall prey to the Punishment Semeai), but White
  also lost a move in the Main Semeai (it did not occupy one of Black's liberties at the right.
 , losing these two liberties again.
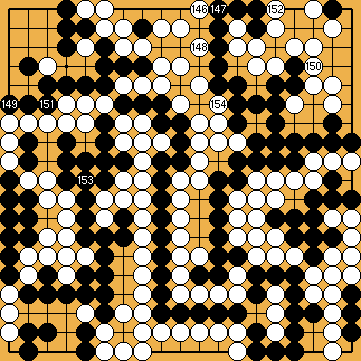
 ), because Black is no longer able to reduce her territory there.
 ), due to the loss of his eye there.
 ), where he captured a White stone.
 ), which she otherwise was able to surround as territory.
 ), where he got one point of territory after capturing a White stone.


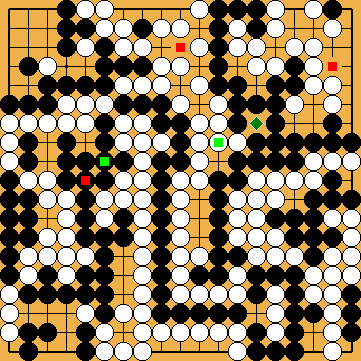
 is KataGo's preferred move; the points marked
  are alternative moves that are also mainly considered.