About Ko in a Semeai Between
Two One-Eyed Groups (2012)
[ Impact on the Main Ko-Semeai ]
|
///:
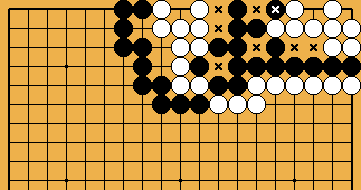
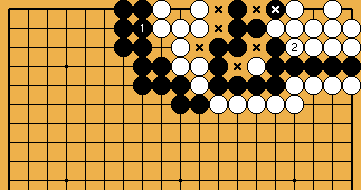
Black's group in the main ko-semeai has eight effective liberties ( |
|
///:
White's group has six effective liberties ( Black needed t = ( Black should occupy a White outside liberty, instead. |
|
|
|
///:
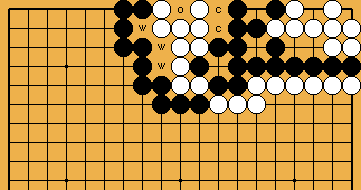
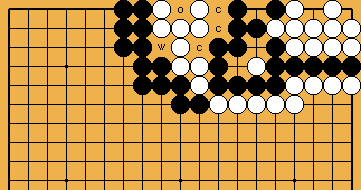
White's group also lost an effective liberty. Black now needs t = ( Not only has Black reduced the number of ko-threats he needed to win, but at the same time he prevented that White could start the semeai with his lower right corner successfully, because her group has only five liberties. |
|
///:
But to be able to play as above, Black must not have occupied all of White's outside liberties beforehand. Here, Black is unable to take any of the shared liberties, because his group has only eight effective liberties ( |
|
///:
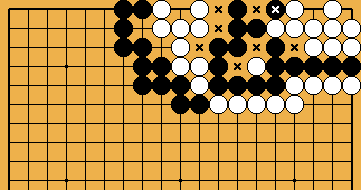
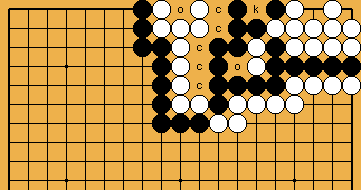
We have the case EX = However, the ko will not come into play, because White - with her group having six liberties - will choose the semeai with Black's lower right corner, after Black connected the hanezeki's tail, as he is forced to do now. Black should have maintained his flexibility, instead, and kept the occupation of at least one White outside liberty in reserve. |
|
///:
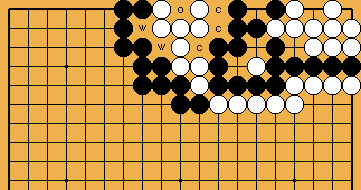
Here we display the position with the additional ko-shape in the centre. Black has eight effective liberties ( |
|
///: White's group has six liberties. The conditions are the same as with the larger Black eye, so both positions will show an identical behaviour. |
|
 ,
,  ,
,  ).
).
 :
: :
:

 = 4 here, but the same formula applies for the number of Black's ko-threats needed to win, as with EX = 2 above: t =