New Story Line 2022
Fujisawa Hideyuki's First Throw-in
VAR 
|
Please �emember that KataGo will have already exchanged |
|
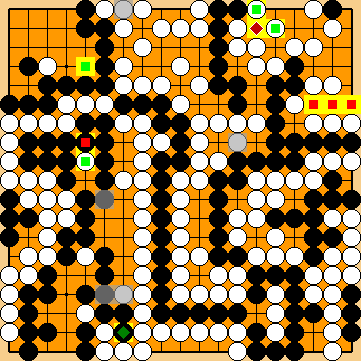
Continuing with the "usual" attachment at Should Black have played Harry's Hasami-Tsuke Sequence earlier (then with Please note that the reduction of White's upper right corner territory ends in sente for Black, which - according to KataGo - seems to be worth one point overall. |
|
We manually enforced Fujisawa Hideyuki's Atari Here, with Harry's Hasami-Tsuke utilised for the reduction of her upper right corner, White is unable to delay Fujisawa Hideyuki's Atari until after her decision point. Black would win the game by two points. Please note that this behaviour is contrary to that with Fujisawa Hideyuki's way to reduce Black's upper right corner. |
|
White's kikashi creates a weakness at
|
|
|
|
|
|
Black must not play any reduction. After White's decision point, White will play at |
|
Capture Variation: Compared to the superordinate variation, ...
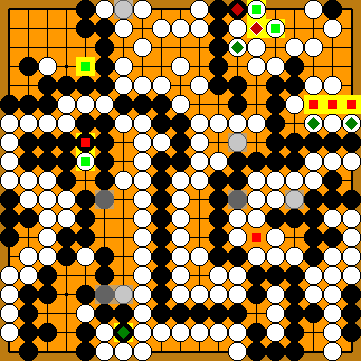
In total, gains and losses compensate for each other. White + 2 => White + 2 This final score is one point better for Black, compared to Fujisawa Hideyuki's classical way of reducing White's upper right corner territory. |
|
Semeai Variation: Compared to the superordinate variation, ...
In total, Black gained three points. White + 1 => Black + 2 |
| |
 2025
2025 for
for  much earlier in the game.
 :
: , as usual.
 :
: would be mistaken here.
 in the Bamboo Joint, so gaining decisively overall.
 for Black's connection
  before she occupied the Guzumi Point with
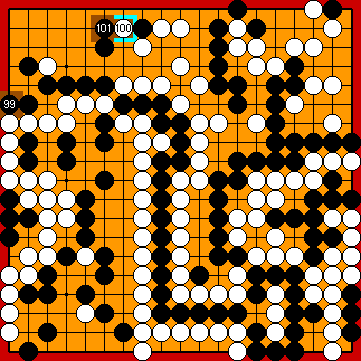
 :
: :
: in the upper left corner.
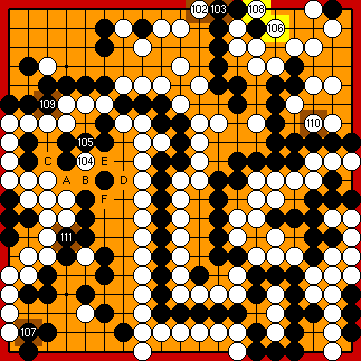
 :
: :
: in Black's formation that White might be able to exploit for a one-point gain unter special circumstances after the standard exchange of
  for
for  .
. :
: :
:
 :
: :
: :
: , so he simplifies the issue by connecting at
  :
: :
: :
:
 :
: