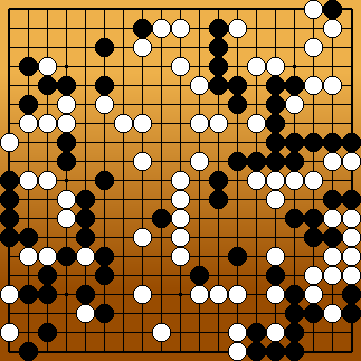
New Story Line 2022
Fujisawa Hideyuki's First Throw-in
|
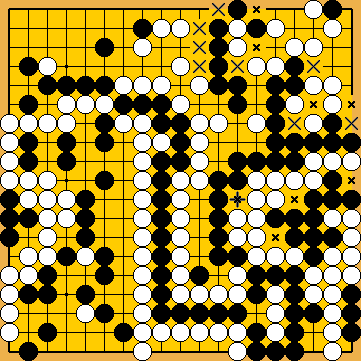
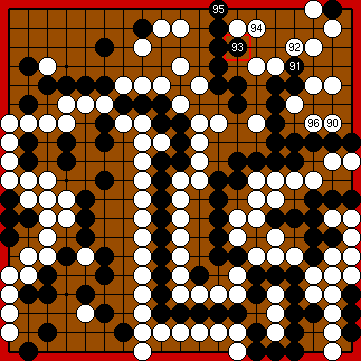
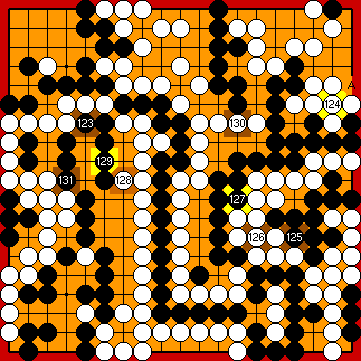
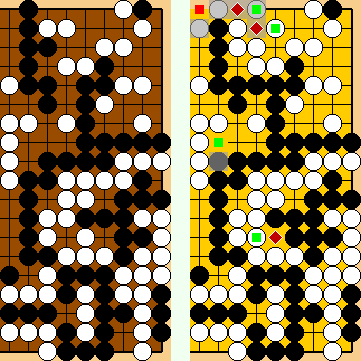
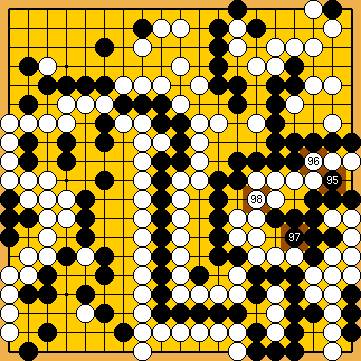
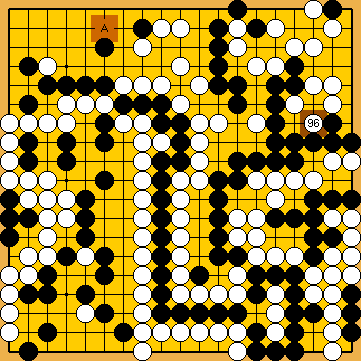
The first throw-in of Fujisawa Hideyuki 9p in the hanezeki seems to be such a "natural" move that it did not deserve the slightest professional comment. We will analyse the specific peculiarities of this move, the most important of which is the reduction of White liberties in the temporary seki in the middle of the right side. White could well have won the game by one point on the basis of this classical knowledge alone, if only she remembered her already well-known oki after capturing the hanezeki's tail! Current analyses with KataGo led to the finding that White could have made a two-point gain by starting the endgame on the left side of the board "early". Choosing Harry's Hasami-Tsuke Sequence for the reduction of White's upper left corner in due time would not only increase Black's flexibility in the game, but also affect the overall result, as KataGo discovered. White's additional gain would be reduced to only one point. In conjunction with my Guzumi, the remaining disadvantage of not playing this first throw-in turns out to be the loss of one point in the Capture Variation. | |
|
Referenced by ( Let's go back to the dawn of time ... |
|
( |
|
As a side effect, the sacrifice of this first throw-in stone will benefit Black by one point in the Capture Variation. We will analyse in the subvariation below what happens if Black mistakenly forgoes this throw-in and continues immediately with the move at |
|
|
|
|
|
///:
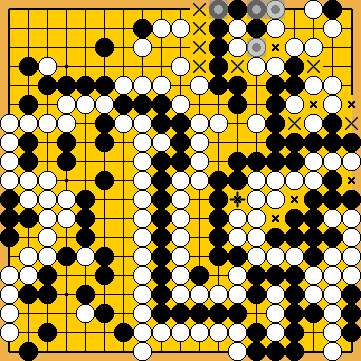
Please note the entire reduction of White's upper right corner will not affect the relation of liberties in the Main Semeai.
Decades later, the world of amateurs will come up with Harry's Hasami-Tsuke of
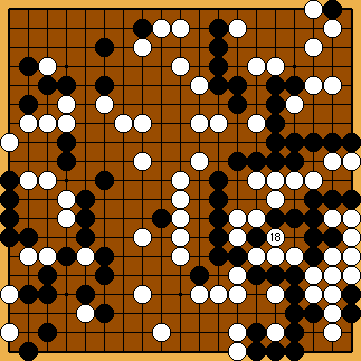
Please note that Fujisawa Hideyuki's sequence for reducing White's upper right corner ends in gote for Black. Therefore, it cannot be played earlier in the game. |
|
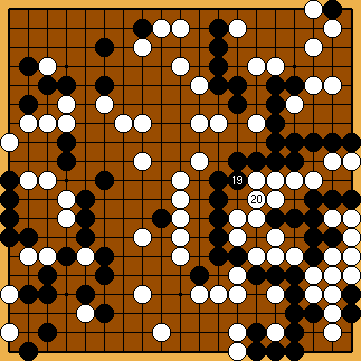
Please note that White will answer Black's atari at |
|
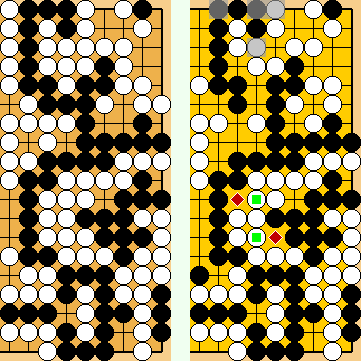
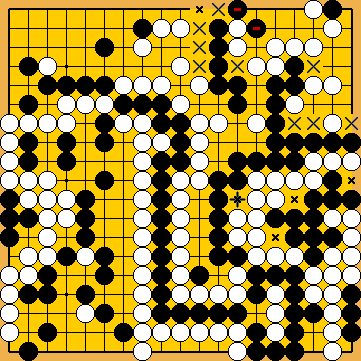
Liberties (in the marked area):
In total, Black has a surplus of eight liberties in the marked area. Please note that both sides will have to occupy the shared liberty Consequences:
|
|
Let's try to find out what KataGo thinks about this matter ... |
|
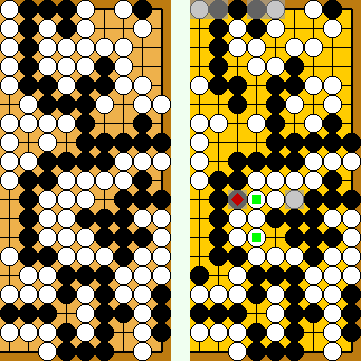
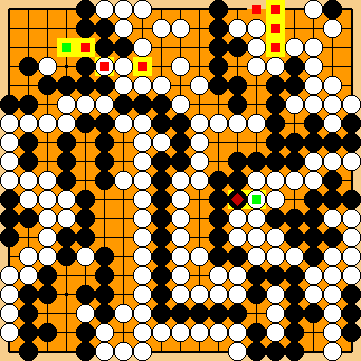
Please note that KataGo will have exchanged
KataGo favours Harry's Hasami-Tsuke
|
|
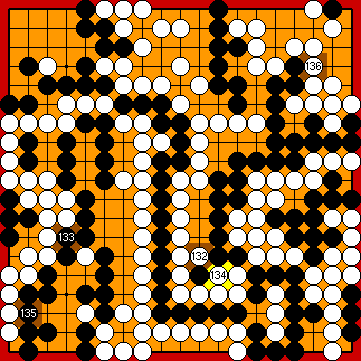
We manually enforced Fujisawa Hideyuki's Atari Starting the endgame on the left side of the board with Fujisawa Hideyuki's Atari "late" after the dissolving of the hanezeki (as in the classical line of play) would be a mistake, losing one point overall. For further details, please refer to section "Jérôme Hubert's Correction of the Mutual Occupation of Opponent's Liberties" (
|
|
White's previous move was played outside the Main Semeai Area, so Black gained one tempo in the Main Semeai. |
|
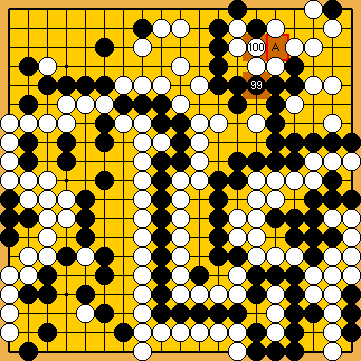
KataGo favoured immediately capturing Black's single stone at the upper edge with |
|
|
|
White could also attach at However, the subvariation will allow us a simple comparison with the historical line of play, in which the endgame on the left was started only after the resolving of the hanezeki.
|
|
It would make no sense for Black to start a ko-fight with an own move at
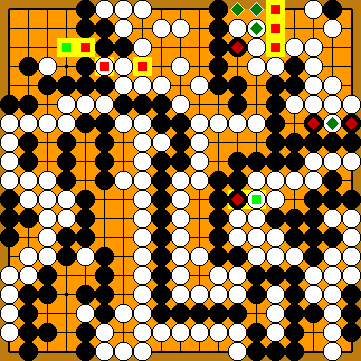
Had KataGo not played its kikashi, the results of the two Main Variations would have swapped places.
|
|
Black must not play any reduction. |
|
Capture Variation: Compared to Our Solution (2015 / 2017), ...
In total, Black lost seven points. Black + 5 => White + 2 |
|
Semeai Variation: Compared to Our Solution (2015 / 2017), ...
In total, Black lost four points. Black + 3 => White + 1 |
|
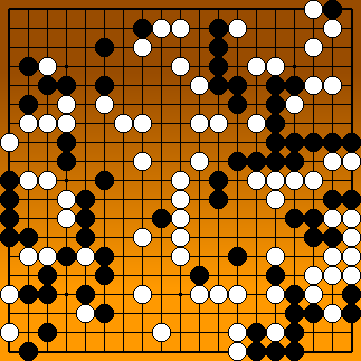
Let's go back again to the dawn of time ... |
|
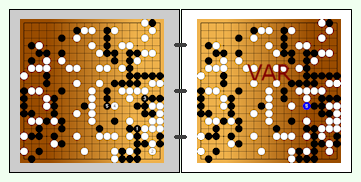
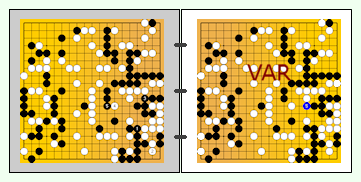
VAR |
|
|
|
Please note that Black will not play the upper throw-in at For an analysis of White's connection at Please also note that we limit ourselves here in this section to the classical line of play - with a later exception regarding the reduction of the upper right White corner for comparison purposes. |
|
///:
Please note that not reducing White's upper right corner would not increase Black's liberties in the Main Semeai.
Decades later, the world of amateurs will come up with Harry's Hasami-Tsuke of
|
|
Please remember that White still has the kikashi of |
|
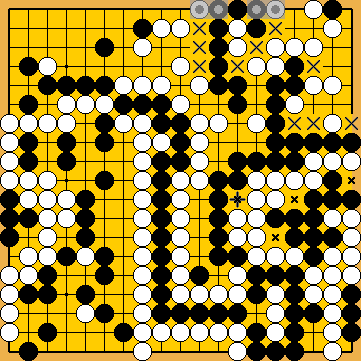
Liberties (in the marked area):
In total, Black has a surplus of seven liberties in the marked area. Please note that both sides will have to occupy the shared liberty Consequences:  in the temporary seki by Black's abandonment of Fujisawa Hideyuki's First Throw-in. in the temporary seki by Black's abandonment of Fujisawa Hideyuki's First Throw-in.White will win the game by a very large margin. |
|
Let's enter the world of amateurs and apply the knowledge gained there a few decades later ... |
|
( For further details, please refer to section "Harry's Hasami-Tsuke Sequence" ( ( (G |
|
|
|
Choosing the solid connection of |
|
Liberties (in the marked area):
In total, Black has a surplus of eight liberties in the marked area. Consequences:
|
|
Territory (in the Capture Variation): Compared to Fujisawa Hideyuki's solution, ...
In total, Black lost three points. White + 3 => White + 6 |
|
Territory (in the Semeai Variation): Compared to Fujisawa Hideyuki's solution, ...
In total, Black gained three points. Black + 4 => Black + 7 |
|
( |
|
|
|
|
|
|
|
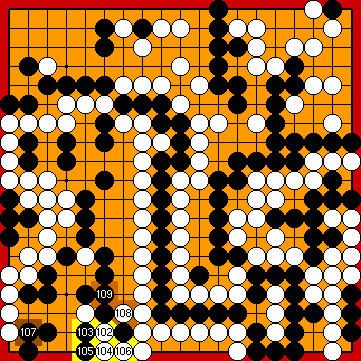
Liberties (in the marked area):
In total, Black has a surplus of seven liberties in the marked area. Consequences:
White will win the game by a very large margin. |
|
Liberties (contd.): Please note that connecting any of the hasami-tsuke stones will not make a difference.
In total, Black has a surplus of seven liberties in the marked area, the same as above. Consequences:
White will win the game by a very large margin. |
|
Liberties (contd.): Please note that connecting any of the hasami-tsuke stones will not make a difference.
In total, Black has a surplus of seven liberties in the marked area, the same as above. Consequences:
White will win the game by a very large margin. |
|
In the world of amateurs, Harry's Hasami-Tsuke Sequence usually appears in conjunction with my Guzumi ... |
|
|
|
///:
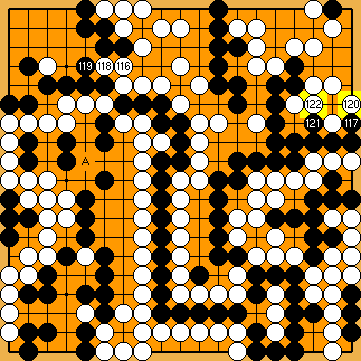
In reality, White would be forced to start the endgame at the left side of the board with Yamada Shinji's Tsuke |
|
Please remember that White has the kikashi of |
|
Liberties (in the marked area):
In total, Black has a surplus of nine liberties in the marked area, one more than is needed to survive the Punishment Semeai. Consequences:
|
|
Liberties (contd.): After the connection of his two hasami-tsuke stones, ...
In total, Black has a surplus of eight liberties in the marked area. Consequences:
|
|
Capture Variation: Compared to Our Solution (2015 / 2017), ...
In total, Black lost two points. Black + 5 => Black + 3 Please note that – compared to Our Solution (2015 / 2017) – the final scores of both MainVariations are identical here. However, KataGo's later improvements provide White with an additional gain of seven points overall in the Capture Variation, which White would then win by four points. |
|
Semeai Variation: Compared to Our Solution (2015 / 2017), ...
In total, gains and losses compensate for each other. Black + 3 => Black + 3 |
| |
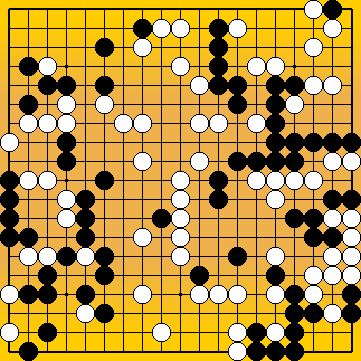
 2022MainLine
 2022MainLine
 secured the connection of all her stones in the temporary seki in the middle of the right side.
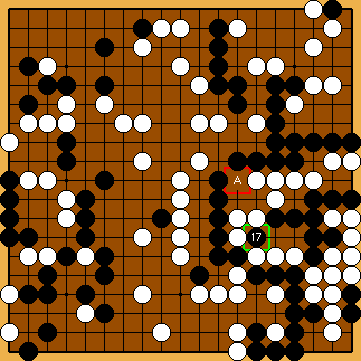
 : (A
: (A  2025
2025 .
.
 :
:
 :
: :
:
 :
: :
: :
: :
: , instead.
 :
:
 :
: :
: in the Capture Variation (after White's hanezeki group has been taken off the board), while White has the benefitical kikashi of
  ,
,  in the Semeai Variation.
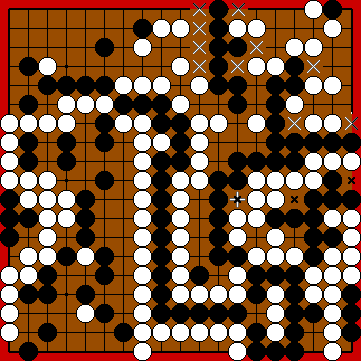
 .
. .
. .
.
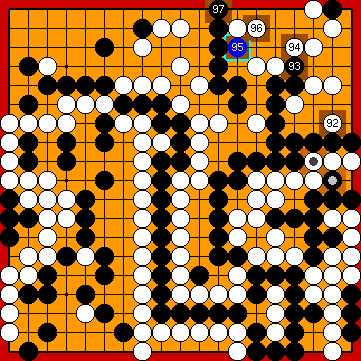
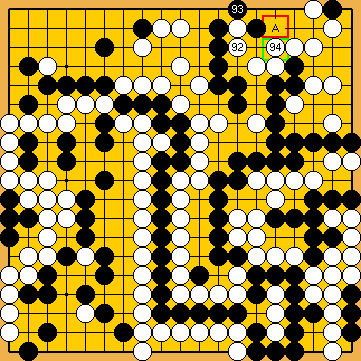
 for
for  96
96  , we manually enforced Fujisawa Hideyuki's push
  , of course.
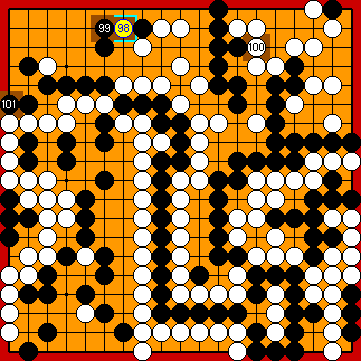
 in the upper left corner.
 2041c
2041c :
: :
:
 :
: :
:
 :
: : (
: ( , instead, which will benefit White by one point overall.
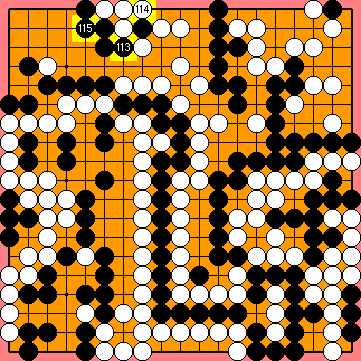
 :
:
 : (A
: (A  :
:
 :
: :
: , since White will not give him any opportunity to continue capturing with
  :
: :
: :
: :
:

 2025
2025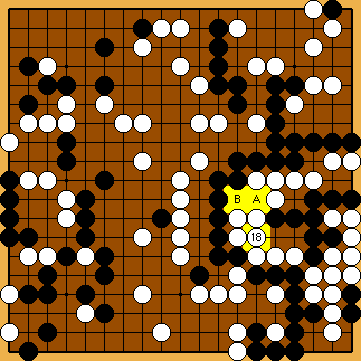
 72
72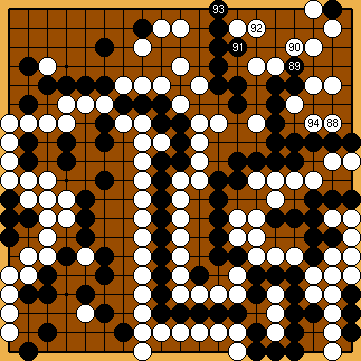
 :
: :
: , instead, which at least helps avert disaster. Provided this option is drawn much earlier in the game, which is possible because Harry's Hasami-Tsuke Sequence ends in sente for Black.
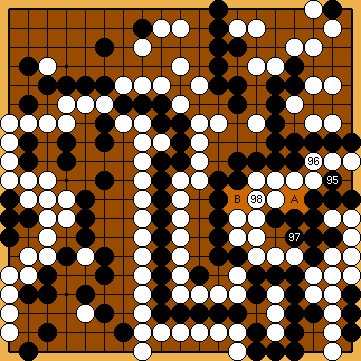
 at her disposal, to be utilised in the Semeai Variation.
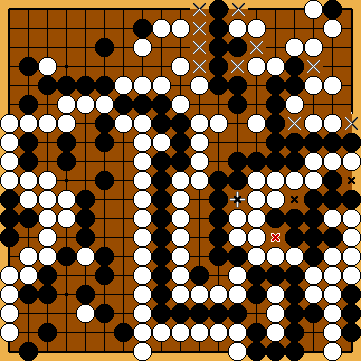


 2025
2025


 : (
: ( :
: :
: :
:
 :
: