New Story Line 2022
Main Line
|
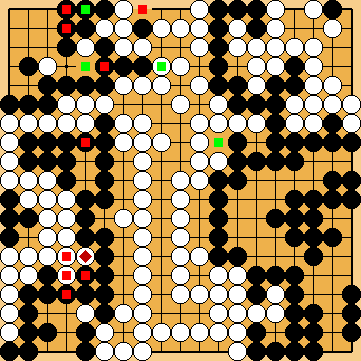
This section contains a very comprehensive description of the solution to Igo Hatsuyōron 120. The choice of the order of moves in it pursues the purpose of offering the reader an approach to the particular elements of this problem, as well as to the historical process of its decoding, that is as easy to grasp as possible.
The interested reader will find branches to all other, much more detailed, sections of this New Story Line 2022 as well as references to the older parts of our intensive analysis.
| |
|
Igo Hatsuyōron 120 was first published in 1982 in a book written by Fujisawa Hideyuki 9p after an old edition of the problem collection was discovered by Araki Naomi, which apparently contained only the problems of the original version, including two previously unknown, one of which was Inoue Dōsetsu Inseki's masterpiece. At that time, Inoue Dōsetsu Inseki's problem collection itself had already been known to the general public for more than a century. In his postface, Inoue Dōsetsu Inseki insists on the necessity, for the study of these problems to bear fruit, to give no indication about them (except whose turn it is), not even the objective to reach. |
|
Let's enter the world of amateurs, arriving about two decades later ... |
|
Once upon a time, Joachim Meinhardt counted the stones on the board and found to his surprise that White has a surplus of one stone, as there are 70 Black stones, but 71 White stones. Please remember that it is Black to move. Our long-standing assumption was that White captured a Black stone that was positioned at However, recent findings, obtained with the support of KataGo, have shown us that White had not in fact captured an additional Black stone before the problem began, but had started the game. For further details, please refer to section "Black's Missing 71st Stone – Vanished" ( |
|
Let's now enter the analysis room for a detailed explanation of a rewrite of Our Solution to the problem ... Please note that we still worked with our original assumption in this 2022 Story Line, for better comparability with our earlier analyses. This implies a komi of one point for White. |
|
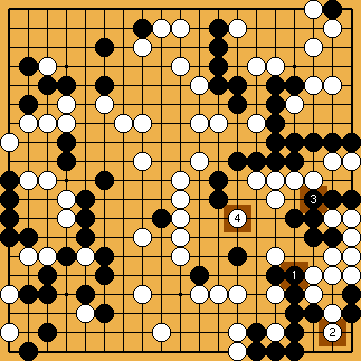
After Black's initial move, there are a variety of options for changing the order of moves during the sequence in the lower right corner.
|
|
KataGo likes to start the reduction of White's upper right corner "very early", so interrupting the process of creating a hanezeki in the lower right corner. Harry Fearnley discovered that the hasami-tsuke at Harry's Hasami-Tsuke would make no difference in the classical solution, but would give Black a noticeable benefit after my later Guzumi For further details, please refer to section "Harry's Hasami-Tsuke Sequence" ( This is also the first and, for a long time, the only moment when KataGo seriously considers my Guzumi. For further details, please refer to section "The Earliest Possible Moment for Playing my Guzumi" ( |
|
The result is a (temporary) seki in the middle of the right side. |
|
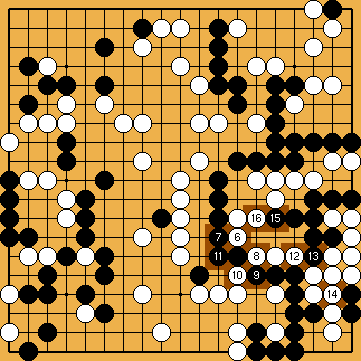
Before starting the creation of the real hanezeki in the lower right corner, Fujisawa Hideyuki inserted the kikashi of For further details about the first throw-in Cheng Xiaoliu 6p described an improvement for Black in his 1988 book, a third kikashi For further details, please refer to section "Kikashi in the Hanezeki" ( I found another – decisive – improvement for Black, the Second Throw-in with For further details about the second throw-in at First and second throw-in contain an outright loss of two points for Black (the two captured stones As a matter of course, even with "early" played throw-in in the hanezeki, Black would not be forced to also play my Guzumi "early". Typically for an AI programme, KataGo plays the entire sequence of all available kikashi ( In order to simplify the following commentaries, we will shade out the region of the (temporary) seki as long as necessary. Please consider it played out according to the context. |
|
The further course of its process is a strict one-way street. Please be aware that Black can neither break through to his allies in the left centre with his large group in the upper right, nor kill White's lower edge. Therefore, simply living in the lower right corner is no valid option for Black.
Black must not let live White independently in the corner (by mistakenly capturing at |
|
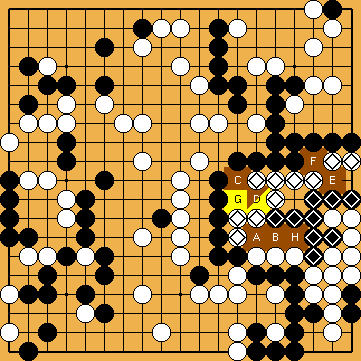
A simple "hane" (i.e. doing without The hanezeki in Igo Hatsuyōron 120 is a very special one; not only because of its two shared liberties at the lower edge, but also due to its interconnection with the temporary seki in the middle of the right side (shaded here). For further details, please refer to section "Igo Hatsuyōron 120's Hanezeki" ( |
|
For further details about the ensuing corner reduction, please refer to section "Harry's Hasami-Tsuke Sequence" ( In his 2010 book, Cheng immediately continued the tail's walk across the board with a move at This is the second moment when KataGo seriously considers playing my Guzumi For further details, please refer to chapter "Timing of the Guzumi (2022)" ( ... to chapter "Timing of the Guzumi Before Harry's Hasami-Tsuke Sequence (2022)" ( Please note that we have refrained from using an "early" Guzumi in the main line of this elaboration in order to achieve a better match with the historical conditions. |
|
In principle, White could also retreat with
Harry's Hasami-Tsuke is a genuine endgame move, but does not have any effect in the classical solutions. Due to the relationship of liberties in the forthcoming Main Semeai, Black will have to sacrifice his hasami-tsuke stone in these lines, so that White will get as much territory in the corner as after the classical reduction sequence For further details, please refer to section "Harry's Hasami-Tsuke Sequence" ( |
|
Please remember that White must not let the hanezeki's tail get two outside liberties, as Black could successfully resolve the hanezeki under this condition.
This further course the hanezeki's tail through the centre of the board is a one-way street again. |
|
Please note that Black will have to sacrifice As an alternative option, KataGo also considers playing my Guzumi at This "real" game sequence that is shown in the subvariation is the (seemingly) equivalent solution mentioned above, which existence would contradict the classical principles of tsume-go that require only one single valid solution (changes in the order of moves are not considered). Please remember that KataGo played all kikashi in the (temporary) seki in the middle of the right side much earlier. For further details, please refer to section "The Earliest Possible Moment for Playing my Guzumi" ( Please note that we have refrained from using an "early" Guzumi in this elaboration in order to achieve a better match with the historical conditions. |
|
This move could be played even later.
|
|
Playing the wedge at Joachim investigated this alternative move (at a time when both throw-in in the hanezeki were played by us), having a semeai with White's centre group in mind. For further details, please refer to section "Black's Wedge in the Centre (Joachim's Ko-Semeai #3)" ( |
|
Typical for AI, KataGo likes to change the order of moves here, and give atari with
She is unable to successfully fight the ko that would develop in the centre after |
|
Joachim investigated Black's hane at Joachim's investigation resulted in an intense ko fight, but which White will win by one move. For further details, please refer to section "Black's Hane at the Top (Joachim's Ko-Semeai #2)" |
|
Playing at Please note that White has not had an opportunity so far to tenuki for playing in the (temporary) seki first. |
|
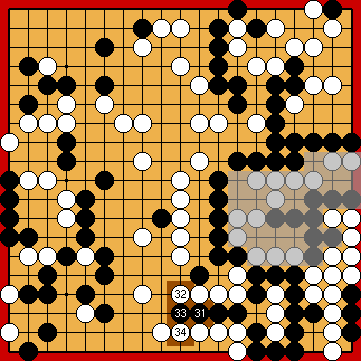
In the classical line of play (based on Fujisawa Hideyuki's solution), however, Black's first throw-in is mandatory in order to reduce the liberties of White's group in the temporary seki. Assuming the further kikashi of However, if White ever got the opportunity to connect at For further details, please refer to section "Fujisawa Hideyuki's First Throw-in" The series of kikashi in the hanezeki could basically be delayed until before the last Black move to complete the forthcoming nine-point nakade at the left edge. We follow the historical development here, where we played the two remaining kikashi in the hanezeki (both throw-in were played before the creation of the real hanezeki) just now. |
|
Otherwise, White would connect at Fujisawa Hideyuki continued immediately with However, he seems to have overlooked the fact that the number of internal liberties For further details, please refer to section "My Second Throw-in" |
|
This additional seki serves as a buffer between Black's large group in the upper right and the true hanezeki that will emerge in the lower right corner. |
|
It was mandatory in the classical solution, in which my Second Throw-in For further details, please refer to section "Kikashi in the Hanezeki" ( This is the position in which Michael Redmond had recommended his Kikashi For further details, please refer to section "Michael Redmond's Kikashi in the Bamboo Joint" ( |
|
|
|
We played the two kikashi in the hanezeki in reversed order, but which does not matter. |
|
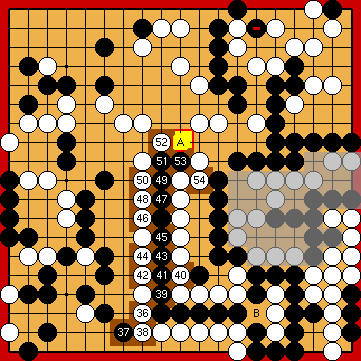
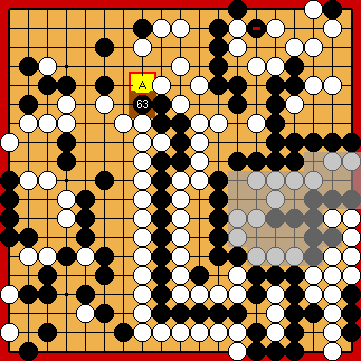
Black pushes to the left for another time, initiating the Crosscut Sequence in the left centre. For a long time, we thought that this was the latest moment to play my Guzumi For further details, please refer to section "My Guzumi" ( The 2019 version of KataGo played my Guzumi also just now, before the start of the Crosscut Sequence in the left centre. The 2021 version of KataGo usually plays the Guzumi Exchange For further details, please refer to chapter "Timing of the Guzumi (2022)" ( |
|
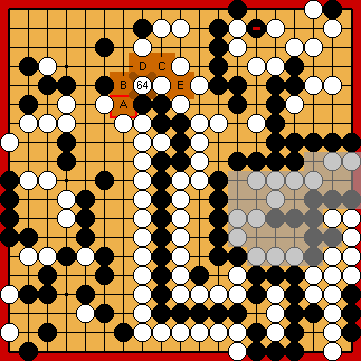
Fujisawa Hideyuki shows a subvariation in which White captures the hanezeki's tail with For further details, please refer to the history of our research ... Please note that this subvariation contains my Second Throw-in, but which will not affect its outcome.
Fujisawa Hideyuki comments that Black must not connect the hanezeki's tail, instead.
Fujisawa Hideyuki also shows that White is unable to play at For further details, please refer to the history of our research ... |
|
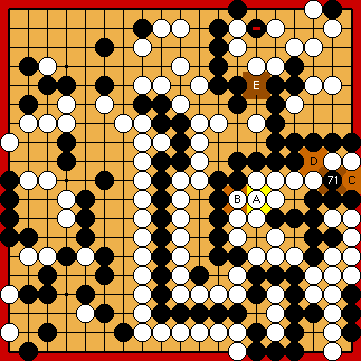
Joachim examined two conceivable alternatives very intensively: Playing the hiki of For further details, please refer to section "Joachim's Hiki at the Upper Edge (Joachim's Ko-Semeai #1)" ( Black is able to capture most of White's stones at the left with a move at For further details, please refer to section "Joachim's Capture of White's Left Side" ( Joachim's investigations into these Black alternative moves took place at a time when the two kikashi in the hanezeki ( |
|
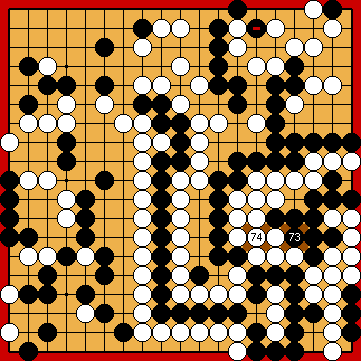
This move triggers the ensuing Nakade Sequence.
The creation of Black's nakade at the left edge of the board is a one-way street, in principle. For further details, please refer to the history of our investigations ... Quite surprisingly, in this position without the Guzumi Exchange For further details, please refer to chapter "Timing of the Guzumi (2022)" ( Please note that Fujisawa Hideyuki (and also Cheng) – apparently not being aware of Harry's Hasami-Tsuke and my Guzumi – mistakenly started the fight at the left edge with the push to |
|
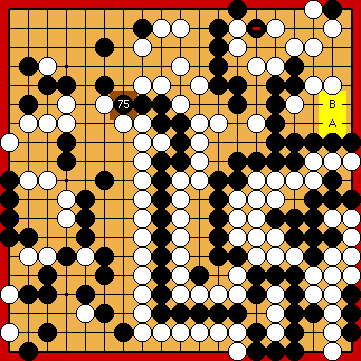
For further details about the timing of this move, please refer to chapter "Timing of the Guzumi (2022)" ( My Guzumi provides Black's large group in the upper right with an additional approach-move liberty, enabling Black to survive the Punishment Semeai even after connecting the hasami-tsuke stone For further details, please refer to section "My Guzumi" ( |
|
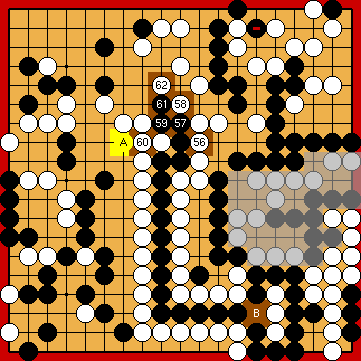
The 2019 version of KataGo also considered the solid connection at After the first analyses of my Guzumi, we played it immediately before the start of the Crosscut Sequence in the left centre, which opened up the principle possibility of a tenuki for White, in particular to attack Black's upper left corner. For further details about these earlier tenuki options, please refer to chapter "Tenuki Variations Before the Crosscut Sequence (2022)" ( |
|
|
|
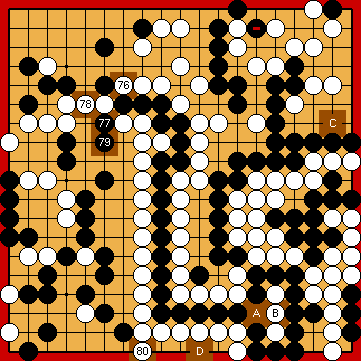
For further details, please refer to the history of our investigations ... We also had this atari in focus once a very long time ago, but today we have to admit that we were not persistent and consistent enough in our analysis at that time. For further details, please refer to section "KataGo's Atari in the Nakade Sequence" ( In the pre-AI era, this move had been played at |
|
KataGo's 2021 version favours playing at
|
|
If Black mistakenly played tenuki, White would first capture Black's nakade with Giving atari with |
|
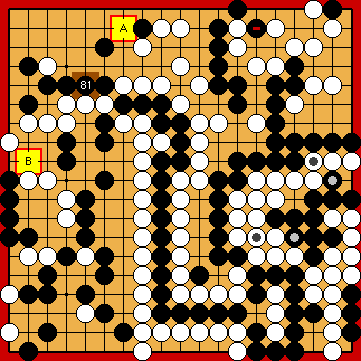
For further details, please refer to section "Yamada Shinji's Tsuke" ( It was Prof. Jeong SooHyun 9p from Myongji University in Seoul, who pointed out to us that the endgame on the left side of the board had to be started "early", as the Main Semeai as such had already been decided. For further details, please refer to section "Prof. Jeong SooHyun's Advice to Start the Endgame Early" ( The classical line of play (as a matter of course without my Second Throw-in, Harry's Hasami-Tsuke and my Guzumi) continued with the mutual occupation of opponent's liberties in the Main Semeai, and started the endgame with the atari of Please note that Fujisawa Hideyuki only gave the first two moves of the endgame in his 1982 book ( |
|
Black is unable to confine White's intruder successfully in the corner by playing at |
|
However, it must be played quite early, in any case before Black consolidated his corner by occupying both points This implies that KataGo's Immediate Crosscut was not possible in the era of Yamada Shinji. For further details, please refer to section "KataGo's Immediate Crosscut after Yamada Shinji's Tsuke" ( ... and to section "Yamada Shinji's Tsuke" ( |
|
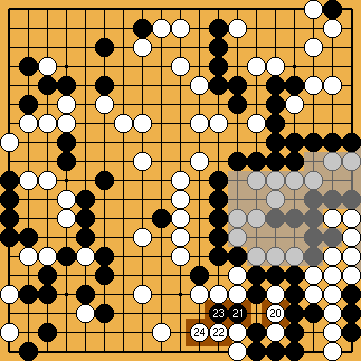
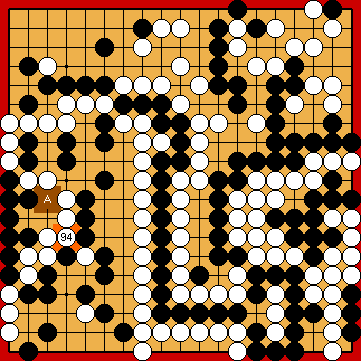
As before, playing at For further details, please refer to section "KataGo's Immediate Crosscut after Yamada Shinji's Tsuke" (
Blocking the lower left corner with For further details, please refer to section "KataGo's Immediate Crosscut after Yamada Shinji's Tsuke" ( Please note that this descent to the lower edge may well be the means of choice in other circumstances. |
|
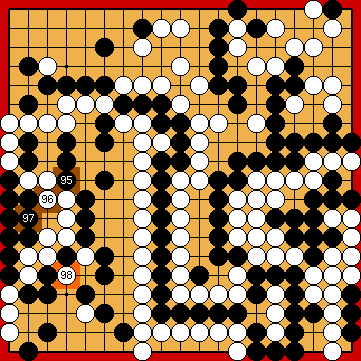
The endgame on the left side of the board in the "classical" environment (i.e. with Fujisawa Hideyuki's Atari instead of Yamada Shinji's Tsuke) has been (also) developed by Jérôme Hubert. For further details, please refer to section "Jérôme Hubert's Correction of the Mutual Occupation of Opponent's Liberties" ( Cheng shows another suggestion for this endgame explicitely in his 1988 book (which is the same as Jérôme Hubert's in the beginning, but will deviate later). For further details, please refer to section "Jérôme Hubert's Correction of the Mutual Occupation of Opponent's Liberties" (
It favours Black over the solid connection at
|
|
|
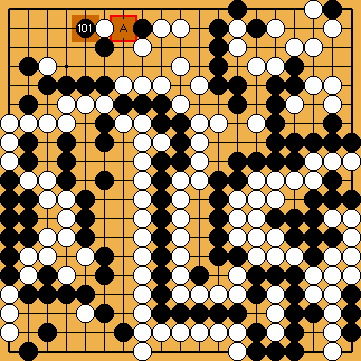
|
However, after decidedly intensive analysis, it will turn out that – due to his weakness of the cutting point Thus, KataGo's Bad-Shape Move reduces Black's territory in the left centre by one point (in the Capture Variation), without effectively losing one tempo in the Main Semeai, as usual with this type of territory-destroying moves. For further details, please refer to section "KataGo's Bad-Shape Move in the Left Centre" ( |
|
Immediately occupying White's liberty at For further details, please refer to section "KataGo's Bad-Shape Move in the Left Centre" ( ... to the history of our investigations ... Playing tenuki to For further details, please refer to section "KataGo's Bad-Shape Move in the Left Centre" ( ... to our very detailed historical analysis under the framework condition "No Early Kikashi" ... Please note that it would result a change in the order of moves with the sequence shown below, if Black played KataGo's Solid Connection in the left centre |
|
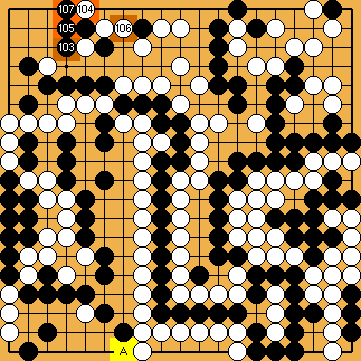
Please note that this connection is possible, only because the endgame in the upper left and lower left corners has already taken place. Please also note that this connection not only secures White quite a lot of points (locally), but also unlocks the cutting-point
Black must play very cautiously and carefully here, because his weakness in the left centre is far more massive than it appears at first glance. Please also refer to the history of our investitation for some variations after Joachim's Tenuki with
|
|
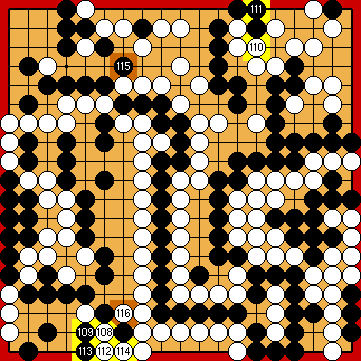
He must not do so before White's connection with
Please note that this move is only possible because White has previously connected her two stones in the lower left with |
|
KataGo likes to continue with
He destroyed two points of White's territory at the upper edge at the cost of only one tempo in the Main Semeai.
Please note that it does not make any sense to reduce Black's territory at the left (for the Capture Variation), starting with moves at
|
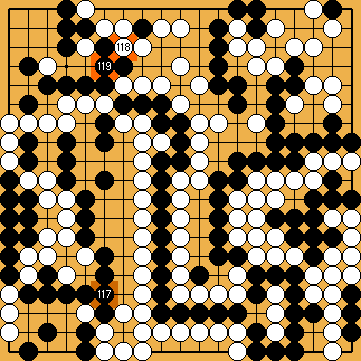
|
Alternatively, she could answer with a move at
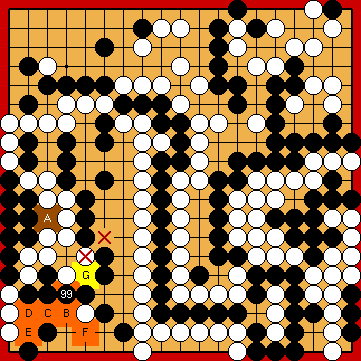
In this very late phase of the game, Fujisawa Hideyuki made several technical mistakes regarding the correct order of moves (which were largely adjusted by Jérôme Hubert). He violated a fundamental principle of the endgame by occupying worthless points before valuable ones, but this had no effect in his own classical solution. For further details, please refer to section "Jérôme Hubert's Correction of the Mutual Occupation of Opponent's Liberties" ( You will be able to see from studying this section that even professionals can err in uncomplicated positions. |
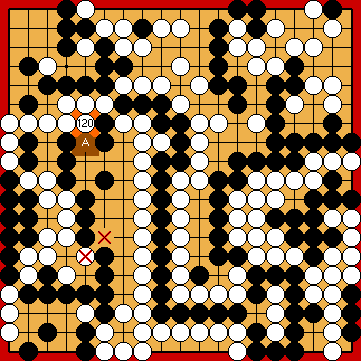
|
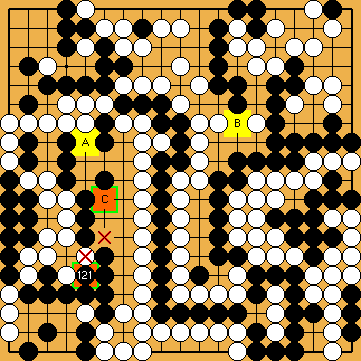
Thereafter, he is back at par with the Punishment Semeai Liberty Level. Black must not lose another tempo in the Main Semeai, e.g. by connecting his single stone in the lower right with a move at |
|
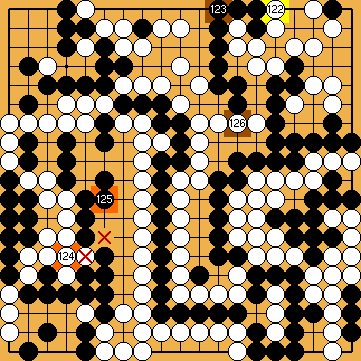
|
|
However, as Ōhashi Hirofumi 7p told us, continuing with a move at For further details, please refer to section "Ohashi Hirofumi's Order of Moves in the Nakade" ( |
|
|
|
KataGo likes to capture the hanezeki's tail immediately, so entering the Capture Variation. Choosing the Semeai Variation (being worse for White, as Black would end four points ahead), instead, would require the capture of the nakade with Playing the exchange of |
|
|
|
In his solution, Fujisawa Hideyuki continued with further occupying Black's liberties (in a slightly different scenario in the right centre), but which was a mistake. For further details, please refer to section "Joachim's Rediscovered Oki in the Hanezeki" ( |
|
Black is unable to connect at
|
|
|
|
|
|
|
|
Capture Variation: Compared to our 2017 solution, ... In total, White gained seven points. Black + 5 => White + 2 |
| |
 , and connected at this point later.
  2023
2023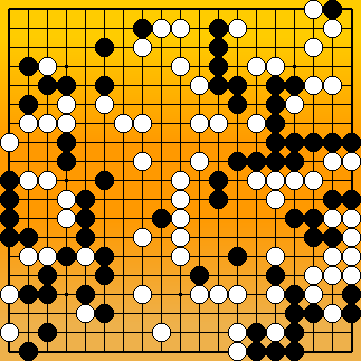
 :
: :
: :
: :
:
 :
: – a typical endgame move – is a better follow-up move for Black than the push at
  that has been used by Fujisawa Hideyuki.
 .
.
 :
: :
: :
: , as Black's bottom group would subsequently get enough liberties to kill the White corner.
 :
: :
: :
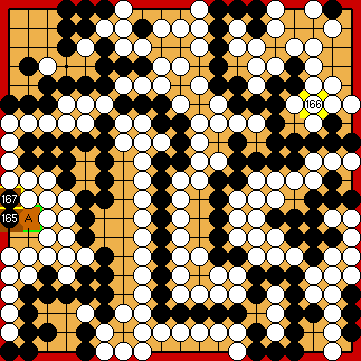
:

 and
and  in the (temporary) seki
  /
/  .
. 2025
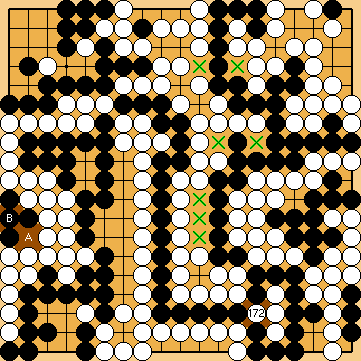
2025 ,
,  , which had to be played immediately afterwards.
 , whereafter Fujisawa Hideyuki's moves
  ,
,  ) "early".
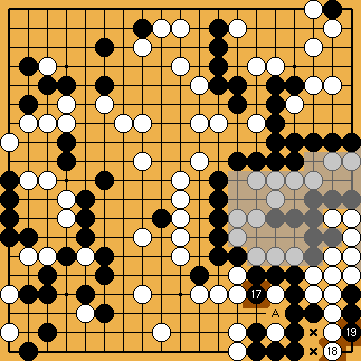
 :
: 39
39 :
: :
:
 :
: :
: :
: would be sente, forcing Black to occupy one of the two shared liberties
  in the hanezeki.
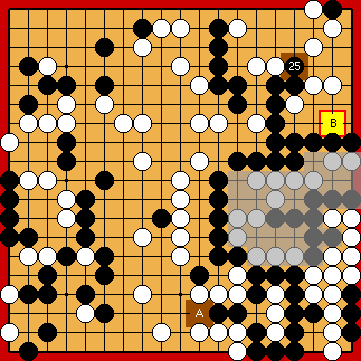
 :
: 1814
1814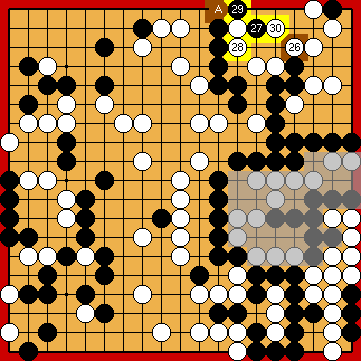
 : (30
: (30  2022a
2022a , not affecting the outcome of the game.
 :
: ,
,  ,
, 
 :
: :
:
 :
: , in order to remain par with the Punishment Semeai Level, as long as my Guzumi has not been played.
 .
.
 :
: :
: (a geta at
  would leave the tail with two outside liberties from the very outset), because connecting the tail to the outside or reducing White's then cut-off bottom group to only one eye are (forcing White to capture the hanezeki's tail for survival) miai for Black.
 :
: or at
or at 
 :
:
 :
: first.
 ,
,  .
. ,
,  ,
, 
 :
:
 :
: ,
, 
 :
: ,
,  will remain that are shared between Black's and White's group in the temporary seki.
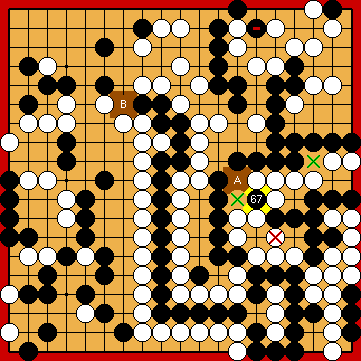
 :
: . Therefore, it is mandatory to play my Second Throw-in at
  at the earliest possible moment (e.g.
  in the following diagram).
 inside the hanezeki, which are shared between Black's large group in the upper right and White's upper group in the temporary seki, is irrelevant for a semeai between groups outside the hanezeki, as long as Black's large group does not gain a potential approach-move liberty, as is the case with Fujisawa Hideyuki's way of reducing the upper right corner.
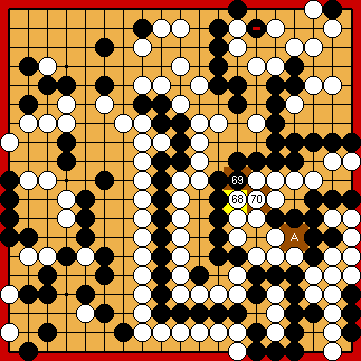
 :
: :
:
 :
: would be empty then), to insert this kikashi as early as possible.
 and
and  ) in the Semeai Variation, in which Black's large group in the upper right becomes captured.
 :
:
 :
:
 :
:
 :
: :
: :
:
 :
: ,
,  ) had not yet been played by us so early. Both kikashi could perhaps become important as Black ko-threats (especially with Joachim's Ko-Semeai).
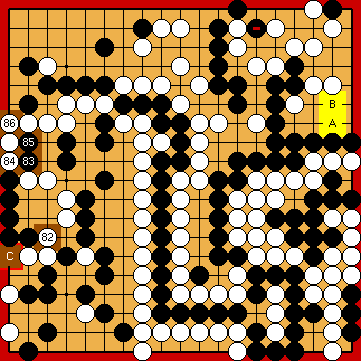
 :
: :
:
 :
: .
.
 :
: .
. 1432
1432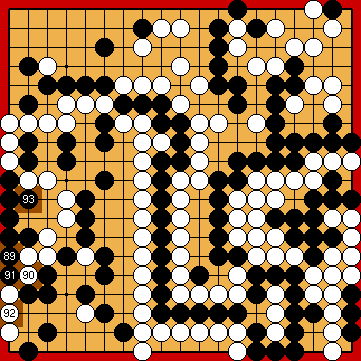
 :
:
 :
:
 : (97
: (97  immediately, which is an equivalent option.
 :
:
 :
: :
: ,
,  ,
,  , instead, was suggested by Harry, but Black cannot hope on winning an ensuing ko. Most likely, a change in the order of moves will result, as Black would have to connect at
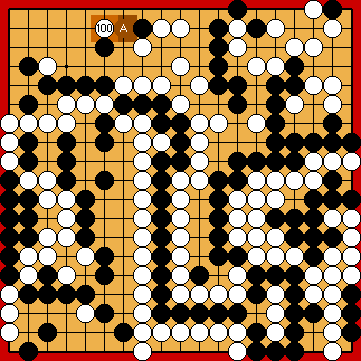
 :
:
 : (A
: (A 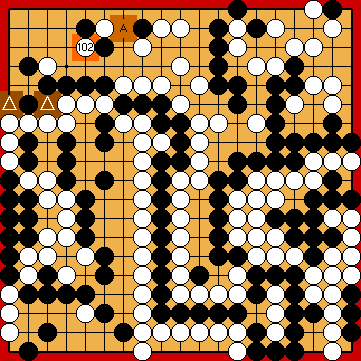
 :
: .
.
 :
: , instead, will not lead to success.
 :
: :
: :
:
 :
: :
: :
: :
: used by Jérôme Hubert.
 :
:
 :
: :
:
 :
:
 :
:
 :
: :
: :
: , which will worsen Black's score in the Semeai Variation ...
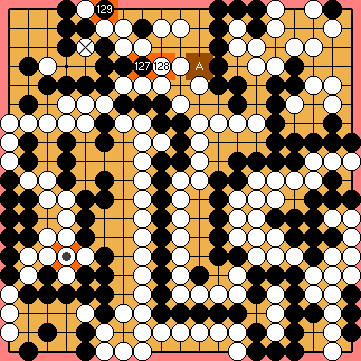
 :
: :
: :
: 's true value (three points) is reduced by one point by this combinatorial effect.
 :
: :
: , instead.
 , gaining profit outside the Main Semeai Area after
  . Black would benefit by two points in the Semeai Variation (but which is irrelevant for KataGo).
 :
: ,
,  :
:
 :
: :
: , changing the order of moves.
 :
:
 : (A
: (A 
 :
:
 :
: :
:
 :
:
 : (A
: (A 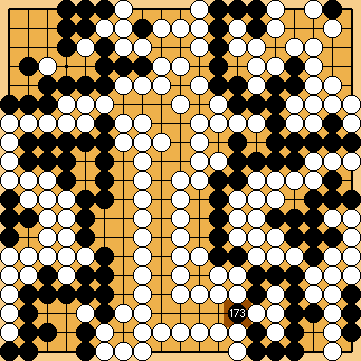
 :
:
 : (A
: (A 
 :
: , instead.
  :
:
 :
: :
:
 ;
;  :
:
 :
: