New Story Line 2022
My Second Throw-in
|
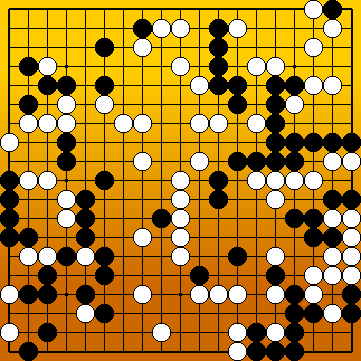
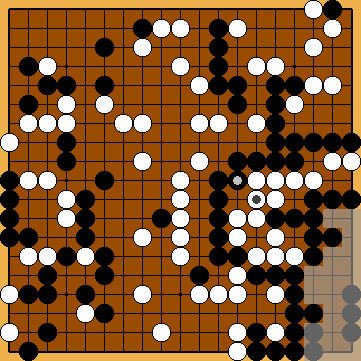
We will shed light on the mistery of Fujisawa Hideyuki 9p rejecting a second throw-in in the hanezeki, but not be able to really penetrate to the core of his reflections. We will follow the chronological sequence of findings on this move and deduct that my Second Throw-in would not affect the relationship of liberties in the hanezeki, but benefit Black territorially in both Main Variations. Choosing Harry's Hasami-Tsuke Sequence for the reduction of White's upper left corner in due time would not only increase Black's flexibility in the game, but also affect the overall result, as KataGo discovered. Black would be able to benefit by another point overall. | |
|
Referenced by ( Let's go back to the dawn of time ... |
|
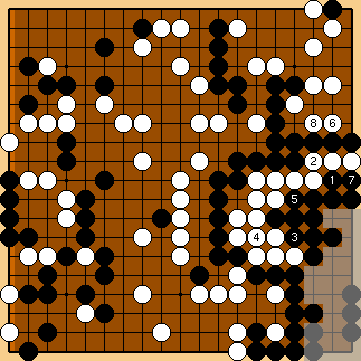
Black can do so in sente, as Black threatens to exploit White's shortage of liberties with Black's connection defends against the forcing sequence |
|
This move stops Black from playing my Second Throw-in In principle, White might alternatively fill the other false eye at |
|
Decades later, in the world of amateurs ... |
|
In his commentary, Fujisawa Hideyuki unfortunately did not elaborate in detail on what was the actual reason for his rejection of this move. However, even after a very long search I could not find any semeai for which my Second Throw-in would result in a disadvantage for Black. Please note that my Second Throw-in must be played just now, as Black's group at the right edge lost a decisive liberty at If Black continued with Before this exchange in the right centre, however, the upper kikashi in the hanezeki |
|
|
|
It threatened Black's atari at Alternatively, White could also fill her lower false eye with |
|
Years later in China ... |
|
This was not particularly surprising, because our collected findings as of June 2008, which we had handed over to the head of the Chinese Professional Go Organisation with a polite - but unanswered - request for qualitative feedback, had quite obviously been passed on to him. |
|
Let's return to the amateur era, enter the amateur analysis room, and stay there for a while ... |
|
In essence, Fujisawa Hideyuki's reasoning means that Black would have to swear off the loss of a shared liberty with White's group in the (temporary) seki below. The loss of one liberty is relevant only in the Capture Variation, as Black's large group will be taken off the board in the Semeai Variation anyway. In the course of the resolution of the hanezeki in the Capture Variation, White's |
|
Only afterwards can Black deal with eliminating the next The all-deciding question is: Can Black succeed with the Punishment Semeai and prevent his |
|
In order to compare the various scenarios, we will determine how many moves Black needs for occupying the "outside" liberties We will see below that the shared liberties |
|
The need to play the upper kikashi at For further details, please refer to section "Kikashi in the Hanezeki" ( In contrast, the lower kikashi with the atari at |
|
Capture Variation: Black needs one move to give atari at White's group. |
|
Let's go back in time again and look over Fujisawa Hideyuki's shoulder ... |
|
This is the comparable position in the Fujisawa Hideyuki's line of play, after Black's forcing exchange |
|
Capture Variation: Black needs two moves to give atari at White's group. |
|
Half a decade later in China ... |
|
Black is forced to occupy a shared liberty with Please note that White will not play the second forcing exchange Black's stones Please remember that at that time - before Cheng's improvements - the Semeai Variation was more favourable for Black than the Capture Variation. |
|
Capture Variation: Black needs two moves to give atari at White's group, as many as in Fujisawa Hideyuki's line of play. |
|
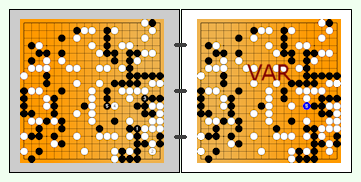
VAR |
|
Black must reduce White's additional gain mentioned above by inserting the upper kikashi in the (temporary) seki as early as possible. This exchange is Black's priviledge, also explained by Cheng in his 1988 book. |
|
Capture Variation: Black needs two moves to give atari at White's group, so nothing has changed with regard to the relationship of liberties for the Capture Variation. |
|
///: Semeai Variation: The exchange of Black's upper kikashi in the hanezeki reduced White's additional territorial gain through Cheng's improvement by two points. The Semeai Variation will end with Black + 2 now, the same score as for the classical Capture Variation. |
|
Let's return to the amateur analysis room, and compare the world of professionals with that of amateurs ... |
|
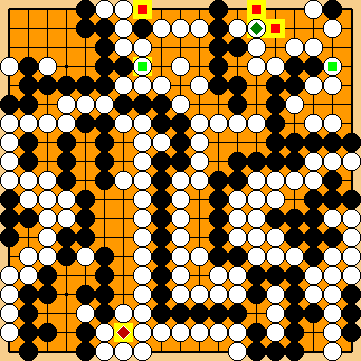
Black's territory in the Capture Variation: Left - Cheng's line of play:
= 33 points in total Right - After my Second Throw-in
= 34 points in total Black gained one point by my Second Throw-in, compared to the correct classical solution. |
|
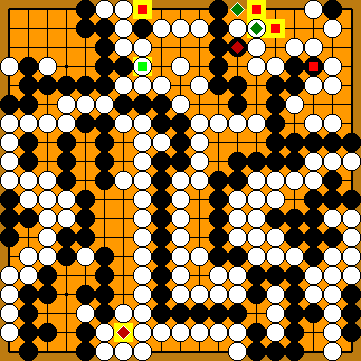
White's territory in the Semeai Variation: Left - Cheng's line of play:
= 38 points in total Right - After my Second Throw-in
= 36 points in total White lost two points by my Second Throw-in, compared to the correct classical solution. |
|
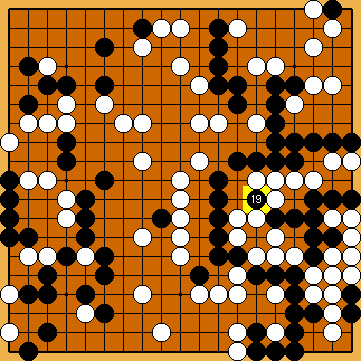
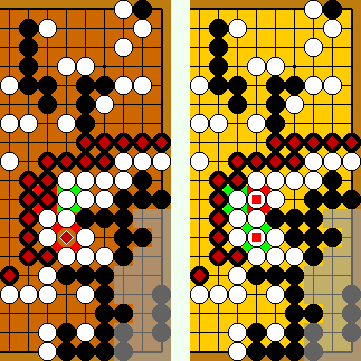
Liberties in the Capture Variation: With Second Throw-in (at right), Black needs only one move to put White's upper group in the hanezeki in atari, one move less than with the correct classical solution (at left). However, this seemingly advantage for Black is irrelevant, as Black's large group in the upper right has one more liberty Thus, it will remain a mystery what made Fujisawa Hideyuki reject the Second Throw-in. |
|
Let's make a short detour to the dawn of time ... |
|
Referring to Fujisawa Hideyuki's choice |
|
... let's try to find out what KataGo thinks about the topic discussed above ... |
|
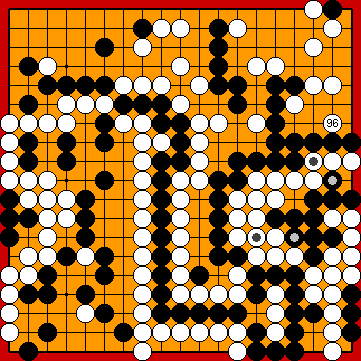
Please note that KataGo will have exchanged |
|
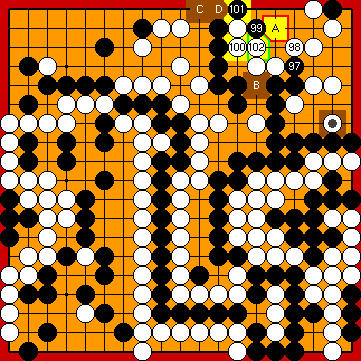
Playing Fujisawa Hideyuki's classical push with
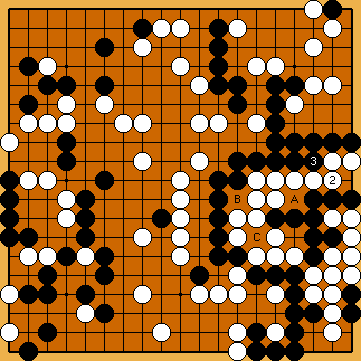
Continuing with the "usual" attachment at Should Black have played Harry's Hasami-Tsuke Sequence earlier (then with Please note that the reduction of White's upper right corner territory ends in sente for Black, which - according to KataGo - seems to be worth one point overall, compared to Fujisawa Hideyuki's classical sequence. |
|
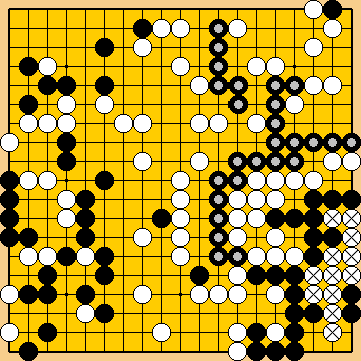
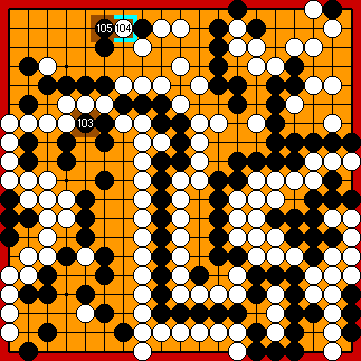
We manually enforced Fujisawa Hideyuki's Atari |
|
|
|
|
|
Black must not play any reduction. |
|
Capture Variation: Compared to Our Solution (2015 / 2017), ...
In total, Black lost six points. Black + 5 => White + 1 This is one point better for Black than without my Second Throw-in, as expected. |
|
Semeai Variation: Compared to Our Solution (2015 / 2017), ...
In total, Black gained one point. Black + 3 => Black + 4 |
|
VAR |
|
We inserted this move manually. |
|
|
|
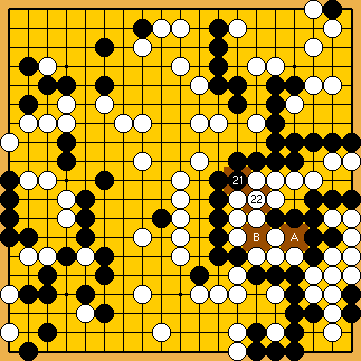
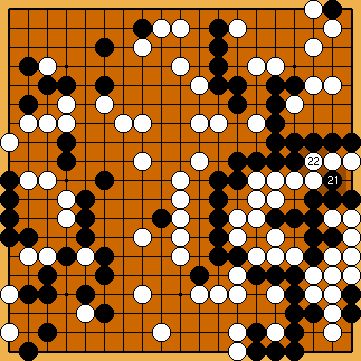
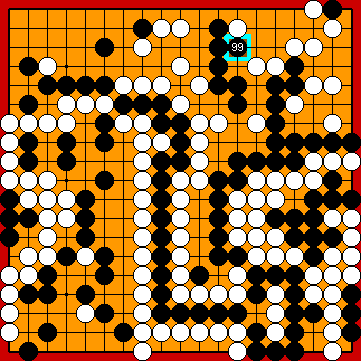
As a matter of course, KataGo favoured the continuation with Yamada Shinji's Tsuke
|
|
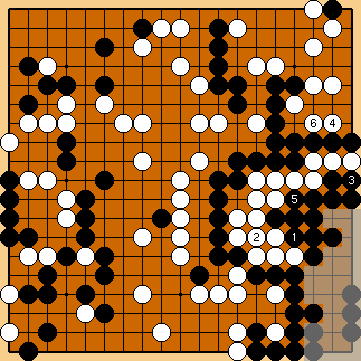
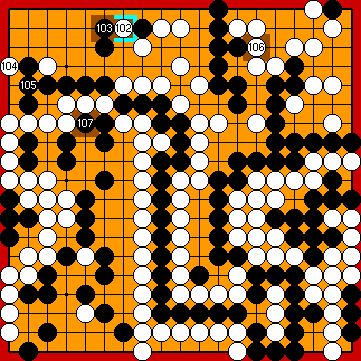
Playing the atari of White's previous move was played outside the Main Semeai Area, so Black gained one tempo in the Main Semeai. |
|
Please note that Black is par with the Punishment Semeai Liberty Level again, so he will not get any opportunity to exploit White's remaining weakness here.
|
|
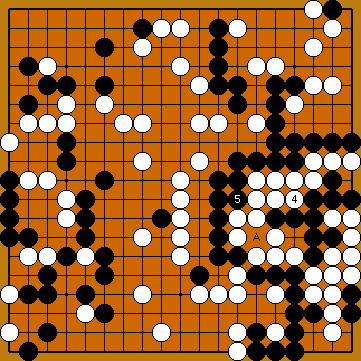
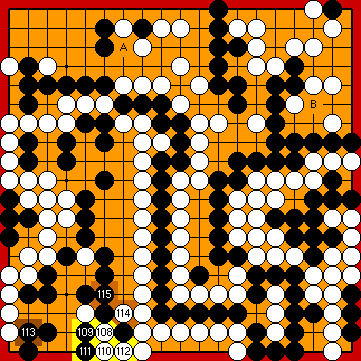
Black plays 1/1 reduction. |
|
Capture Variation: Compared to the superordinate variation, ...
In total, Black lost one point. White + 1=> White + 2 This is the same overall effect as without my Second Throw-in. |
|
Semeai Variation: Compared to the superordinate variation, ...
In total, Black lost three points. Black + 4 => Black + 1 |
| |
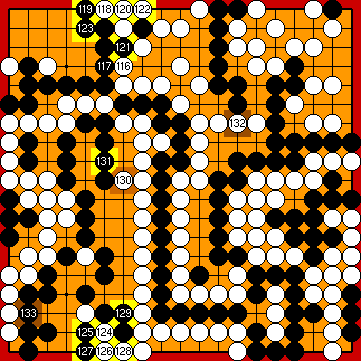
 2022MainLine
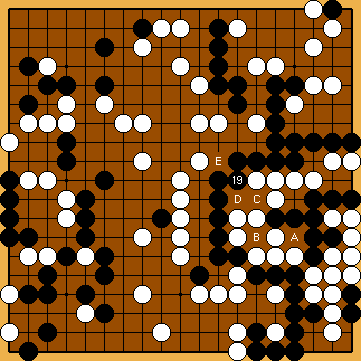
 : (
: ( 2022MainLine
 ,
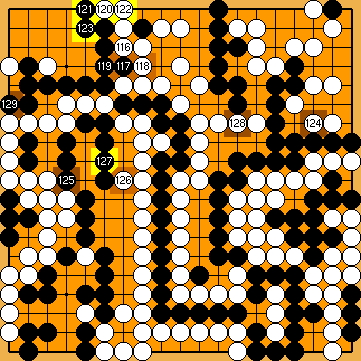
,  ,
,  , aiming at a snap-back.
 (threatens to create an eye),
  ,
,  ,
,  , which White would otherwise play at the earliest possible moment, and which would take Black's large group a decisive Main Semeai Liberty.
 :
: , which will be explained in detail below, later in the game.
 , as Fujisawa Hideyuki rejected my Second Throw-in anyway.

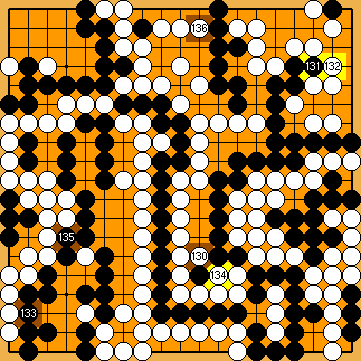
 as a result of the first throw-in at
  .
. ,
, 
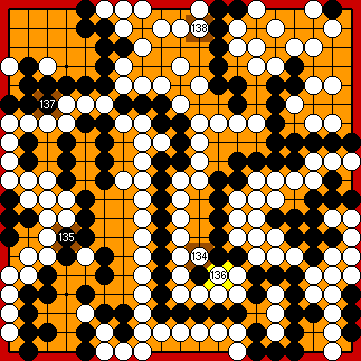
 :
: :
: .
.
 group will be taken off the board.
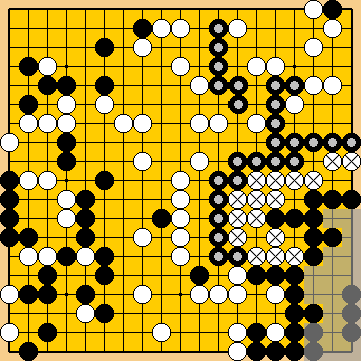
 group from being taken off the board??
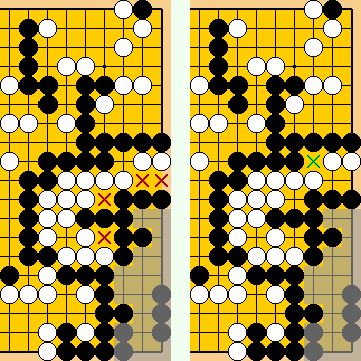
 of White's upper group in the hanezeki until it is in atari.
 above White's group do not really matter in this context.
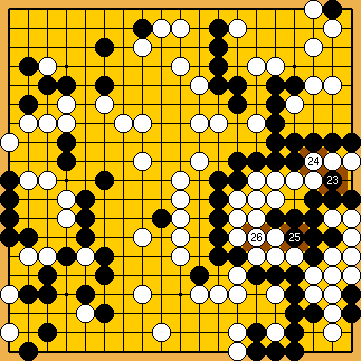
 ,
,  :
: 2027
2027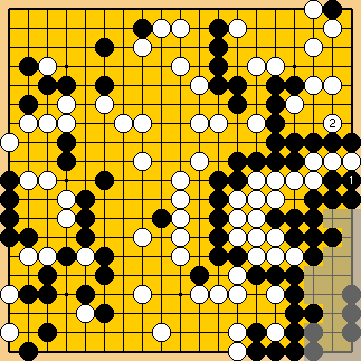

 .
.
 :
: , in order to prevent his group below from becoming captured.
 as territory, so her total gain sums up to five points.
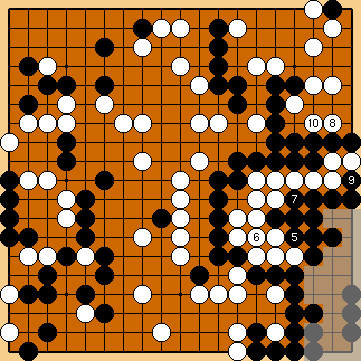

 for
for  remains White's priviledge, which will be played in the Semeai Variation only.

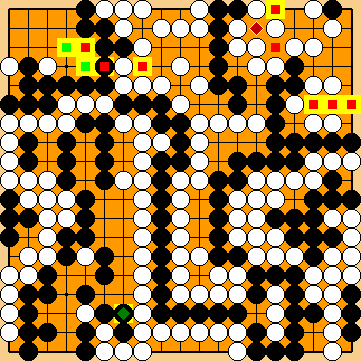
 :
:
 : (100
  2026
2026 for
for  , KataGo favours Harry's Hasami-Tsuke
  , instead, would be a one-point mistake.
 :
: , as usual.
 :
:
 :
: :
: in the upper left corner.
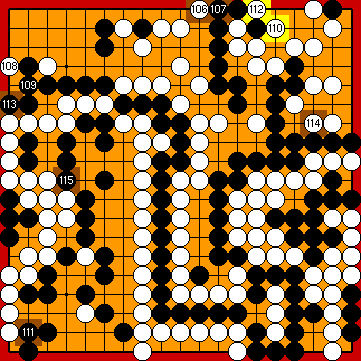
 :
: :
: :
: :
:
 :
: :
: :
: :
: :
: :
:
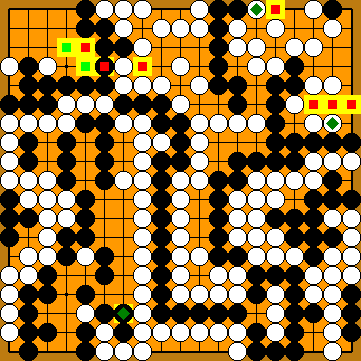
 2026
2026
 in the upper left corner.
 :
: :
: :
:
 :
:
 :
: :
: :
: :
: