New Story Line 2022
Kikashi in the Hanezeki
|
Our presentation will follow the chronological development of the findings on the kikashi in the hanezeki. Fujisawa Hideyuki 9p did not play these kikashi before White's decision point, which turned out to be a mistake for the Semeai Variation a few years later. We originally played this kikashi immediately after the Tsuke of Yamada Shinji 6p, but then came to the conclusion that it would be better to insert these just before the completion of the Crosscut Sequence. Finally, KataGo favours this kikashi very early in the game, following a typical characteristic of AI programs. | |
|
Referenced by ( Let's go back to the dawn of time ... |
|
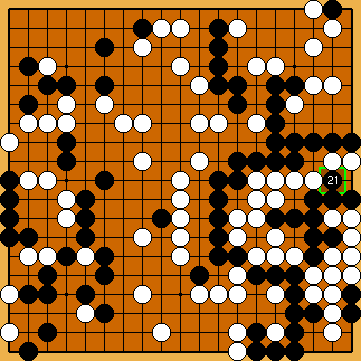
He will play Black's kikashi |
|
Almost four decades later in the world of KataGo ... |
|
Please note that the first (upper) kikashi at
|
|
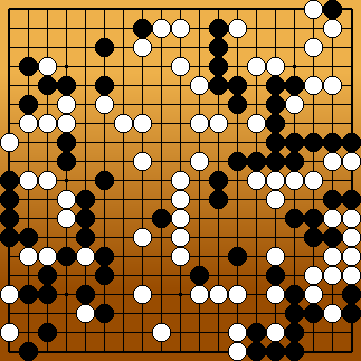
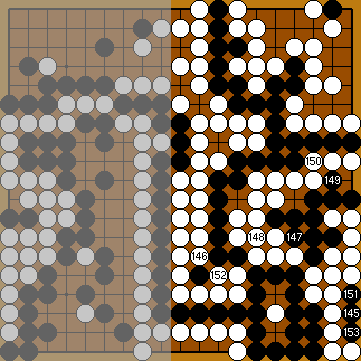
Let's return to the era of Fujisawa Hideyuki, arriving much later in the game, just before an alternative semeai comes to an end ... |
|
Fujisawa Hideyuki gives only the first four moves of his Semeai Variation. Our assumption is an identical sequence in the hanezeki as in the other semeai between Black's large group in the upper right and White's bottom group, which he explains in detail.
White's corner group has only two liberties left, so her earlier kikashi |
|
The final result of the application of the sequence shown above would fit with Fujisawa Hideyuki's commentary on his Semeai Variation, which reads "Black wins by a large margin." (i. e. Black + 5 under the assumption of komi = 1). |
|
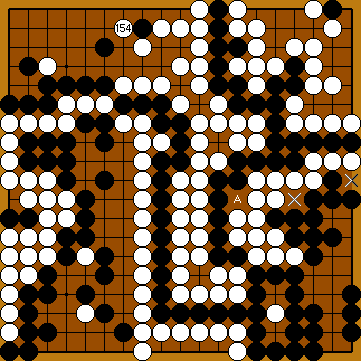
Back to the main line again, much later in the game ... |
|
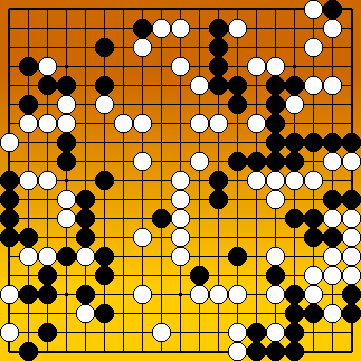
This is the position in Fujisawa Hideyuki's line of play after White's choice of the Semeai Variation of the Main Semeai. This sequence is not continuously enforced - in the sense that both sides would have several opportunities to play tenuki - so let's forget the left half of the board for the moment. |
|
Please note that he would have really done so as early as with White will capture at |
|
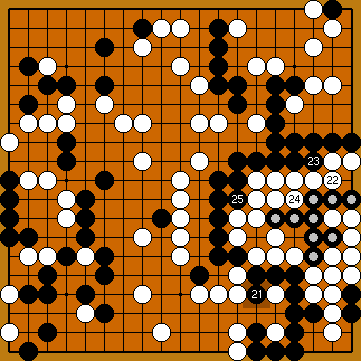
Let's take a short detour to China, exploiting a weakness in Fujisawa Hideyuki's sequence ... |
|
Both Cheng explained this special feature of the hanezeki in his 1988 book.
|
|
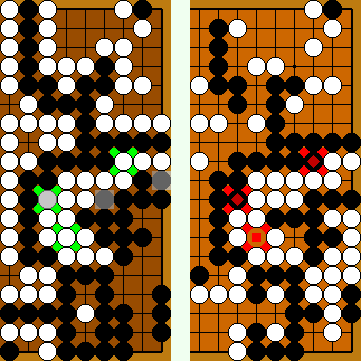
Semeai Variation: White gained five points in the hanezeki area (at right), compared to Fujisawa Hideyuki's assumed sequence (at left): - White captured an additional two Black stones, so gaining four points. The game will end in a draw now. |
|
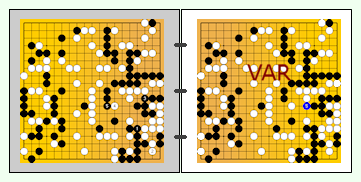
VAR |
|
In his 1988 book on Igo Hatsuyōron, Cheng found this early kikashi being an improvement for Black, providing him with an advantage of two points in the Semeai Variation (which at that time was better for White than the Capture Variation), see above. We have already met this kikashi in the previous section. |
|
|
|
Sometime later before White's decision point ... Even after Black's initial kikashi in the hanezeki, Again, Black is forced to occupy a White liberty with his move at Please note that this exchange will benefit Black in the Capture Variation, so White might utilise it as the initial moves of the Semeai Variation. |
|
Semeai Variation: In the hanezeki area, White gets three points of territory now (at right), which is two points less compared to Cheng's proposal of an optimal White sequence for the continuation of Fujisawa Hideyuki's aborted Semeai Variation (at left). Black will win the game by two points now. This is the same score as in Fujisawa Hideyuki's (assumed) Capture Variation. |
|
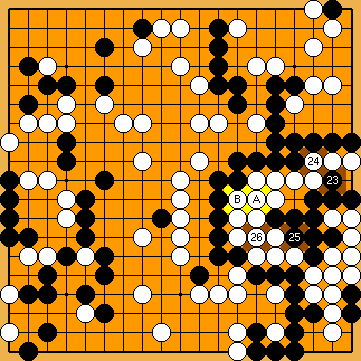
Let's enter the world of amateurs now ... |
|
Please note that KataGo's Immediate Crosscut after Yamada Shinji's Tsuke was not yet born at that time. |
|
VAR |
|
|
|
For further details, please refer to the history of our investigations ... In the end, Black will have lost one point overall. |
|
Since then ... |
|
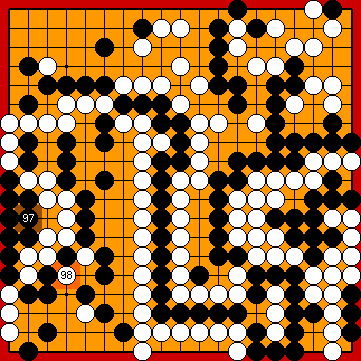
... we played the kikashi direct before the start |
|
Let's return to KataGo's world again ... |
|
|
|
|
|
|
| |
 2022MainLine
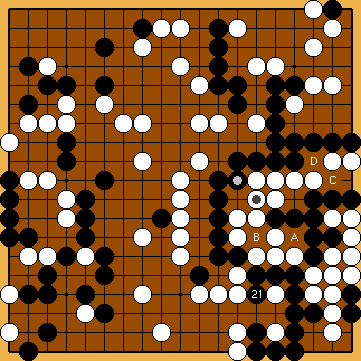
 : (
: ( 2022MainLine
 for
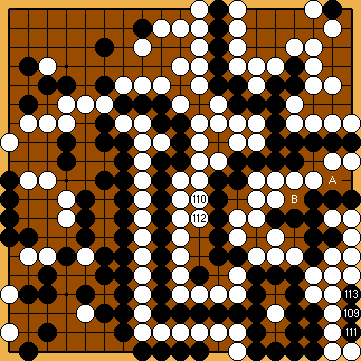
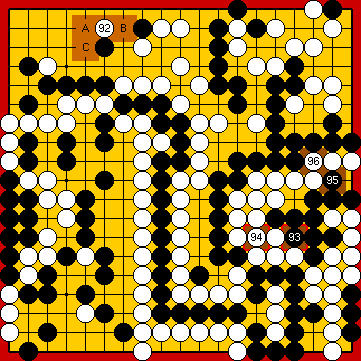
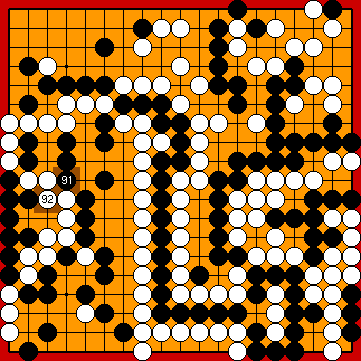
for  in the (temporary) seki, Fujisawa Hideyuki 9p continues with giving atari at
  ,
,  and
and  ,
,  much later, that is after White's decision point in the Main Semeai.
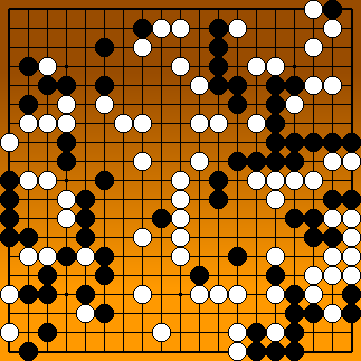
 :
: would be gote.
 :
:
 :
: :
: /
/ 
 :
: :
: .
.
 :
: in the diagram above, as all of White's moves are gote therein.
 of her upper hanezeki group.
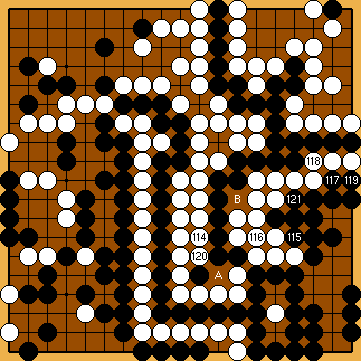
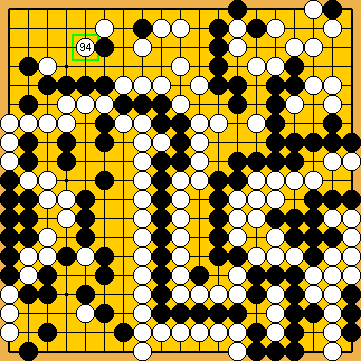
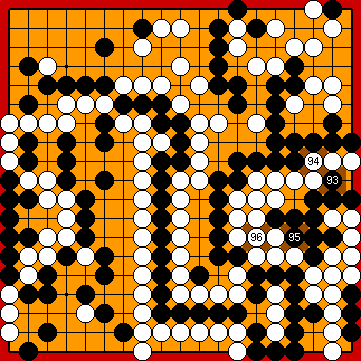
 :
: ,
,  take a liberty of Black's
  :
:


 is still White's priviledge, if she wants to capture Black's large group above.
 , which will end up as an additional stone in White's prisoner lid.
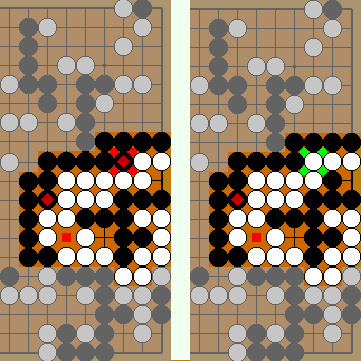
 :
: .
. : (C
: (C  2027
2027 .
.
 2027
2027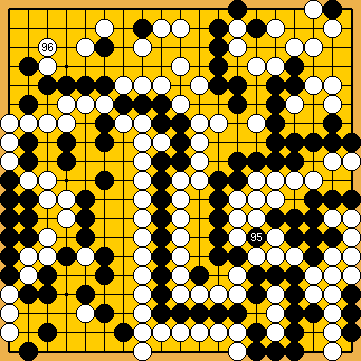
 :
: :
: 1092a
1092a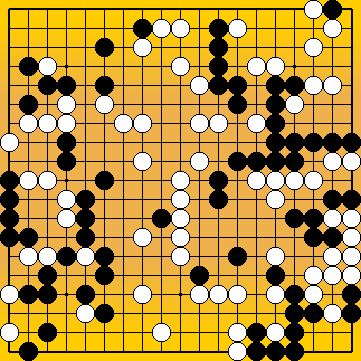

 ,
, 
 :
: :
:
