New Story Line 2022
Joachim's Hiki at the Upper Edge
(Joachim's Ko-Semeai #1)
|
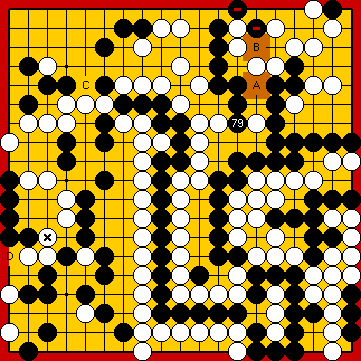
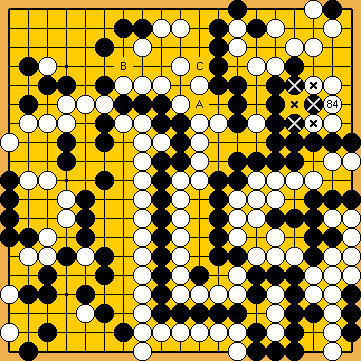
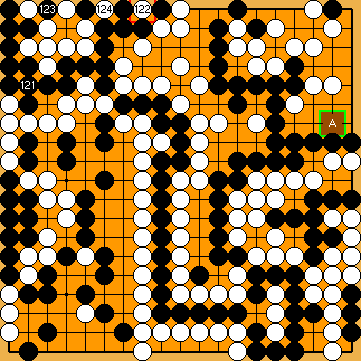
We will present Joachim Meinhardt's alternative move suggestions, which basically lead to the creation of a ko-shape in the Guzumi Area within a semeai between Black's large group in the upper right and White's centre group. Unlike our historical attempts, which resulted in the initial variation of Joachim's Ko-Semeai, KataGo invades the top left corner, but then falls for its tragic love of triple-ko, presumably a holdover from its early days under area scoring. First, to set the record straight, we present some simple ideas with which KataGo could easily circumnavigate the aforementioned cliff. We then shed light on Joachim's ideas at the time. KataGo - as usual - has some sharper moves on offer, but in principle fully confirms the validity of Joachim's considerations, which, despite all their efforts, ultimately end in Black's defeat. | |
|
Referenced by ( Let's go back in time and enter the world of amateurs ... |
|
Black did not occupy White's Main Semeai Liberty at Joachim's Ko-Semeai is a variation of the "classical" solution, i.e. the Guzumi has not been played before. Please also note that at the time of its creation, my Second Throw-in, but none of the kikashi in the hanezeki, had been played by us. |
|
With komi = -1, KataGo also favours this move. With larger reverse komi, KataGo prefers to insert the atari |
|
Inserting Michael Redmond's Kikashi in the Bamboo Joint Black is unable to return to the Main Semeai with a move at |
|
|
|
Vital points for Black's forthcoming attack on White's centre group are |
|
Let's find out what KataGo thinks about this matter ... |
|
With larger reverse komi, White's push |
|
We also considered this kikashi, but found out that playing it "early" is irrelevant here (contrary to the classical professional solution), as the outcome of the semeai is not affected. Capturing White's single stone in the upper right with |
|
Joachim thought that immediately defending with
For further details of our earlier analysis, please refer to the history of our investigations ... |
|
However, this move also opens up the possibility for KataGo to trip itself up, as we will see below. It would have been far easier to play the second push on |
|
Could also be played at
|
|
She threatens to continue with the double-atari of
|
|
Playing at
However, she should have better chosen the connection at
If he played at
Again,
However, a move at
|
|
I found that White should continue with the Main Semeai, instead, and occupy the Guzumi Point with
|
|
|
|
|
|
... |
|
White should continue with the Main Semeai, instead, and occupy the Guzumi Point with The game will end with no result. |
| |
 2035
2035
 : (
: ( 2022MainLine
 , instead, and so has to sacrifice both hasami-tsuke stones to survive the Punishment Semeai.
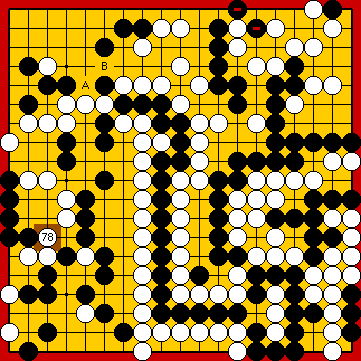
 :
: in the upper left as a kikashi beforehand, which Black will have to answer by connecting at
  .
.
 :
: ,
,  before will not make a difference.
 , instead, as White would capture his nakade stones at the left edge with
  , for example.
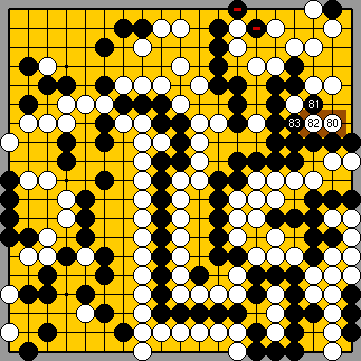
 :
: :
:
 :
:
 2034e
2034e
 : (92
: (92  would erase several of White's option in this area.
 ,
,  ) at the left edge was not played at that time.
 :
: :
: 270
270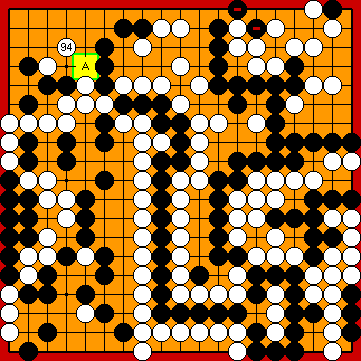
 : (
: ( A
A 
 :
: :
: :
: :
: ; it would result a change in the order of moves (
 ,
,  ,
,  ,
, 
 :
: :
: :
:

 :
: : (112
  , instead, would it make too easy and uncomplicated for White.
 : (
: ( , instead, which would result in an approach-move ko.
 :
: , instead, it would be White, who would get the point of
  at the upper edge, after the previous exchange of
  for
for  :
: : (
: ( :
:
 :
: : (
: ( :
:
 :
: :
: :
:
 :
:
 :
: , as already shown in the corresponding subvariation above.
