New Story Line 2022
Igo Hatsuyōron 120's Hanezeki
|
Igo Hatsuyōron 120 lives decisively from a very special, extended hanezeki. We will explain its individual components and their effects here in this section. As usual in a hanezeki, neither player may make the first move without suffering a significant disadvantage. An analysis of the surrounding positions ultimately ends with the conclusion that Black's large group in the upper right as well as White's group at the left edge are the decisive weak points that bring the dissolving of the Hanezeki back into the game. We will show that the additional temporary seki is required as a buffer in the Main Semeai as well as for the regulation of the score difference. At the very end, we present the Yōshin Teiki, another collection of problems by Inoue Dōsetsu Inseki, which may have represented an essential predecessor to his Igo Hatsuyōron. | |
|
Let's enter the analysis room ... |
|
|
|
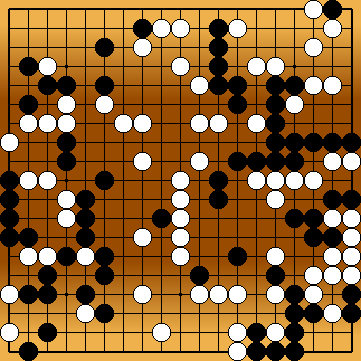
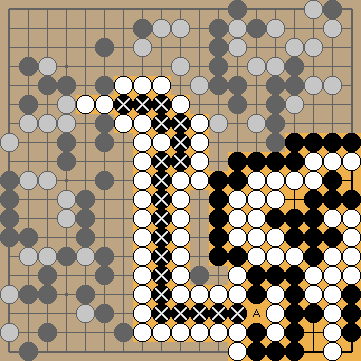
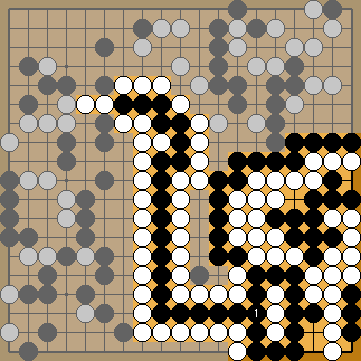
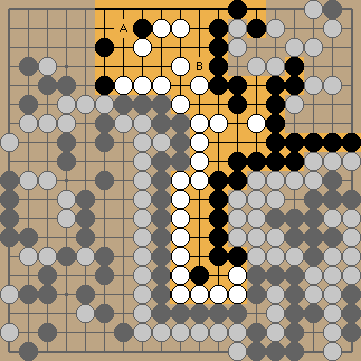
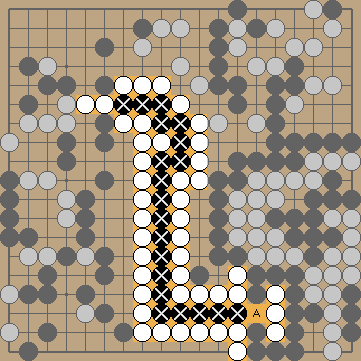
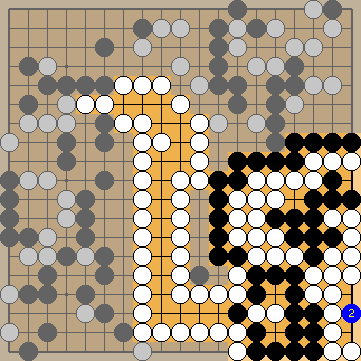
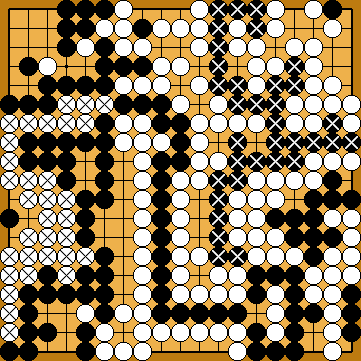
We decided to call the entire formation in the lower right quarter of the board - including Black's meandering group in the centre - "hanezeki", in order to simplify the verbal reference to it. Strictly speaking, this compound of Black and White groups is a hanezeki extended by a simple seki, where the "hane" as the outer lying component is a tail of 20 stones. |
|
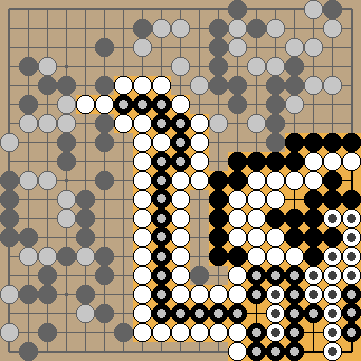
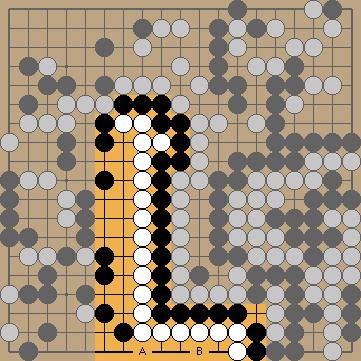
The marked groups in this diagram form the true hanezeki in the corner. |
|
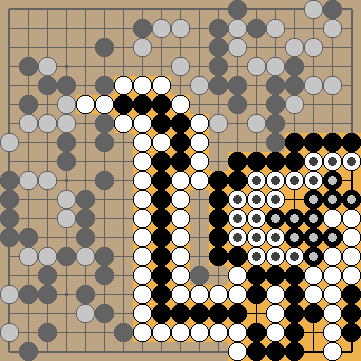
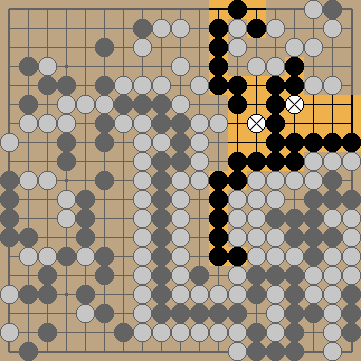
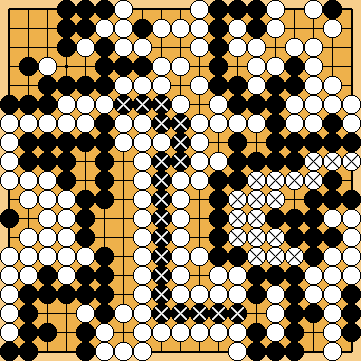
The marked groups in this diagram form an additional seki on the right side. The importance of this additional seki for the functionality of Igo Hatsuyōron 120 will become clear below. |
|
Let's first discuss the hanezeki's tail ... |
|
For most of the game, neither side wants to play You can certainly imagine that such a move, with which 20 Black stones are either captured or supposedly saved, seems so extremely attractive to "normally-trained" AI - having never encountered a hanezeki it its life - that it wants to play it consistently. The length of the tail with 20 pieces is no coincidence. |
|
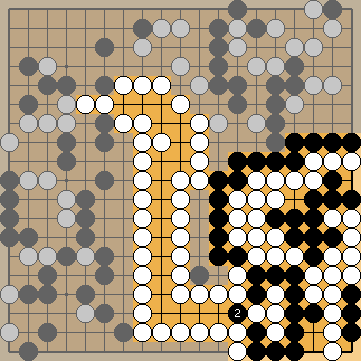
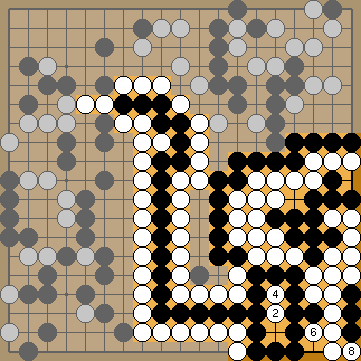
We explain the dissolving of the hanezeki by White first. |
|
|
|
|
|
Connecting with
|
|
|
|
|
|
In a simplified view of the initial position, 23 Black but 34 White stones die. Consequently, White would only be able to resolve the hanezeki if she won sufficient compensation for her big loss in it elsewhere on the board. |
|
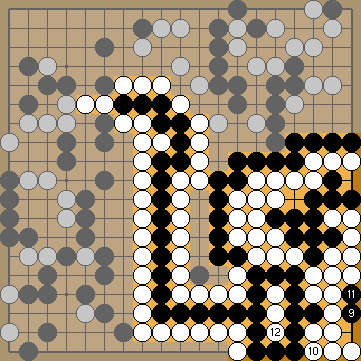
Black's dissolving of the hanezeki suffers from a comparable mechanism. |
|
|
|
After this, Black is helpless, because his connected hanezeki group suffers from a severe shortage of liberties.
|
|
|
|
In a simplified view of the initial position, 3 White but 35 Black stones die. Consequently, Black would only be able to resolve the hanezeki if he killed any of White's groups that surround the hanezeki's tail. |
|
Let's now analyse the wider surroundings of the hanezeki ... |
|
We start with Black's large group in the upper right. Black's group cannot achieve independent life on its own. Black's only hope is the collapse of the entire hanezeki. |
|
White's upper right corner is alive as it stands. There is no way to reduce White's formation to only one eye. |
|
White's centre group (and at the top) is also alive as it stands. In the current position, Black does not have any chance of killing this group, as Even otherwise, if Black got to occupy both of these points ( For further details, please refer to section "Joachim's Hiki at the Upper Edge (Joachim's Ko-Semeai #1)" ( |
|
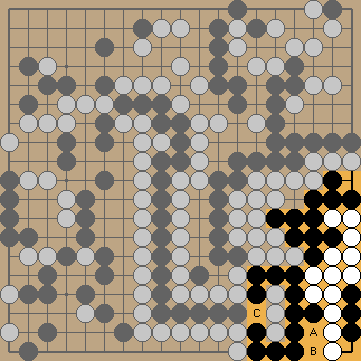
White's group in the additional seki at the right side is safe - for the time being. Black cannot give atari at e.g. In order to be able to attack this group successfully at all, the prior dissolving of the true hanezeki in the corner would be a mandatory prerequisite. |
|
However, Black cannot give atari at White's corner group just now, due to his shortage of liberties. If he played |
|
It follows that Black must force White to capture the hanezeki's tail However, as we have seen above, it is associated with a great disadvantage for White to play this move. |
|
As is already explained above, Black cannot hope on attacking White's centre group, as the points of |
|
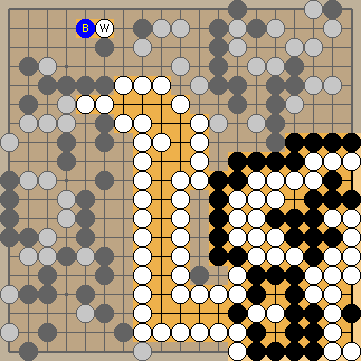
Black could reduce White's bottom group to only one eye with a move at However, it is White's turn in this position. |
|
Black could also reduce White's group at the left to only one eye with a move at But it is White's turn in this position again. |
|
However, bringing these groups to independent life is gote for White in each case. Consequently, she can only succeed for one of them, because the rules forbid her to move twice in a row.
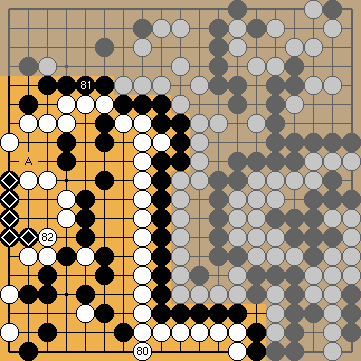
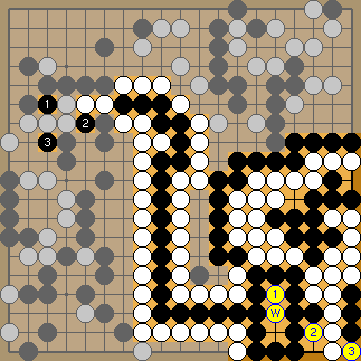
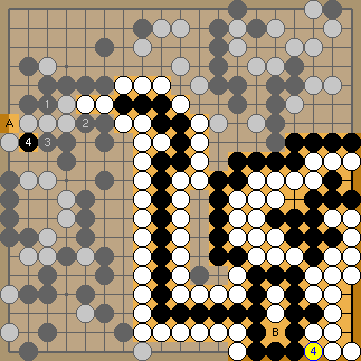
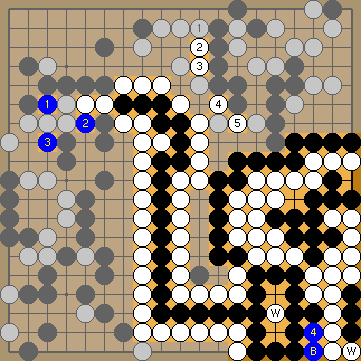
This move starts the Nakade Sequence at the left side of the board. |
|
Across the board, the Main Semeai will effectively develop between White's As we now know, White's seemingly already captured stone |
|
Let's now determine the buffer effect of the hanezeki with regard to the Capture Variation of the Main Semeai, ... |
|
|
|
|
|
|
|
|
|
The hanezeki delays the Main Semeai in the Capture Variation by six moves / liberties. |
|
Capture Variation of the Main Semeai: |
|
However, if White were unable to effectively capture Black's large group in the upper right, because this group has at least seven liberties, ...
|
|
|
|
|
|
|
|
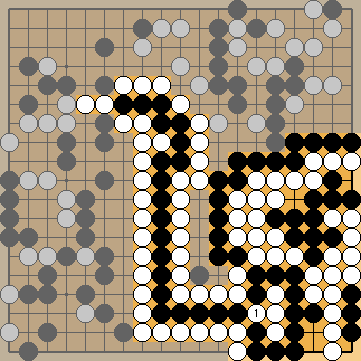
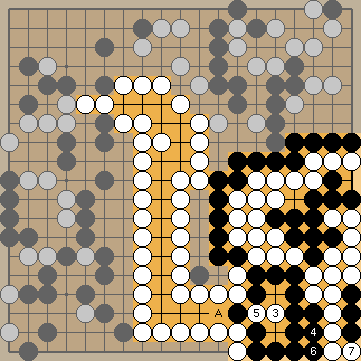
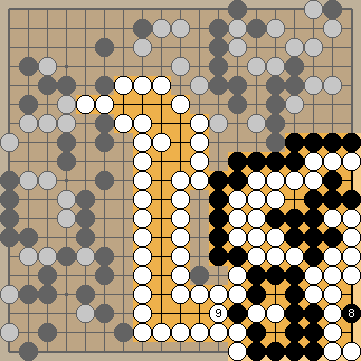
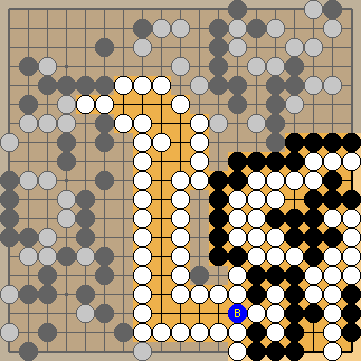
Let's now determine the condition under which Black can successfully connect the hanezeki's tail ... |
|
|
|
|
|
Otherwise, his connected hanezeki group will be taken off the board by |
|
But here in the very specific environment of Igo Hatsuyōron 120, ... |
|
... White would achieve independent life for her hanezeki group in the lower right corner, so gaining a large game-deciding benefit there. Please remember that Black's large group in the upper right cannot get more than only one eye, and so would be dead here, as would be Black's group in the temporary seki. |
|
As a result - with regard to the Main Semeai - Black can connect the hanezeki's tail, only if White's group at the left has a maximum of four liberties (i.e. This also implies that White's left-hand group has four liberties at the moment of White's decision point. As a matter of course, White would not have wasted her moves |
|
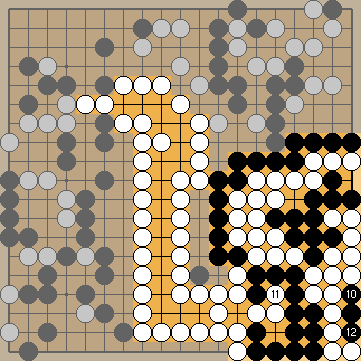
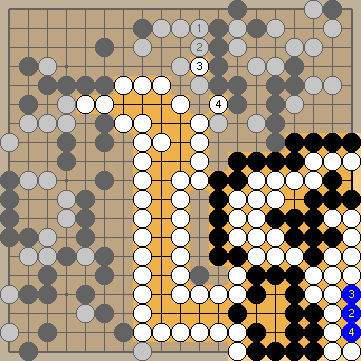
Semeai Variation of the Main Semeai: |
|
|
|
|
|
|
|
But let's continue for some moves, in order to achieve an additional insight into the problem. If Black has a maximum of two surplus liberties (= 9 Main Semeai Liberties in total) then White will still capture his large group in the upper right in the Semeai Variation. Black needed at least three surplus liberties (= 10 Main Semeai Liberties in total) for large group in the upper right to also survive the Semeai Variation. |
|
This means that a gain of individual liberties for Black's large group in the upper right remains without any effect in the Semeai Variation. This is also an effect of the additional temporary seki |
|
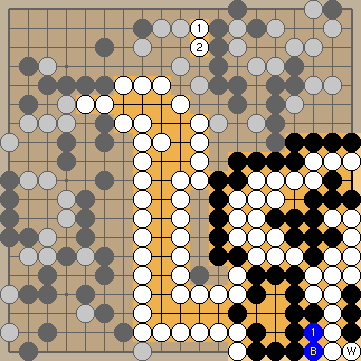
Finally, we will explain the territorial effect of the additional seki at the right side of the board ... |
|
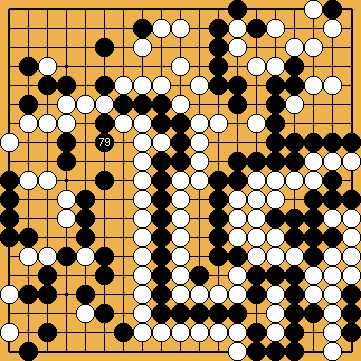
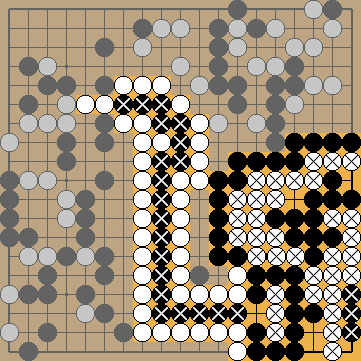
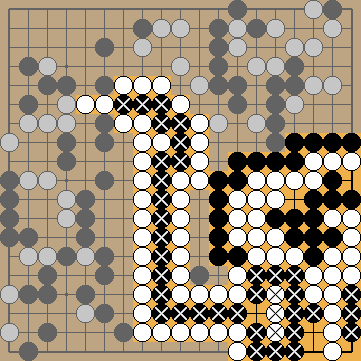
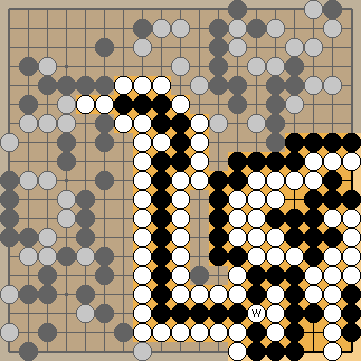
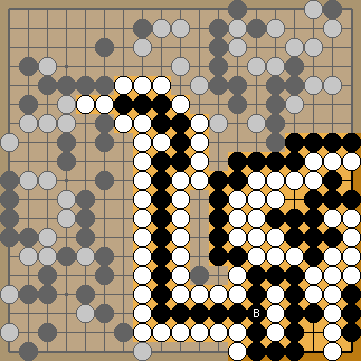
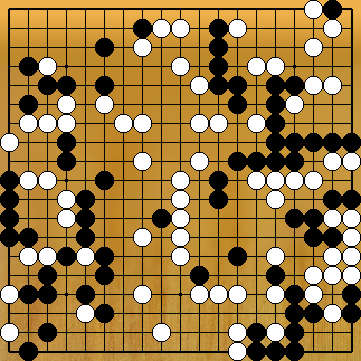
This diagram shows the board position at White's decision point; Please note that White's |
|
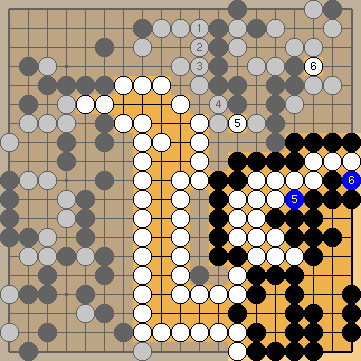
Semeai Variation: Roughly calculated, the captures of White's large White will lose 32 stones and Black will lose 34, which is about the same. |
|
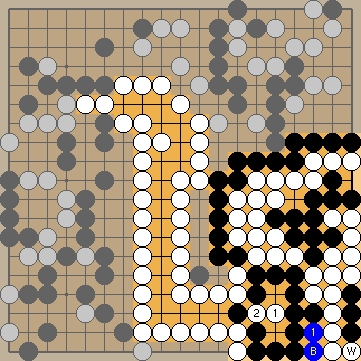
Capture Variation: Roughly calculated, the captures of Black's tail Black will lose 20 stones and White will lose 18, which is about the same. |
|
Conclusion: The temporary seki is needed for delaying the Main Semeai, as well as for adjusting the score between both Main Variations. Only this design allows two almost equivalent Main Variations. |
|
Let's now take a closing look back to the time before the Big Bang ... |
|
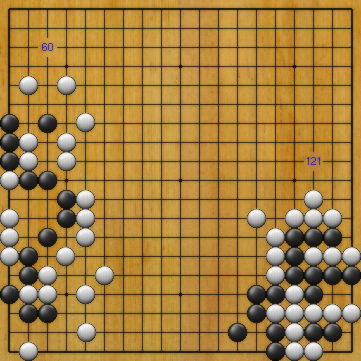
Yōshin Teiki (要津定規, "Principles to Follow at Important Points") is a classic tsumego collection, written by Inoue Dosetsu Inseki in 1708. It was laid out in six volumes, encompassing over 1,500 problems, but the majority of the work has been lost. Each volume was ordered in a clear fashion from easy to hard, apparently with the intention to be used as a study course of lessons. The two volumes which survived are the section on nakade, numbering 107 problems, and the section on seki, numbering 28 problems, for a total of 135 problems. The first problems of each section are accessible for a single-digit kyu player, while the last ones are at the high amateur dan level. These surviving problems have been compiled by John Fairbairn in his book Today We Have a Splendid Feast, The Meijin Inseki's Yoshin Teiki by Inoue Inseki Meijin, which is accessible as a SmartGoBook. There would certainly have been other mosaic stones to be found in the complete problem collection, with the help of which Igo Hatsuyōron 120 would have been better understood from the outset. |
|
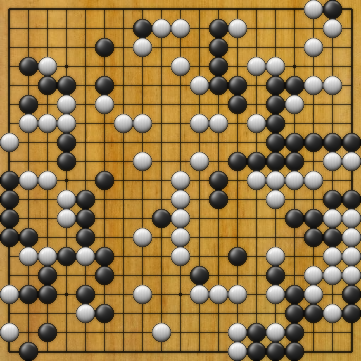
Problem 60 (at left) addresses a nine-stone Nakade, Problem 121 (at right) a "simple" Hanezeki. |
|
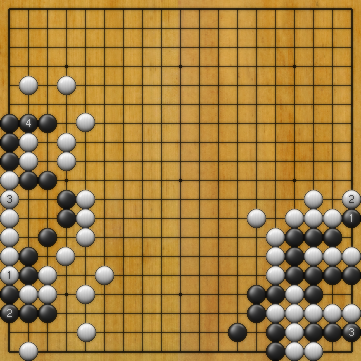
Problem 60:
His three stones at the left edge were in danger of becoming captured by White, starting with an atari at the same point. Problem 121:
|
|
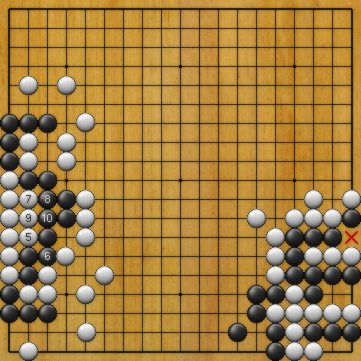
Problem 60:
White threatened to capture his stones in a series of atari, starting with
Problem 121: The position has become a seki. |
|
Problem 60:
Thereafter,
If Black's group ever gets involved in an "external" semeai (assuming that parts of White's encirclement could be cut off), Black must play |
| |
 : (
: ( 2022MainLine
 , as that would be a serious mistake, as we will see below.
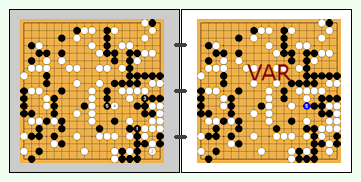
 :
:
 :
:
 :
: :
: would be a grave mistake.
 and Black would suffer from a serious shortage of liberties.
 :
: :
: :
:
 :
: :
:
 :
:
 :
:
 :
: :
: :
:
 :
: :
:
 stones is gote for Black, so he can only capture one of these for an eye, but not both.
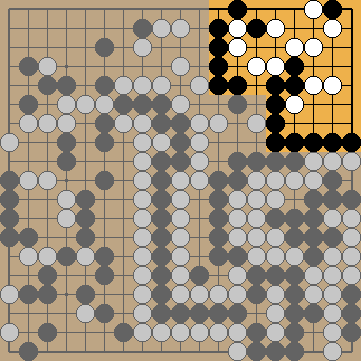
 are miai.
 ;
;  ), it would turn out that Black's large group (also one-eyed then) would have at least one liberty too few.
 2034
2034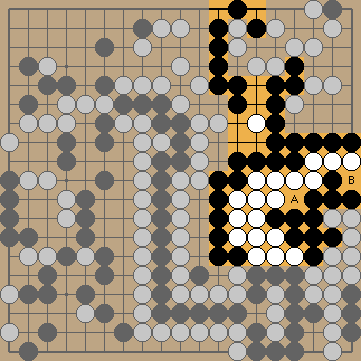
 .
.
 .
.
 with
with 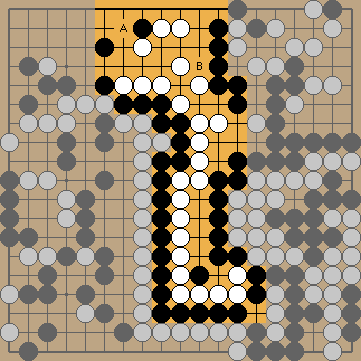

 :
: :
: :
: at the left edge, so preventing Black from capturing her left-hand group easily.
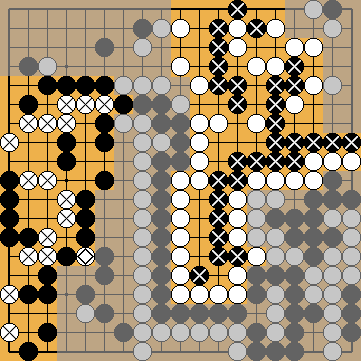
 :
:

 in the hanezeki under these circumstances.
 ,
,  on the right edge.
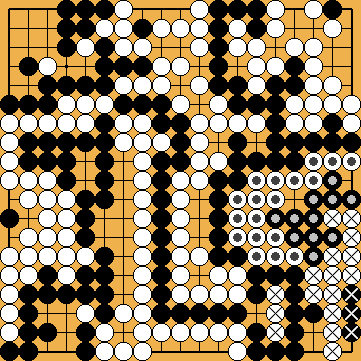
 :
:
 .
. :
: , as they would lose the ensuing semeai in the corner.
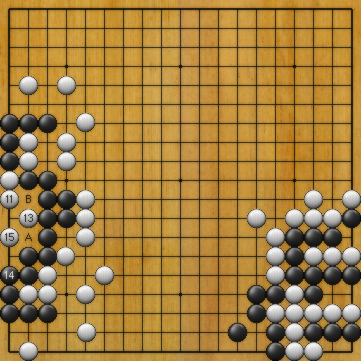
 :
: :
: and
and  are miai.