New Story Line 2022
KataGo's Bad-Shape Move in the Left Centre
|
This section is dedicated to KataGo's third new discovery, the Bad-Shape Move in the left centre, which in combination with KataGo's Atari wins another point for White. After a presentation of the subsequent moves, especially on the left side of the board, we focus on another idea of Joachim Meinhardt to gain by a tenuki into the right centre, as KataGo's third discovery loses a tempo in the Main Semeai in principle. KataGo's original version was based on area scoring and at the time favoured the arguably "safer" of two therefore equivalent alternatives (which we then mistakenly used as "Our Solution" for some time), of which the "unsafe" one involved a complicated ko-fight and ultimately gave White -- albeit only under territory scoring – a one-point advantage. KataGo's current 2021 version uses territory scoring and consequently finds even more approaches for clarification. | |
|
Let's go back a few years and enter the world of KataGo ... |
|
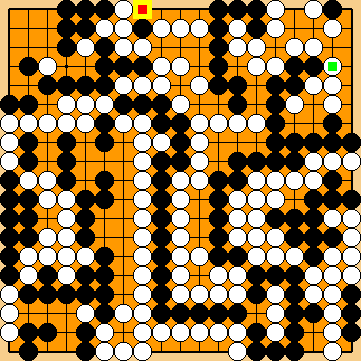
White plays KataGo's Bad-Shape Move in the left centre. Please note that this move loses one tempo in the Main Semeai, in principle, as it does not occupy one of the liberties of Black's large group at the right. |
|
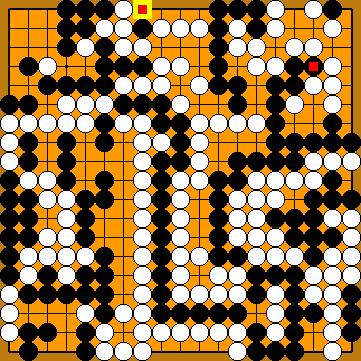
This push must not be played if Black is par with the Punishment Semeai Liberty Level. Please also note that answering KataGo's Bad-Shape Move by immediately occupying one of White's Main Semeai Liberties with
|
|
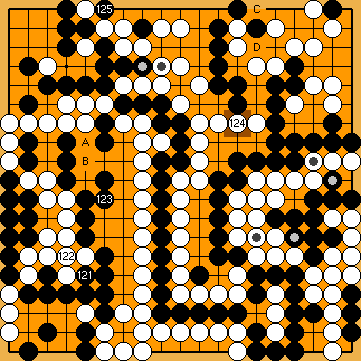
Connecting at Immediately occupying White's liberty at the left with
Please note that the AI-typical kikashi of
Playing tenuki to But this implies that the 2019 version was not able to handle Joachim's Tenuki "correct" (with regard to territory scoring; at least on our not so very powerful hardware), which was flying below the radar of area scoring (utilised by KataGo at that time). Black will not win the forthcoming ko-fight in the left centre after this tenuki here, so we analysed it entensively without all of Black's kikashi (
|
|
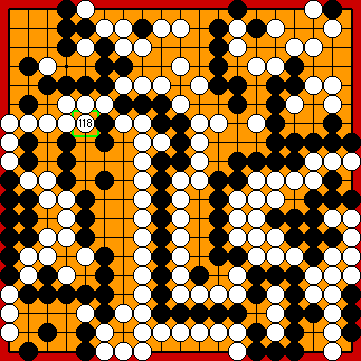
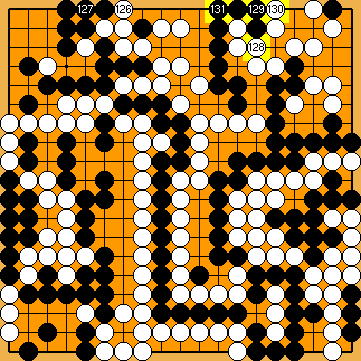
Please note that KataGo likes to let Black occupy this point, which will not affect the overall result of the game, but enhance Black's score in the Semeai Variation only.
|
|
|
|
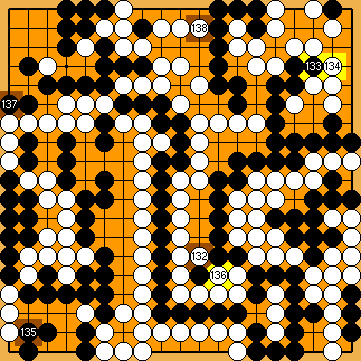
Capture Variation: Compared to our 2021 solution, ...
In total, gains and losses compensate for each other. White + 2 => White + 2 |
|
Semeai Variation: Compared to our 2021 solution, ...
In total, White gained two points. Black + 6 => Black + 4 |
| |
 : (
: ( 2022MainLine
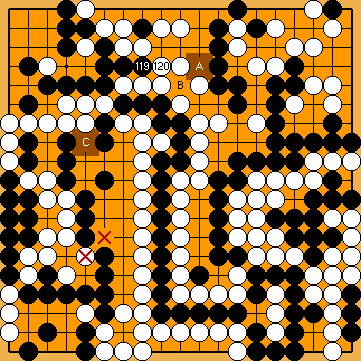
 :
: , and win the Punishment Semeai thereafter.
 thereafter would be of no use for Black, as he would be unable to divide White's centre group after she connected with
  .
. will not benefit Black, due to his weakness of the cutting point
  in the lower left centre. Please refer to the subvariation below.
 :
:
 : (A
: (A  2039a
2039a , instead, will result in a change in the order of moves.
 , instead, would be possible, but could be considered a technical mistake, as White would gain in the Semeai Variation unnecessarily.
 :
: is of no use here, as it reduces Black's territory inside the Main Semeai Area, and Black could easily compensate for this temporary loss in the upper right through also reducing White's territory there.
 , instead, follows a suggestion of Joachim Meinhardt, which (mistakenly, as we now know) resulted in our KataGo-based 2019 solution to the problem.
 ,
,  has been taken place before (erasing potential ko-threats of both sides in this area).
 513a
513a :
:
 :
: :
: :
:
 :
: