Variations of Our Solution (IIIa)
No Early Kikashi
This chapter explains all variations, as far as they do not relate specifically to the professional solution.
This is an extraction from the "Variations of Our Solution (III)" ( 513).
513).
Order of Updates
|
At the beginning of the year, Dany introduced his atekomi to us, which leads to Dany's Ko. |
|
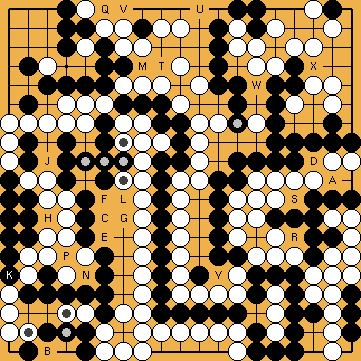
A few months later, Dany found that White's atari (played after her wedge in the left centre) should not be played so early, but kept in reserve as a ko threat. |
|
It was a big shock when I noticed that we had taken the order of moves of several exchanges (especially with "natural" looking moves) too easy, not considering their effect on the number of Black's Main Semeai Liberties at the moment of White's decision point (when she has to choose between Capture, and Semeai, Variation). |
|
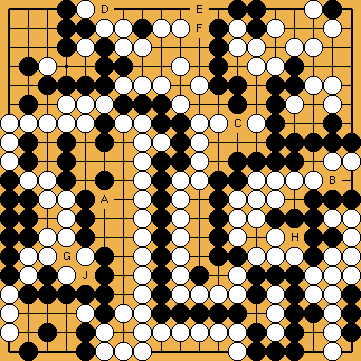
Joachim introduced his Final Ko in the Semeai Variation, but only as a side note. During my further investigations on this subject, it turned out that its application cases were far more numerous than Joachim had assumed.
Some special cirumstances given, Joachim's Final Ko will make it impossible for White to win the Semeai Variation if Black's large group has "only" nine Main Semeai Liberties (surely you will know already the Black's group survives the Semeai Variation with ten Main Semeai Liberties). |
|
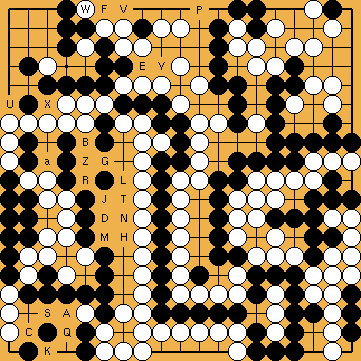
Joachim found another mistake in the order of moves, related to the number of Black's Main Semeai Liberties. If Black is par with the Punishment Semeai Liberty Level, he must not play his push at the top. White will continue with the Main Semeai thereafter, winning the Punishment Semeai. |


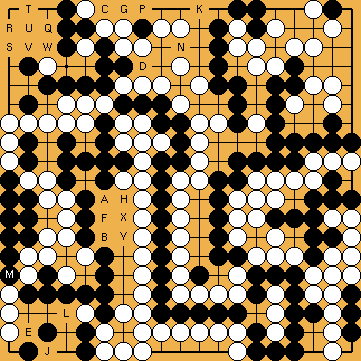
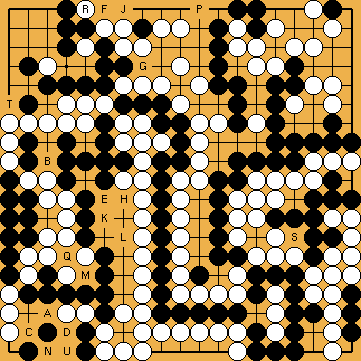
Colours of the Boards' Edges
|
Darkgrey = 6 Main Semeai Liberties: |
|
Darkred = 7 Main Semeai Liberties: |
|
Brown = 8 Main Semeai Liberties: |
|
Pink = 9 Main Semeai Liberties: |
|
Lightgrey = 10 or more Main Semeai Liberties: |
|
Lightbrown: |
|
Darkbrown: |
|
Cyan: |


 Variation Tree
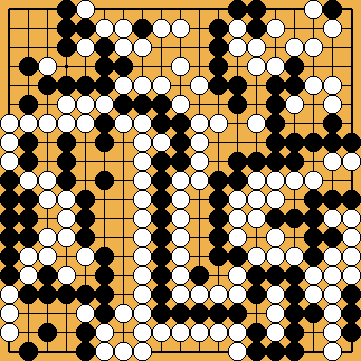


 (.1) @
 +2
+2  +2
+2

 (.1) @
 ++
++

 @
@ 
 @
@ 
 @
@ 

 @
@ 
 @
@ 

 @
@ 


 Connects his stone in the lower right
 @
@ 
 @
@ 
 +2 Jigo
 @
@  @
@  @
@ 
 @
@ 
 @
@ 
 @
@ 
 @
@ 
 @
@ 

 @
@  @
@  @
@ 
 @
@ 
 @
@  @
@ 
 @
@ 

 @
@ 

 @
@ 
 (.1) @
  (.1) @
  (.1) @
  @
@  @
@  (.1) @
  @
@  @
@  @
@  @
@  @
@  @
@  @
@  @
@  (.1) @
  @
@  @
@  @
@  @
@  @
@  @
@  @
@ 
 @
@  @
@ 
 @
@  @ !
@ ! (.1) @
  @
@  @
@  @
@ 
 @
@  @
@  @
@  @
@  @
@  @
@  @
@  @
@  @
@  @
@ 


 @
@  @
@  @
@  @
@  @
@  @
@ 
 @
@  @
@  @
@  @
@ 
 @
@  @
@ 

 @
@ 
 @
@ 


 @
@  @
@  @
@  @
@ 
 @
@  @
@  @
@  (.1) @
  @
@  @
@  @
@  @
@ 
 @
@  @
@