New Story Line 2022
Black's Missing 71st Stone - Vanished
|
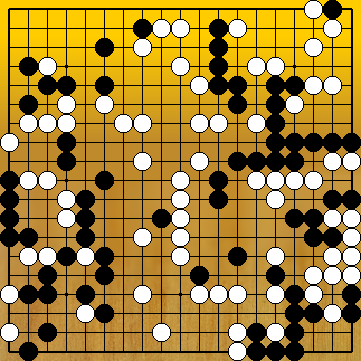
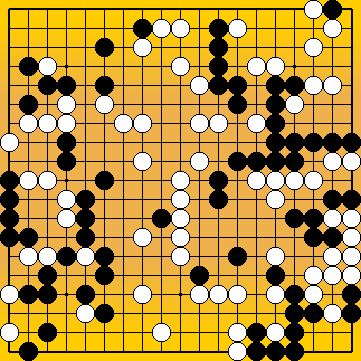
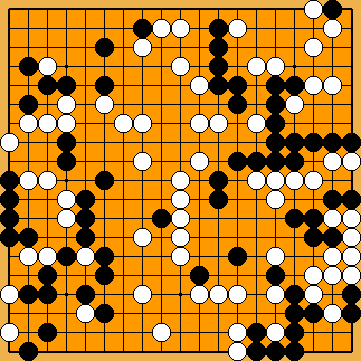
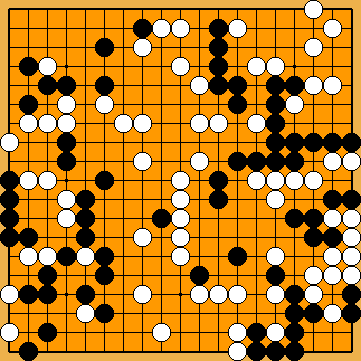
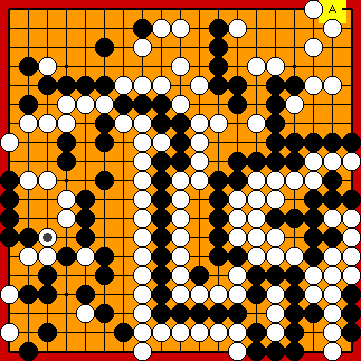
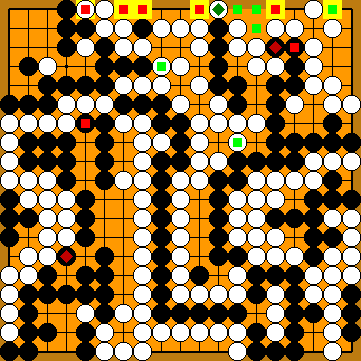
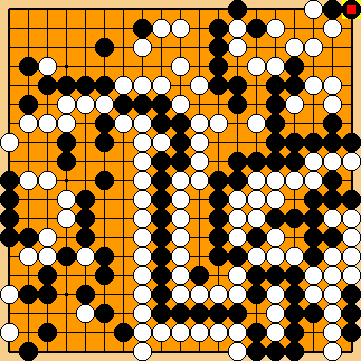
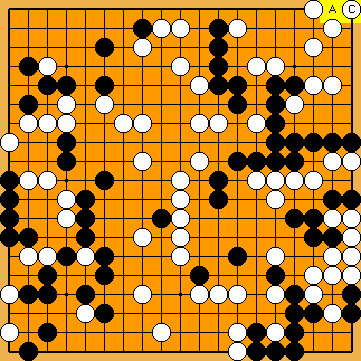
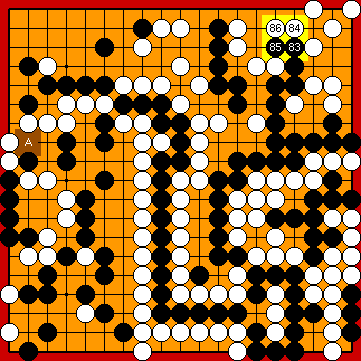
Igo Hatsuyōron 120 shows a position that could almost be taken from a real game. Although it it Black's turn, however, there are 71 Black stones on the board, but only 70 stones in White. One of the conventions chosen for tsume-go problems of high calibre like those in Igo Hatsuyōron is that all the stones of the initial setting must be useful. We assumed for a very long time that White must have captured a Black stone before the problem was set, since consequently not a single Black stone may be taken from the board to resolve the supposed imbalance. When we investigated a suspicion that the opposite might be the case, we came across a significant difference in the perceptual abilities of AI and human players, which makes it necessary to consider KataGo's analysis results very cautiously in certain cases. At the end of all our efforts it turned out that the classical convention applied after all and that it must have been White who had started the game. | |
|
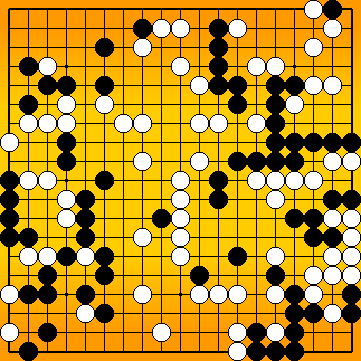
Let's go back in time and enter the world of amateurs ... |
|
(
White captured a Black stone at We followed this option for the vast majority of our engagement with the problem.
White started the game. Perhaps a kind of homage to the origin of the game of Go, ancient China, in which it was White who made the first move. This second option will turn out to be Inoue Dōsetsu Inseki's true intention, as we shall see further below. |
|
Let's make a short detour into KataGo's world ... |
|
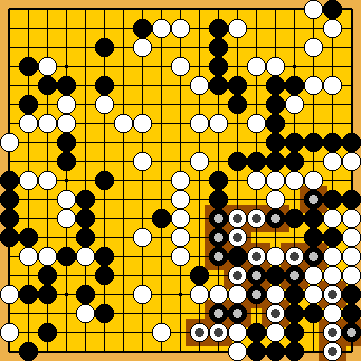
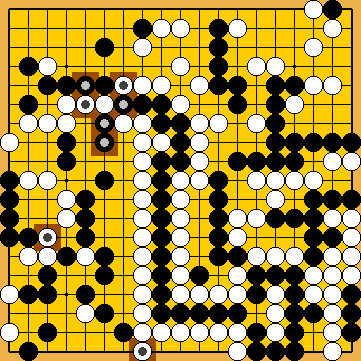
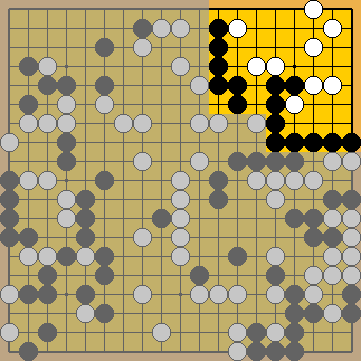
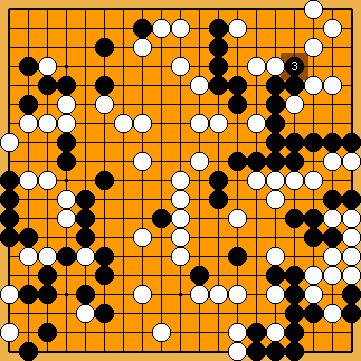
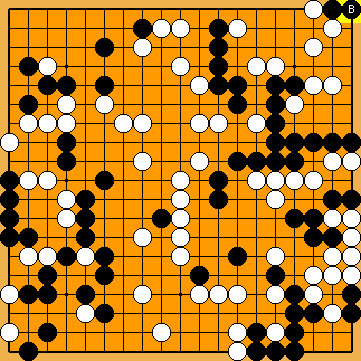
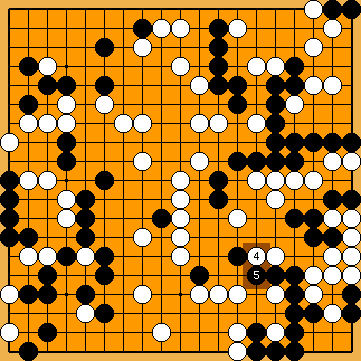
Karl Desfontaines mentioned that – according to his trials with KataGo – Black's trapped stone To check this, I analysed three different scenarios for the upper right corner. You may wonder what this topic is doing here in this section. Well, the results of the analysis unintentionally shed new light on the question of Black's (seemingly) missing 71st stone, as we will see much further on. |
|
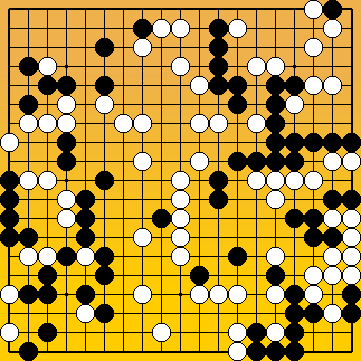
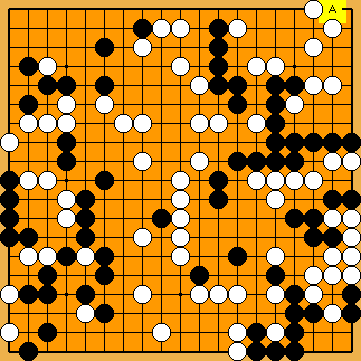
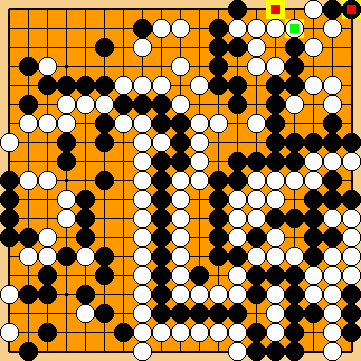
Scenario A: ( Black's stone at
One Black stone was added at
Black's stone at |
|
But first, let's highlight a key difference in the perceptual abilities of humans and AI. In the world of amateurs ... |
|
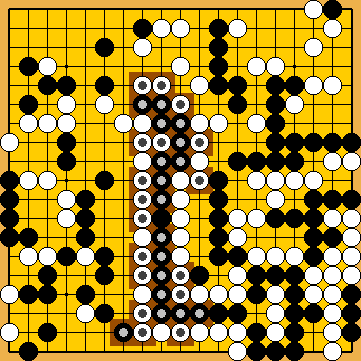
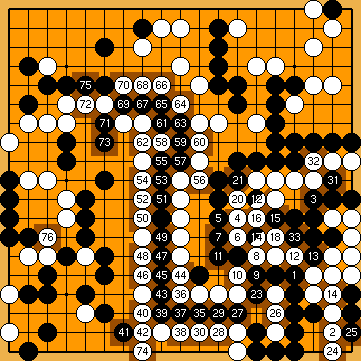
The sequence of moves to create the hanezeki is - seen in itself - a self-contained, single element of the solution. |
|
The sequence of moves of the wandering of the hanezeki's tail through the centre of the board is - seen in itself - another self-contained, single element of the solution. |
|
The sequence of moves of the Crosscut Sequence is - seen in itself - another self-contained, single element of the solution. |
|
The same is true for the two throw-in in the hanezeki, ... |
|
... as well as all the ensuing forcing-moves in the hanezeki. |
|
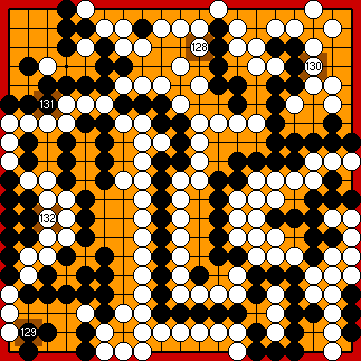
The total view of a clustered one-way street in human understanding, massively reducing the complexity of the problem. |
|
This implies the following ... |
|
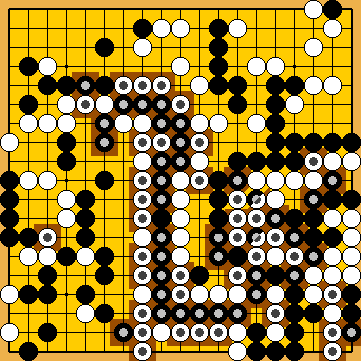
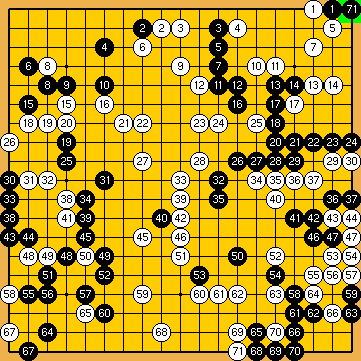
From the starting position of Igo Hatsuyōron 120, ... |
|
... in a way, human players only need two moves – independent (in principle) of a large part of the board, especially of the upper right corner (humans are capable of concentrating on the part of the board relevant to this sequence and blocking out everything else) – ... |
|
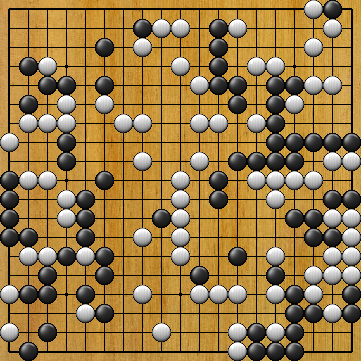
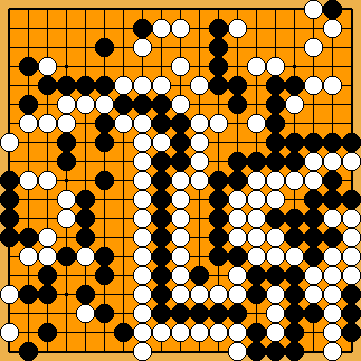
... to reach the position before both sides' engagement on the left side of the board and in the upper right corner. |
|
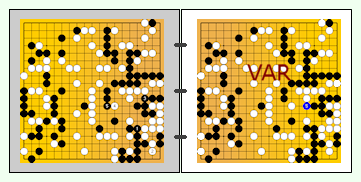
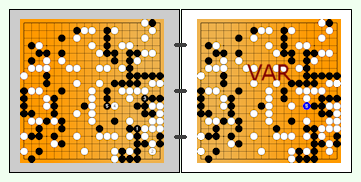
VAR |
|
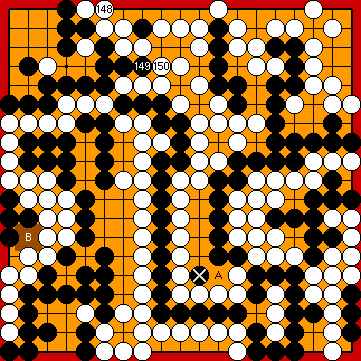
Conversely, this means that human players can analyse minimal changes, e.g. in the upper right corner, locally, completely disregarding the rest of the board. |
|
But in the world of KataGo, ... |
|
From the starting position of Igo Hatsuyōron 120, ... |
|
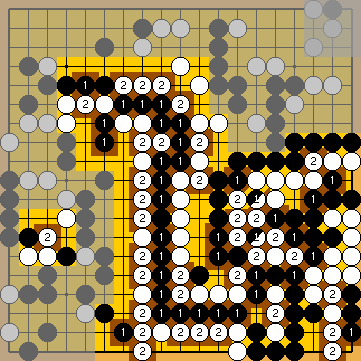
... KataGo still needs 76 single moves – always considering the whole board – ... |
|
... to reach the position before both sides' engagement on the left side of the board and in the upper right corner. |
|
VAR |
|
For KataGo, the minimal change in the upper right corner has created a new whole-board position that it has never ever seen before. KataGo is still a player of superhuman strength, and also still has the specific knowledge about the problem. Therefore, it will not fail entirely with solving the "new" problem. However, the impact of the "small" change may realise too far in the future (i.e. hidden behind KataGo's event hoziron), so it is not unlikely that KataGo will just follow its "first instinct", which would mean "playing as usual". |
|
Let's now find out what KataGo thinks about the three scenarios described above, starting with the first one ... |
|
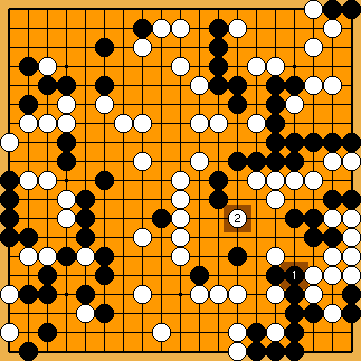
Scenario A: ( |
|
KataGo run in Analysis Mode with a komi of -1 here. |
|
|
|
|
|
However, White's "usual" block with It would be correct to occupy a liberty of Black's large group at |
|
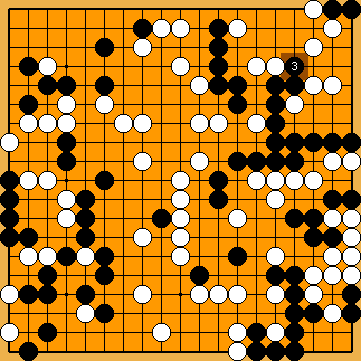
The solution sequence will continue with a Black move at White will win the game by one point. In my experience, it is a good idea to vary the komi for the self-play games in order to find out to what extent there are "hidden traps" for KataGo in a previously "unknown" position. The final scores were as follows:
Starting from komi = -1, the final scores appear to match the increase in reverse-komi. However, decreaing the reverse-komi in White's favour produced final results that were inexplicably better for Black. |
|
VAR |
|
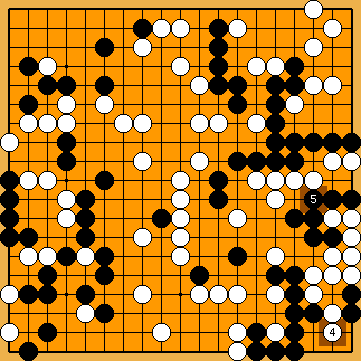
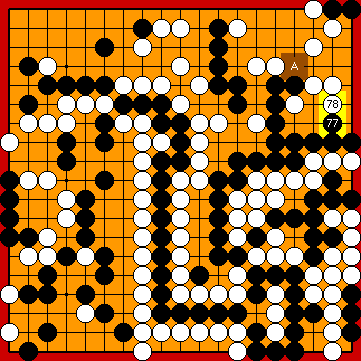
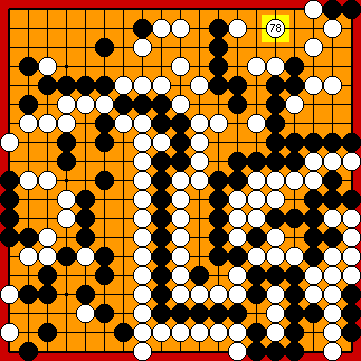
Referenced by ( We lend KataGo a helping hand by saving it the trouble of thinking about the first 76 moves of the game and only start the self-play game after White's move |
|
|
|
It seems that the consequences of this move are now within reach of KataGo's computational skills. We will explain the continuation in thematically connected units (using changes in the order of moves), while KataGo loves to bounce back and forth on the board in its self-play games. |
|
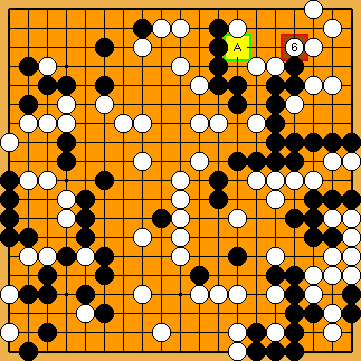
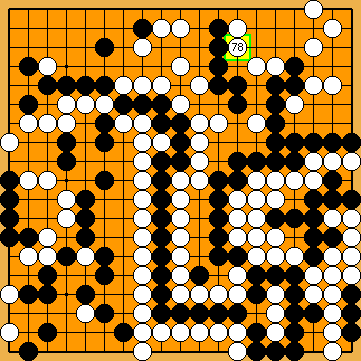
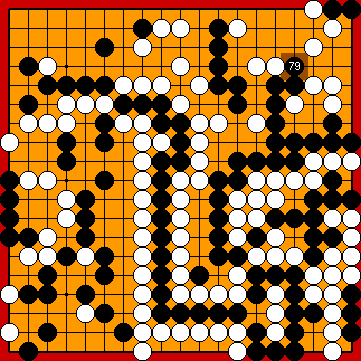
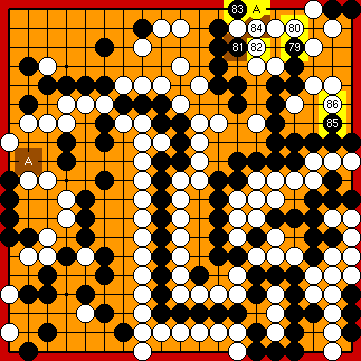
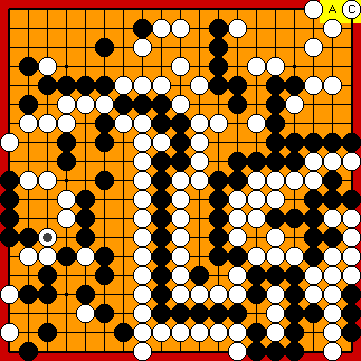
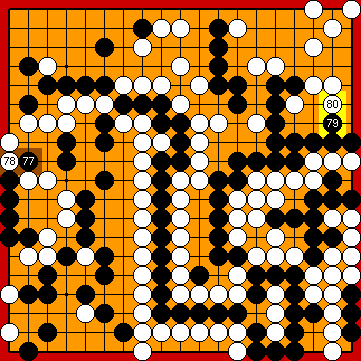
Further reducing White's territory at the top with Due to the missing Black stone at Please also note that Black does not have the time to play the descent to |
|
|
|
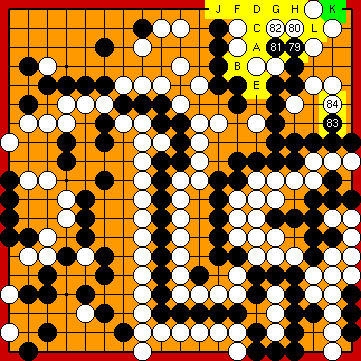
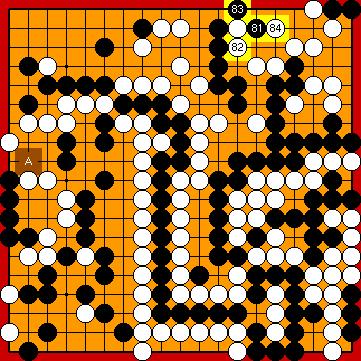
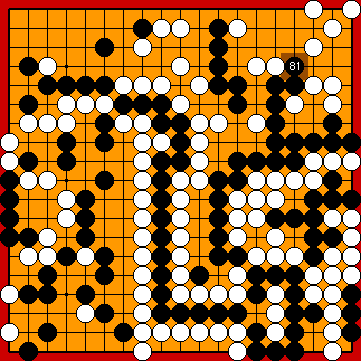
Black could give atari at
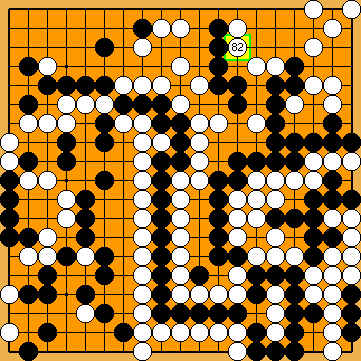
Alternatively, Black might give atari at White's two stones in the lower left with |
|
|
|
Therefore, she has to defend there first. She can do so in sente, as Black is par with the Punishment Semeai Liberty Level. |
|
|
|
|
|
|
|
Connecting his stone Black will continue with the atari of |
|
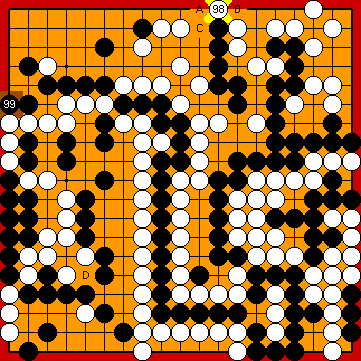
Capture Variation: Compared to Our Solution (2021), ...
In total, White gained one point. White + 2 => White + 3 A final score of White + 1 was to be expected, so the missing Black stone in the upper right corner gives White a net advantage of two points. |
|
Semeai Variation: Compared to Our Solution (2021), ...
In total, White gained three points. Black + 4 => Black + 1 |
|
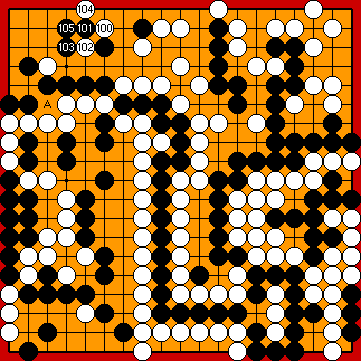
Let's discuss the second scenario ... |
|
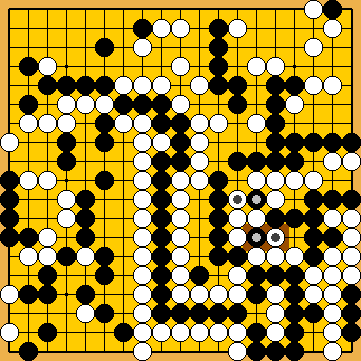
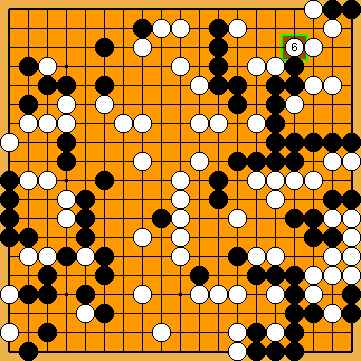
Scenario B: ( |
|
|
|
|
|
|
|
|
|
White will win the game by three points. |
|
VAR |
|
We lend KataGo a helping hand by saving it the trouble of thinking about the first 76 moves of the game and only start the self-play game after White's move |
|
As a matter of course, choosing the push to |
|
|
|
Runner-up is the jump back to |
|
The game will continue with Black's move at |
|
Capture Variation: Compared to Our Solution (2021), ...
White gained one point. White + 2 => White + 3 As was to be expected. |
|
( |
|
|
|
|
|
It does not make any sense to start a ko-fight with a move at The game will continue as usual with Black's move at |
|
Capture Variation: Compared to Our Solution (2021), ...
White gained one point. White + 2 => White + 3 As was to be expected. |
|
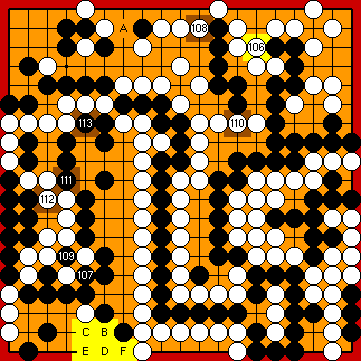
Let's discuss the third and final scenario ... |
|
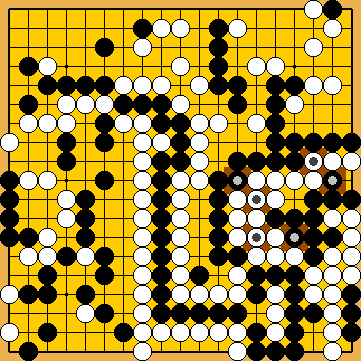
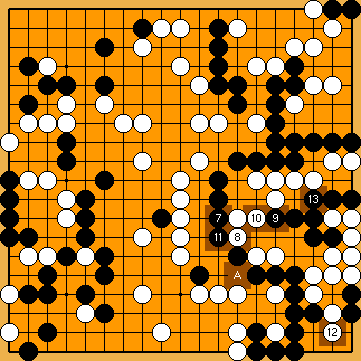
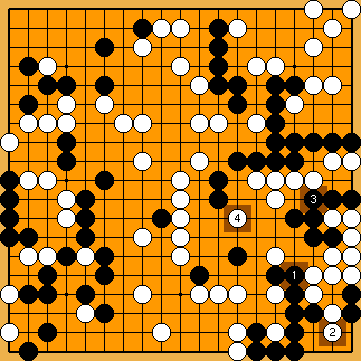
Scenario C: ( |
|
|
|
|
|
It would be correct to occupy a liberty of Black's large group at |
|
Thereafter, Black will continue with The game will end in a draw. |
|
VAR |
|
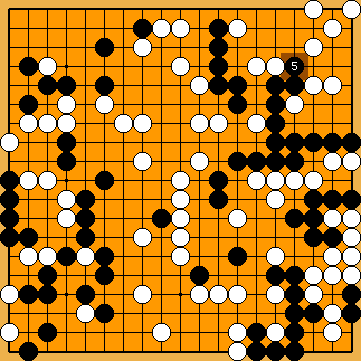
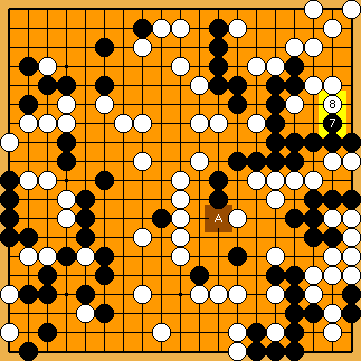
We lend KataGo a helping hand by saving it the trouble of thinking about the first 76 moves of the game and only start the self-play game after White's move |
|
|
|
|
|
It seems that the consequences of this move are now within reach of KataGo's computational skills. |
|
The game will continue similar to Scenario A above with Black's atari White will win the game by two points. A final score of Jigo was to be expected, so the missing Black stone in the upper right corner gives White a net advantage of two points. |
| |
|
Let's return to the amateur world for some final conclusions ... |
|
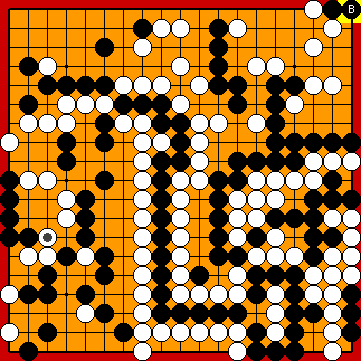
If Inoue Dōsetsu Inseki had ever wanted to equalise the number of Black and White stones in the initial position of the Igo Hatsuyōron 120, he could obviously have done so without any problem, e.g. with But he had not made use of this option at all. |
|
Thus, in the end, we have to admit that our long-standing assumption that White had captured Black's 71st stone KataGo has shown us that this assumption was wrong. |
|
Thanks to KataGo it is now clear that White (and not Black) started the game. This implies that komi has to be reset to zero, as usual in the Edo period in Japan. The correct solution of Igo Hatsuyōron 120 ends with a White victory by one point. |
|
Let's now take a closing look over the shoulder of John Fairbairn for some supplementary information about the time before the Big Bang ... |
|
" … game records with White playing first in Japan exist around this time, and one of them is Inoue Dosetsu Inseki (GoGoD 16687-03-07a). This was against Lord Makino and may have some sort of deferential or ceremonial significance, but there are other examples where neither of the two players is an aristocrat. These may still have an element of deference, in that they were played in the presence of someone august, but it may also have been the case that playing with White first was then either normal or common, or players just didn't care. At any rate, there seem to be reason to assume a Chinese connection. There is also the possibility that colours were swapped in the printing process, which we know has happened with other old books." |
| |

 2022MainLine
 ).
). . And connected there later.
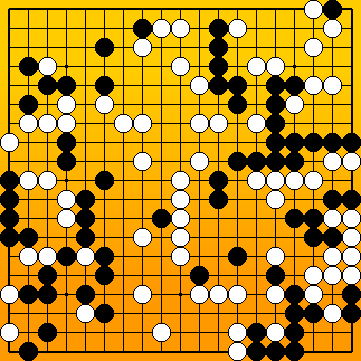

 in the upper right corner might be superfluous.
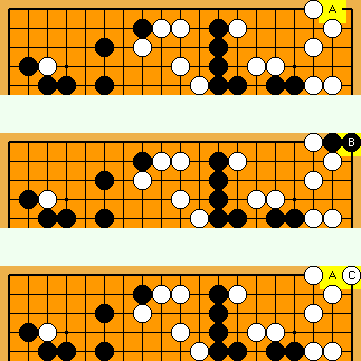
 2023
2023 was taken off the board.
 .
. . The resulting shape is the same as after capturing the original Black stone.
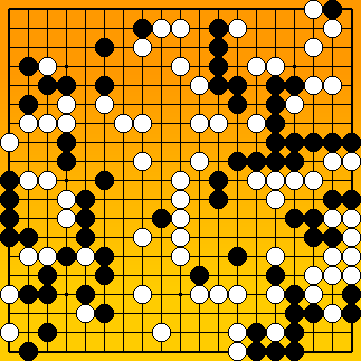


 2023
2023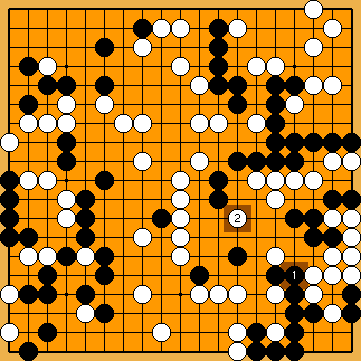
 :
: :
:
 :
:
 :
:
 :
: , instead, as we discovered a long time ago.
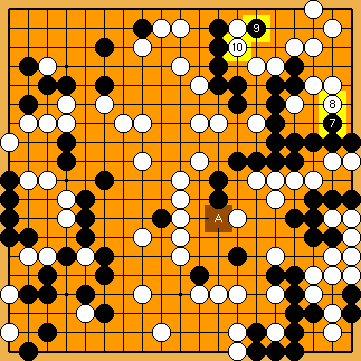
 :
: "early", ...
 :
:
 2024
2024 on the left side.
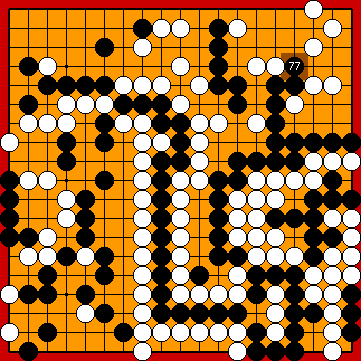
 :
:
 :
:
 ;
;  :
: :
: would take Black's large group a decisive liberty.
 , the sequence from
  to
to  would not work here, as White would be able to connect her stones in atari with
  .
. were on the board, Black could capture White's connected stones with
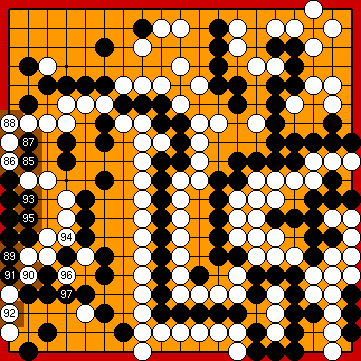
 :
: :
:
 :
: :
: .
.
 :
: :
:
 ;
;  ;
;  :
: , would be gote for White, in principle. This would allow Black to reduce her territory in the upper right corner.
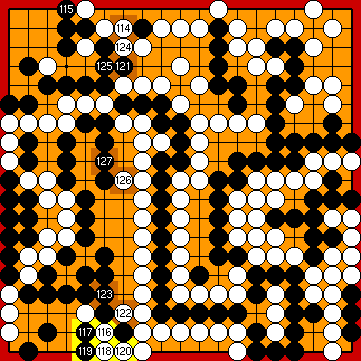
 :
:
 :
:
 ; ...;
  :
:
 :
: :
: in the lower right with a move at
  , instead, is out of the question, as this would lose two Main Semeai Liberties, one too many.
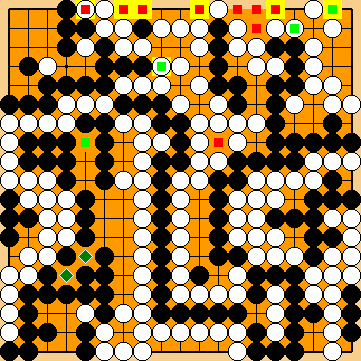
 :
:
 2023
2023
 :
: :
:
 :
:
 in the top right corner according to scenario B above.
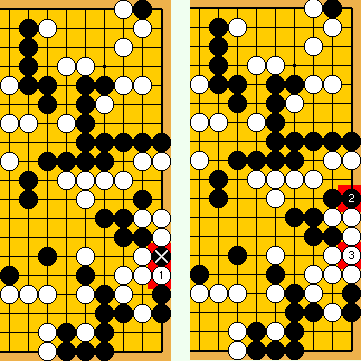
 , and later connected there with
  , is on extremely weak footing.