New Story Line 2022
Harry's Hasami-Tsuke Sequence
|
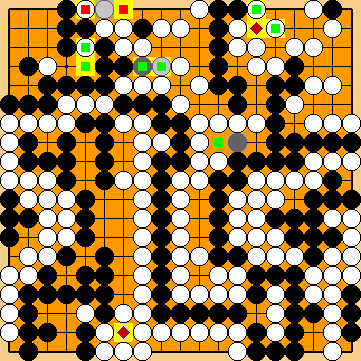
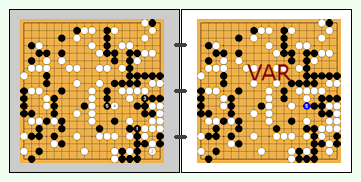
The Hasami-Tsuke found by Harry Fearnley is in principle a "very normal" endgame tesuji, but which must have much of a kikashi inherent in it, because KataGo wants to play this move extremely early in the solution sequence. When compared with the classical line of play, it will turn out that Harry's Hasami-Tsuke could also have been played in the original solution of Fuisawa Hideyuki 9p without disadvantages. We will also shed light on the specific peculiarities of this move, which offer starting points for making additional use of them. Coincidentally, the KataGo-supported analysis of a minor aspect in the following section "Fujisawa Hideyuki's First Throw-in" revealed that choosing Harry's Hasami-Tsuke Sequence for the reduction of White's upper left corner in due time would not only increase Black's flexibility in the game, but also affect the overall result, as Black would benefit by one point in the "classical" line of play (i.e. without my Guzumi, Yamada Shinji's Tsuke, as well as without most of KataGo's new moves at the left side of the board). At the end of this section, KataGo will confirm this finding, with a ban on my Guzumi as the only restriction. | |
|
Referenced by ( Let's enter the world of KataGo ... |
|
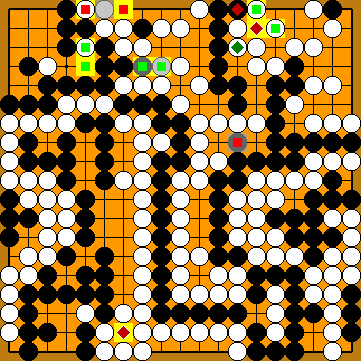
Please note this push is only feasible due to the existence of Black's seemingly misplaced stone |
|
We also analysed a White response at However, KataGo rates this alternative move as equivalent, both in the classical solution and with my Guzumi. For further details, please refer to the respective subvariation of the Story Line 2022 ( Quite the contraty, if Black's seemingly misplaced stone For further details, please refer to section "Black's Missing 71st Stone - Vanished" ( |
|
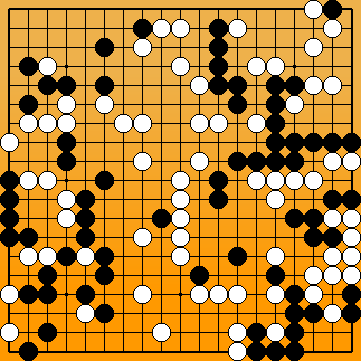
Let's go back to the dawn of time ... |
|
|
|
As already mentioned earlier, a White move at For further details, please refer to the respective subvariation of the Story Line 2022 ( |
|
However, as we know now, this move is a mistake.
Please note that Black's final move of Fujisawa Hideyuki's reduction sequence is gote locally.
|
|
Let's return to the era of KataGo ... |
|
|
|
Let's go back in time and enter the world of amateurs ... |
|
As we will see below, this move gains a lot of profit in conjunction with the already played Guzumi Exchange ( |
|
Let's reenter the world of KataGo ... |
|
|
|
|
|
Let's go back to the dawn of time again ... |
|
Please note that Black's descent to
|
|
Let' s enter the analysis room and stay there for a while ... |
|
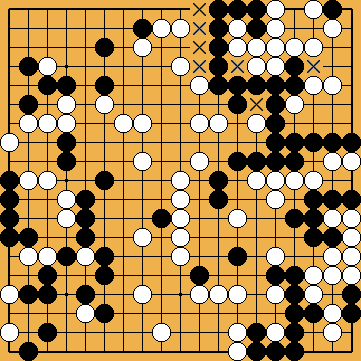
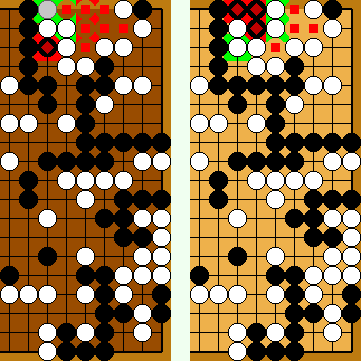
Without any reduction of White's corner, Black's large group has seven liberties ( |
|
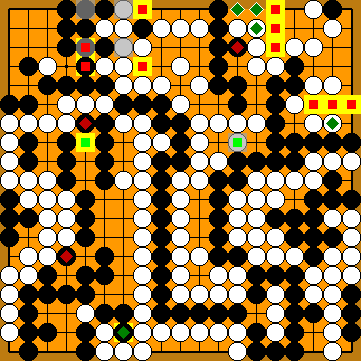
After Harry's Hasami-Tsuke Sequence |
|
However, we have to take into account that White's formation has got a decisive weakness identified by Michael Redmond 9p in 2017, in the context of the classical solution sequence, where White occupied the point of
White's options for answering Black's move are the solid connection of In reality, White might play in the bamboo joint first, with Please note that if Black played my Guzumi with For further details, please refer to section "Michael Redmond's Kikashi in the Bamboo Joint" ( |
|
Afterwards we will focus on the atari at |
|
|
|
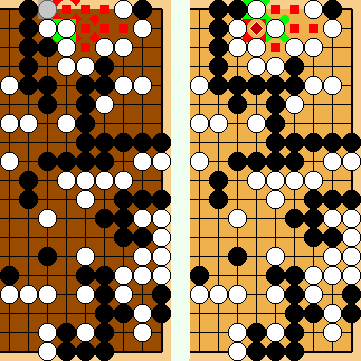
Therafter, his group is left with seven liberties in the upper right area. |
|
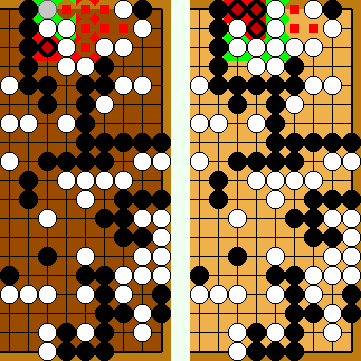
Capture Variation: Fujisawa Hideyuki (at left):
Harry's Hasami-Tsuke (at right):
White lost four points of territory. |
|
Semeai Variation: Fujisawa Hideyuki (at left):
Harry's Hasami-Tsuke (at right):
No difference. |
|
( |
|
|
|
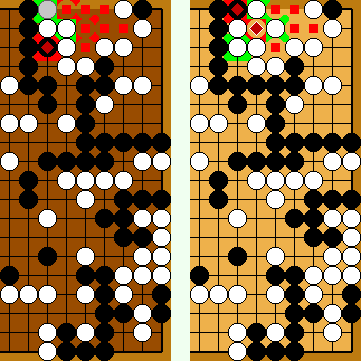
However, dependent on the surrounding conditions, he might be forced to connect at |
|
However, his large group is left with only six direct liberties thereafter, which is one less than above with White's solid connection. The fate of Black's group depends on whether Under the assumption that Black survives the Punishment Semeai ... |
|
Capture Variation: Fujisawa Hideyuki (at left):
Harry's Hasami-Tsuke (at right):
White lost four points of territory. |
|
Semeai Variation (assuming that there in no approach-move liberty in the upper right): Fujisawa Hideyuki (at left):
Harry's Hasami-Tsuke (at right):
White gained one point of territory. |
|
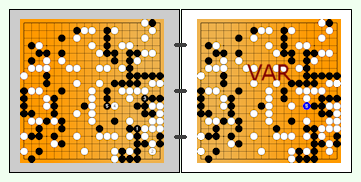
VAR |
|
As you will see below, the effects of this sacrifice on the liberties of Black's large group as well as White's territory in the upper right corner are identical to those of Fujisawa Hideyuki's classical reduction sequence. This implies that Harry's Hasami-Tsuke could be played without any risk at any appropriate moment. |
|
Black's large group is left with seven liberties in the upper right again. |
|
Capture Variation: Fujisawa Hideyuki (at left):
Harry's Hasami-Tsuke (at right):
In total, White got seven points. No difference. |
|
Semeai Variation: Fujisawa Hideyuki (at left):
In total, White got nine points. Harry's Hasami-Tsuke (at right):
In total, White got nine points. No difference. |
|
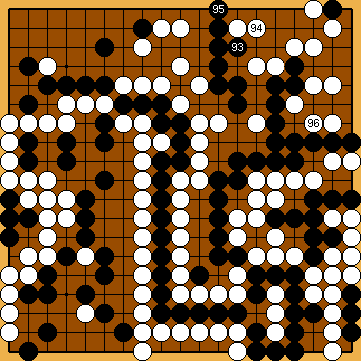
Let's try to find out what KataGo thinks about this matter ... |
|
My Guzumi would create additional approach-move liberties for Black's large group in the upper right, which would develop their full effect exclusively in cooperation with Harry's Hasami-Tsuke. Please remember that KataGo played my Second Throw-in, inserted the kikashi in the temporary seki early, and captured Black's single stone in the lower left after KataGo's Atari during the creation of the nakade. |
|
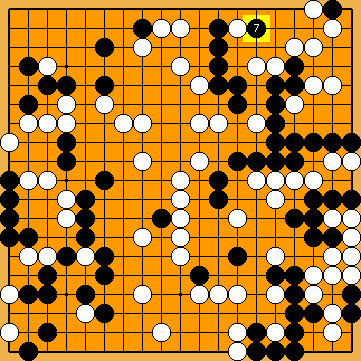
We enforced this move manually. As a matter of course, KataGo would like to play Harry's Hasami-Tsuke
|
|
|
|
|
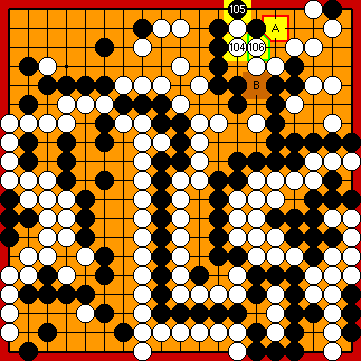
|
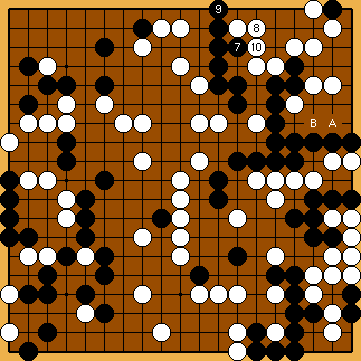
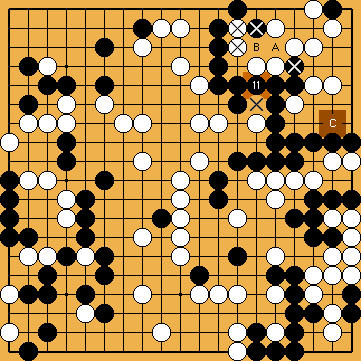
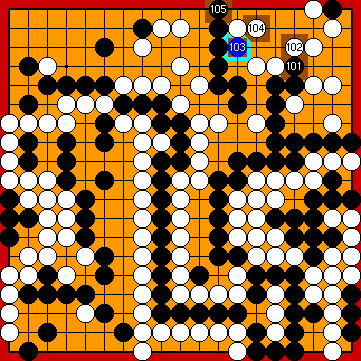
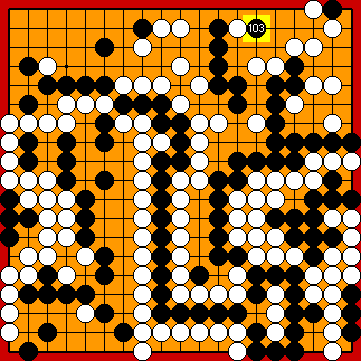
Black must not play any reduction. After her decision point, White will give atari |
|
Capture Variation: Compared to Our Solution (2021), ...
In total, White gained five points. White + 2 => White + 7 |
|
Semeai Variation: Compared to Our Solution (2021), ...
In total, White gained four points. Black + 4 => Jigo |
|
VAR |
|
|
|
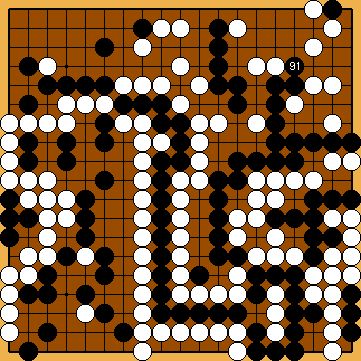
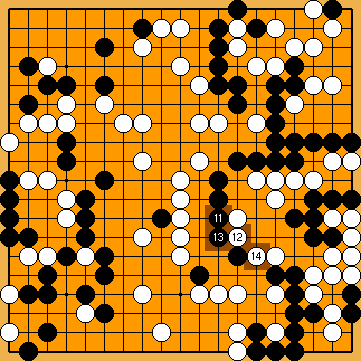
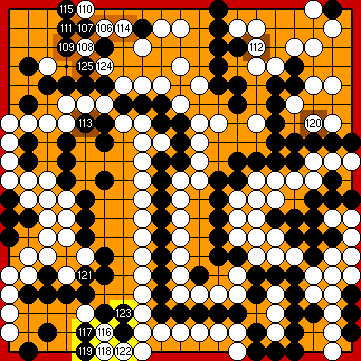
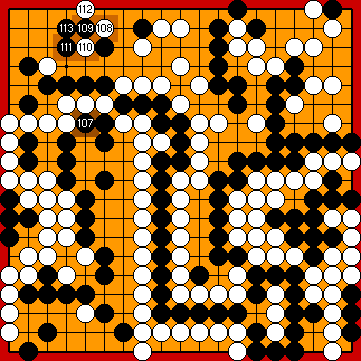
Continuing with the "usual" attachment at Please note that the reduction of White's upper right corner territory ends in sente for Black, which - according to KataGo - seems to be worth one point overall. |
|
|
|
|
|
|
|
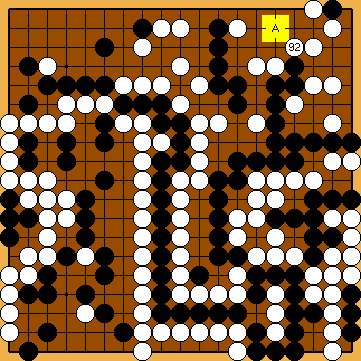
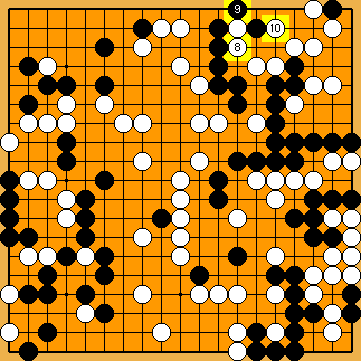
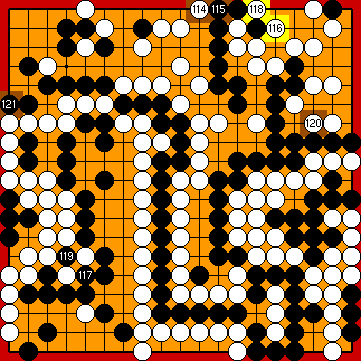
Black must not play any reductionl Just before her decision point, White will connect her single stone at the upper edge with If she mistakenly waited until after her decision point, Black would not sacrifice the additional stone at |
|
Capture Variation: Compared to the superordinate variation, ...
In total, Black gained one point. White + 7 => White + 6 |
|
Semeai Variation: Compared to the superordinate variation, ...
In total, Black lost one point. Jigo => White + 1 |
| |
 2022MainLine
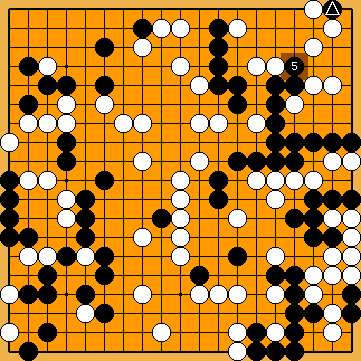
 : (
: ( 2022MainLine
 in the corner (see below).
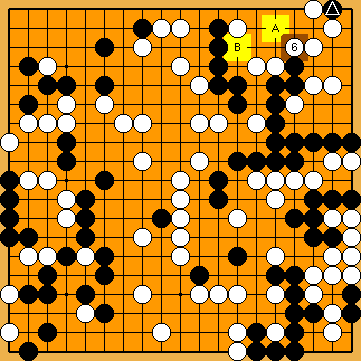
 :
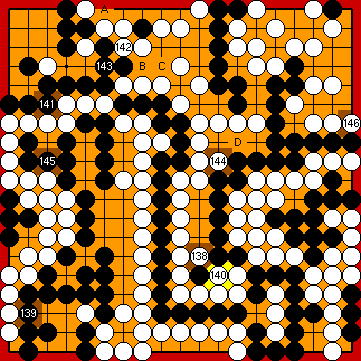
: early in our investigations, but refrained from considering this retreating move as an alternative, because we came to the conclusion at the time that it was a few points worse for White.
 2022a
2022a at the left, also taking Black's large group a Main Semeai Liberty.
 :
:
 :
:
 :
: :
: :
:
 : (
: (

 :
: ,
,  ).
).
 :
: :
: :
:
 :
:
 ) in the upper right.
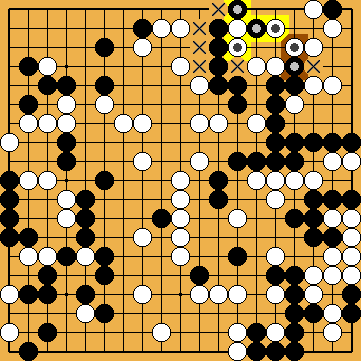
 .
. /
/  , threatening to capture White's two
  stones to the left.
 ,
,  , Michael Redmond's Kikashi would not have any effect.
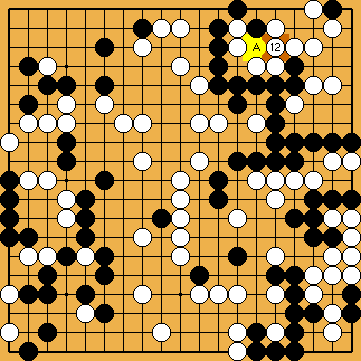
 : (A
: (A  2024
2024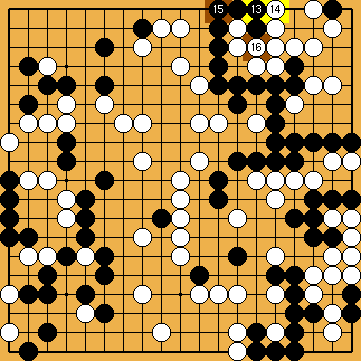
 :
:

 2024
2024
 2024
2024
 , instead, so sacrificing his pivotal stone.
 becomes an (additional) approach-move liberty or whether White loses at least one Main Semeai Liberty elsewhere on the board.


 :
:
 :
: : (
: ( 104
104  , instead, which will turn out to carry a quite unexpected one-point benefit.
 :
:
 :
: :
: :
: :
: :
: :
: :
: :
: :
:
 :
: :
: :
: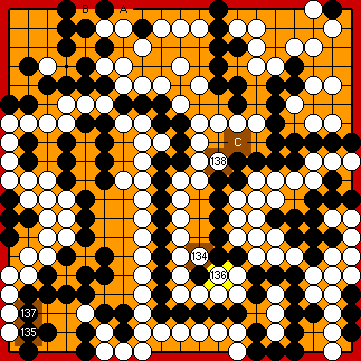
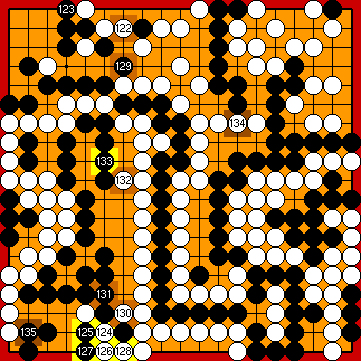
 (he will be unable to win this endgame ko), and White will take the last valuable point in the right centre with
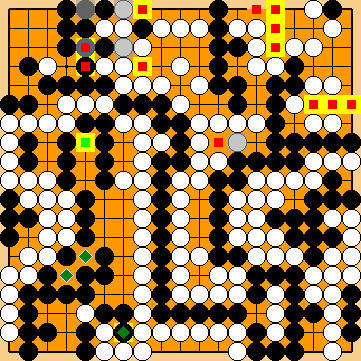
 :
:
 :
: :
:
 :
: :
: :
:
 :
: :
: :
: :
:
 in the right centre.
 in the Semeai Variation, so gaining one point.