The Main Path of Our Solution (I)
In this chapter, we begin to show our latest suggestion for the sequence with the strongest moves for both sides. Black wins by three points. The solution sequence starts in the lower right corner, passes through the centre of the board, touches the upper right corner - where it finds its all decisive move (stage 2;  197) - and is then hard and persistently engaged on the left side of the board (stage 3; 503). In the end we can marvel at a reunion with the lower right corner, where it all began.
It should be noted that this sequence contains some moves, which - until now - cannot be found in professional publications about the Igo Hatsuyōron.
| The Road to Hanezeki | 39 |
| The Hanezeki's Tail | 43 |
| The Top Right Corner | 45 |

 : (A
: (A  57
57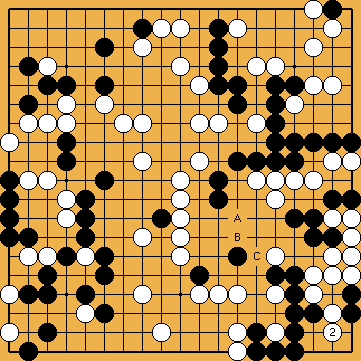
 : (A
: (A  (or at
  , or
, or  ) will simply lead to a change in the order of moves. We have not yet made detailed investigations for other variations for
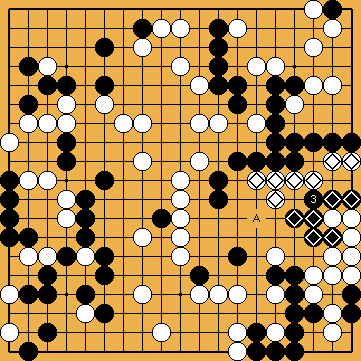
 : (A
: (A  -group to the outside, or to capture Black's
  -group. Ideally, she will manage this task while not letting Black's top right group connect to the bottom one, and while keeping sente to play on the left side first.
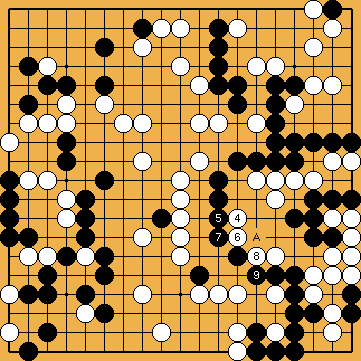
 : (6
: (6  (or
(or  ) is very likely simply to lead to a change in the order of moves.
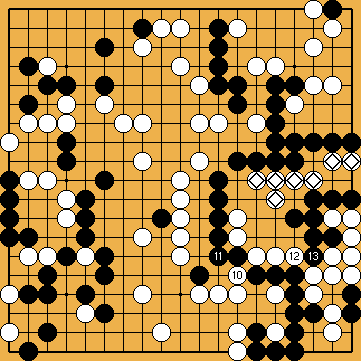
 : (11
: (11  does not work for White. Black's bottom group will get sufficient liberties to kill White's group in the corner, thus capturing White's stones above, including her
 :
: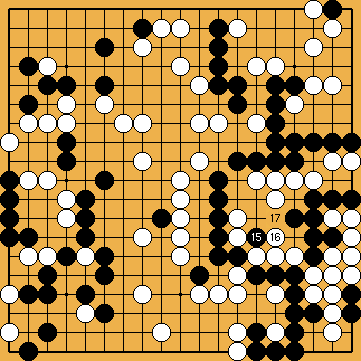
 : (17
: (17  first. This move can be found in the professional solutions (
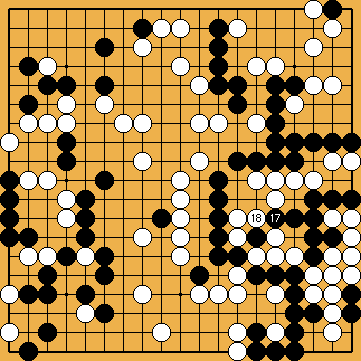
 , instead. However, this will not be sufficient to win the game.
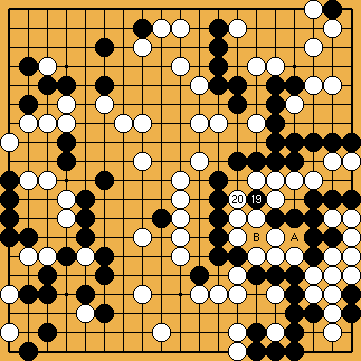
 :
: (White will answer at
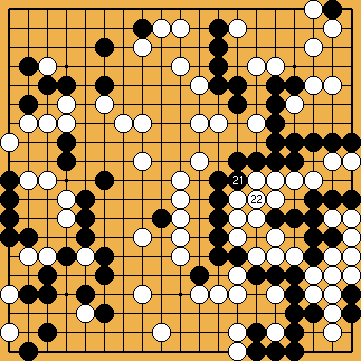
 :
: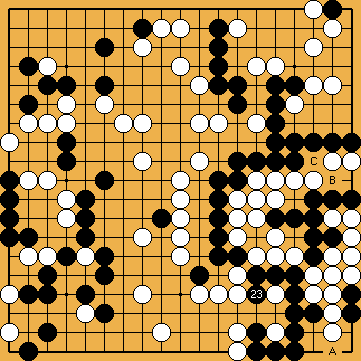
 : (23
: (23  , isolating the resulting temporary seki involving the entire lower right corner from the rest of the board. Black's top right group cannot get two eyes, so White will win the game with ease.
 ,
, 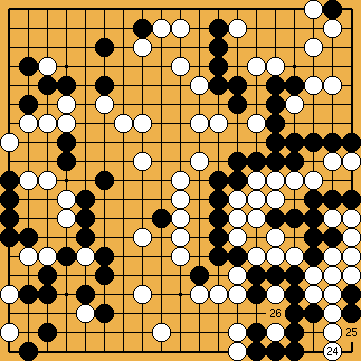
 : (25
: (25  , nor at
  , instead. Black would be able to capture White's group in the lower right corner, so dissolving the hanezeki, and winning the game.
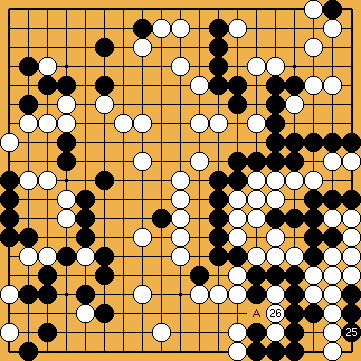
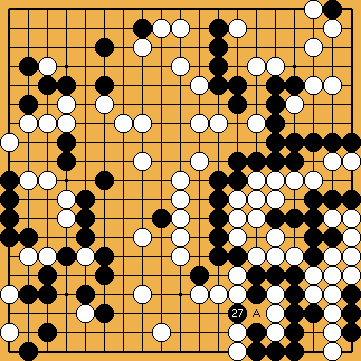
 : (A
: (A  . But White will do the same for her group in the corner by playing at

 : (A
: (A 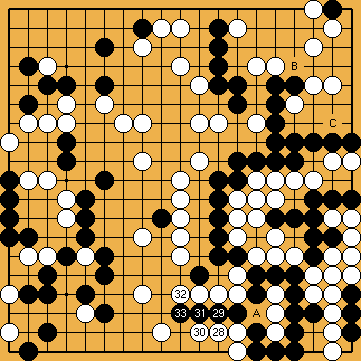
 : (29
: (29  . Black will either capture at
  ). Black's group will get two eyes.
 (at
(at  ), or
), or  (at
(at  ).
).
 : (B; C
  is also played "early".
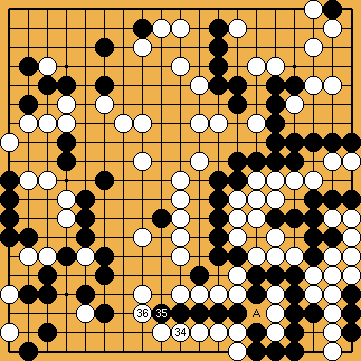
 : (35
: (35  . Again, Black can either capture at
  to win the fight in the corner.
 : (A
: (A 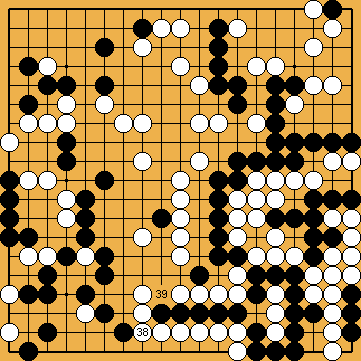
 : (39
: (39  , instead. As usual, Black will force her to capture the tail, and Black will win.
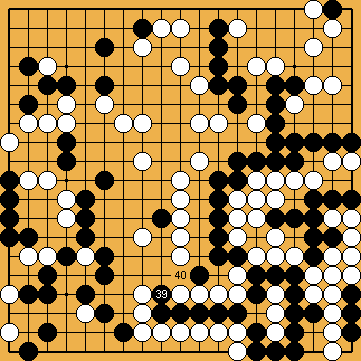
 : (40
: (40  does not work. Black's group cannot break out and connect. White's group on the bottom edge can be cut off, but will easily get two eyes.
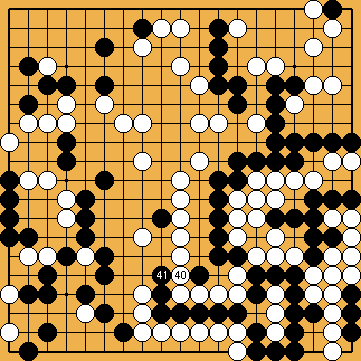
 :
: . The same principle applies as with
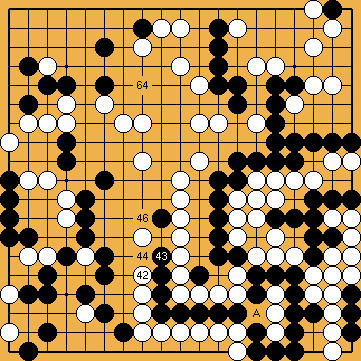
 : (44
: (44  , instead. Black would have one liberty too many, and could now capture at
  to
to  .
.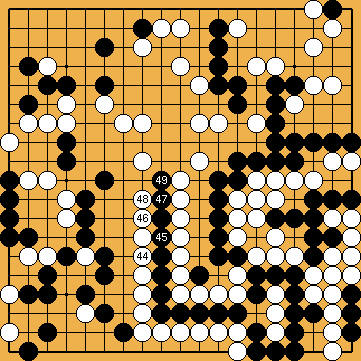
 . Black would push through at
  , and then connect out or force White to capture the hanezeki's tail in order to save her group on the lower edge. This would lead to the loss of all the White stones at lower right.
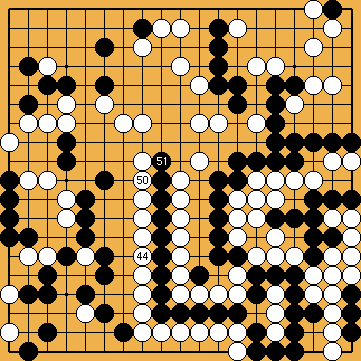
 :
: now.
now.
 : (53
: (53  instead, Black's centre group gets an additional outside liberty with a move at
  , and thereafter Black captures White's corner.
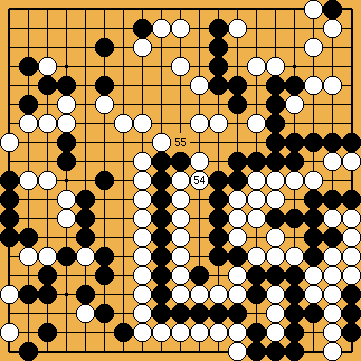
 : (55
: (55  . Black cuts at
  and wins.
 : (56
: (56  , instead. His top right group will lose a liberty, and thereafter lose the semeai with White's group on the left edge.
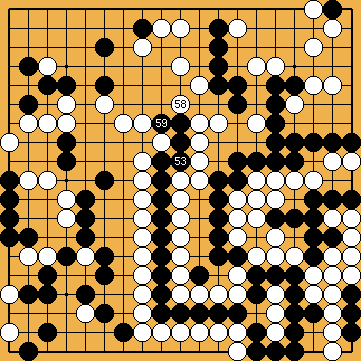
 :
: applies, should White play at
  now.
now.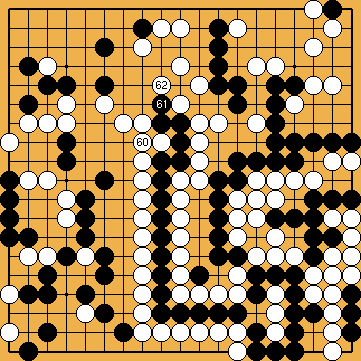
 : (61
: (61  , because it will be Black who wins the resulting ko.
 : (64
: (64  . However, an interesting, and new, seki variation could then arise.
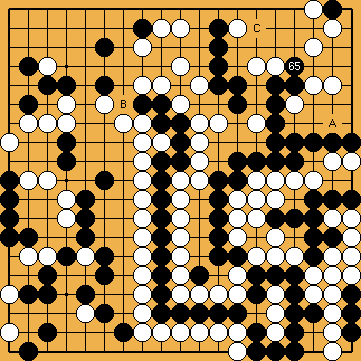
 : (C
: (C 
 : (A
: (A 
 :
:
 : (A
: (A 
 : (A
: (A  and
and  , instead, does not profit White.