Problem No. 120 from Igo Hatsuyoron
By Inoue Dosetsu Inseki (1646 - 1719)
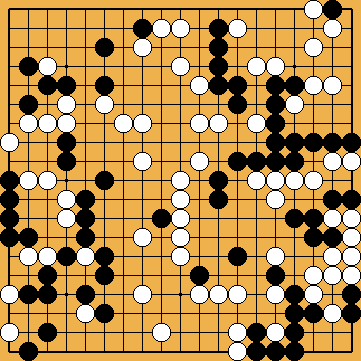 Black to play and win |
 |
Black to play and win |
|

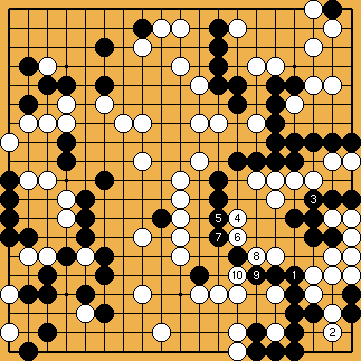 Figure 001: B 1 - W 10 |
B 1:
Primary topic of this problem is the status of the big Black group in the upper right, but action starts in the lower right corner. W 4: White tries to escape into the centre, ... B 9: ... what Black can prevent successfully. |
 Figure 011: B 11 - B 19 |
B 17: Throwing in at 17 is necessary for Black, ... B 19: ... but following the available sources he should refrain from doing so again with this move. [ see variation ] Explanations on this second Throw-in follow in a separate part of this page. We were unable to find a sequence there after ending badly for Black. Update 2011: Cheng Xiaoliu 6p used the second Throw-in in his 2010 book "Research on Weiqi Fayanglun". The two White groups on the right side and the Black one between them form part of a temporary Seki. The big Black top right group can only get one eye. So Black must try to live with his stones at the bottom or at least get enough liberties, what would enable him to capture the White stones in the bottom right corner, resolving the temporary Seki. |
 Figure 020: W 20 - B 23 |
B 21: The exchange of Black 21 and White 22 is very important at this moment. Otherwise White would have the option to play at 21 herself, forcing Black to fill in one liberty of his upper group with a move at 22 - and this additional Black stone may be in danger of being captured some time in the future, forming part of White's territory. B 23: Black cannot play on the 2-1-point in the corner. [ see variation ] |
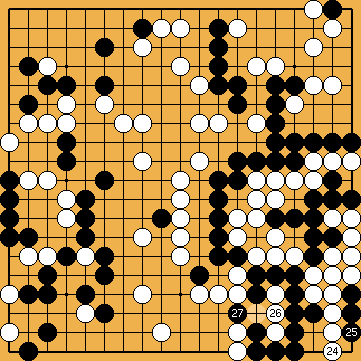 Figure 024: W 24 - B 27 |
W 24: This move should not be played at 25 by White (Black would be forced to answer at 24). [ see variation ] B 27: Black has to run for the life of his group with 27, as he is unable to capture the three White stones instead. [ see variation ] |
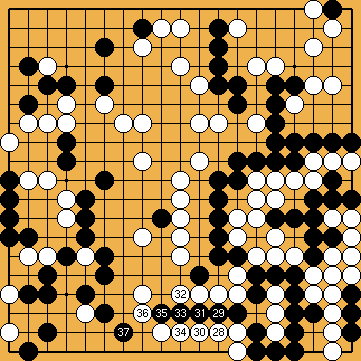 Figure 028: W 28 - B 37 |
W 28: White cannot give Atari at 29. [ see variation ] W 36: Black's path to the left is now stopped by White. After the Kikashi of 37 Black runs upwards. |
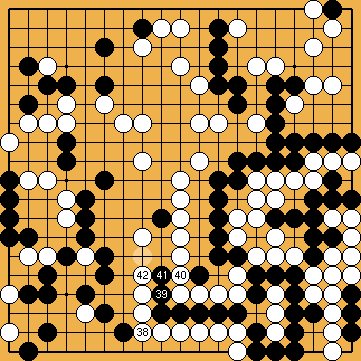 Figure 038: W 38 - W 42 |
W 42: White must never allow the Black chain of stones to have more than two liberties. A Geta will be too slow here. [ see variation ] |
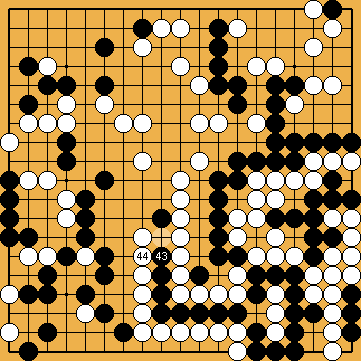 Figure 043: B 43 - W 44 |
W 44: White cannot block Black's path successfully, too. [ see variation ] |
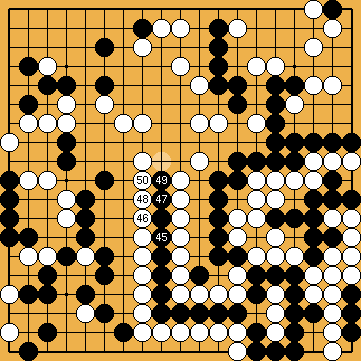 Figure 045: B 45 - W 50 |
W 46, 48: To try a Geta (at 48 or 50) with these moves will not be successful, as shown at the variation for W 42. W 50: Even some moves later White will have no success in blocking Black's path. [ see variation ] |
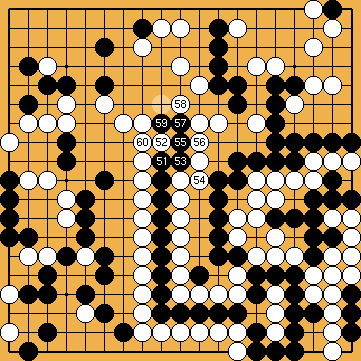 Figure 051: B 51 - W 60 |
W 60: White is unable to block above 59 with this move, as she will not win the following Ko. [ see variation ] |
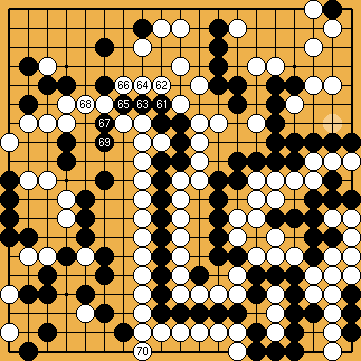 Figure 061: B 61 - W 70 |
Update 2011: B 63: It is not correct to play this move at 64. But if White answers not correct, too, this will lead to a Seki across the right half of the board. A new type of Seki was born. [ to the sequences ] Update 2009: B 65: This is the last moment Black can play the "bad-shape" move in the top right corner, which probably wins him the game. But: This probability has not been proven by professionals yet ! [ to the sequence ] Update 2011: A collection of over 1.000 variations after the Guzumi can be found [ here. ] W 66: Black is now shut in. B 67: Therefore Black has to cut the White troops and ... B 69: ... to save his cutting stone. W 70: White must live on the lower side. She cannot go for the Black top right group. [ see variation ] |
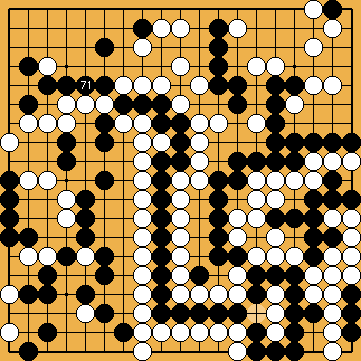 Figure 071: B 71 |
B 71: Black's only option left is to try to kill the White group on the left. Black cannot capture the three White stones inside his encircled centre group. [ see variation ] Black must protect his top left corner; he cannot play on the left side instead. In this case White would answer with 71 herself and we get a result that is similar to a variation shown later. [ to the sequence ] |
 Figure 072: W 72 |
W 72: But on the other side White cannot capture the Black centre group, too. [ see variation ] |
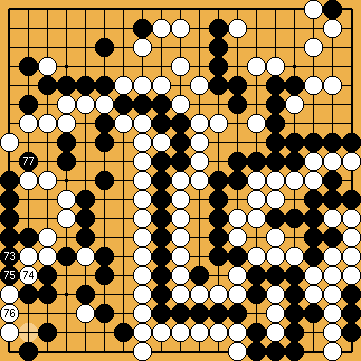 Figure 073: B 73 - B 77 |
B 77: The obvious idea to look after the three White stones on the lower left will end in White life on the left side. [ see variation ] |
 Figure 078: W 78 |
W 78: The attempt to connect on the third line is condemned to failure. [ see variation ] |
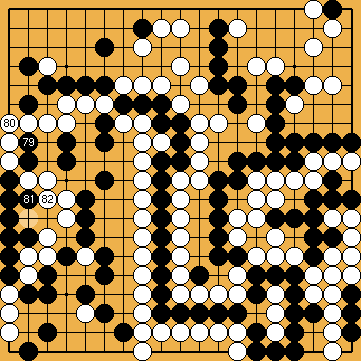 Figure 079: B 79 - W 82 |
B 81: May look like more effective one point lower in creating a Dango, but that has much of a misjudgement. [ see variation ] W 82: White is denied from throwing in. [ see variation ] |
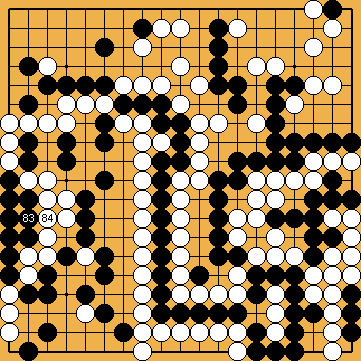 Figure 083: B 83 - W 84 |
B 83: Black has built an oversized Nakade on the left. W 84: Even after White captures nine Black stones, surprisingly enough she is unable to get two eyes. |
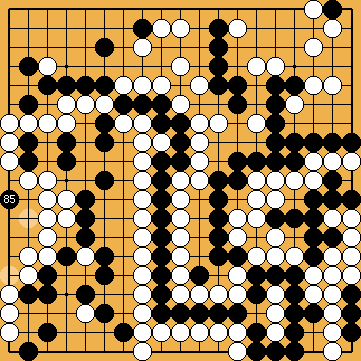 Figure 085: B 85 |
B 85: On the other side, Black is unable to reduce the space of White's eye to a smaller one. [ see variation ] |
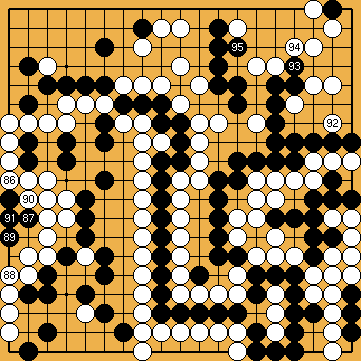 Figure 086: W 86 - B 95 |
B 91: My question, if this move could be played at 92, is discussed in the questions part of this page Update 2009: Black should play this move earlier (with 65) at 92. B 93, 95: Black reduces the White territory in the top right to some extend. |
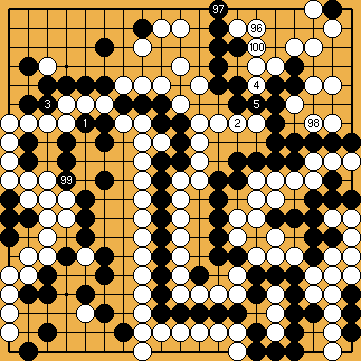 Figure 096: W 96 - B 105 |
B 97: But he cannot go any further after the Sagari of 97, what provides him with one additional liberty. B 99: Any further move in the top right corner would cost him one of his life-spending liberties. [ see variation ] |
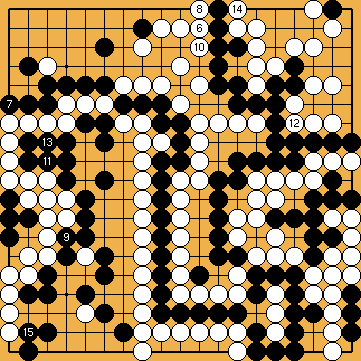 Figure 106: W 106 - B 115 |
|
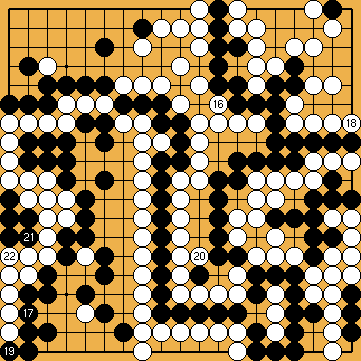 Figure 116: W 116 - W 122 |
|
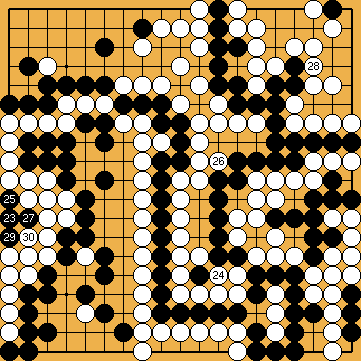 Figure 123: B 123 - W 130 |
|
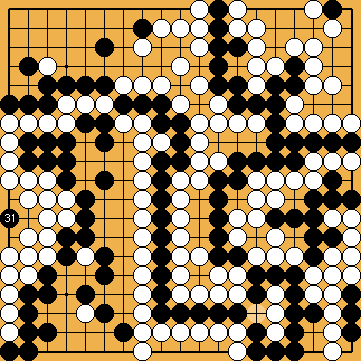 Figure 131: B 131 |
B 131: Black must make a placement into the centre of the White 4-point-eye on the left. [ see variation ] |
 Figure 132: W 132 |
W 132: To the surprise of the whole Go world White (who has listened carefully to a German Kyu player) now chooses a move for 132 that could not have been played successfully for the previous sixty moves. She captures the twenty Black centre stones ! To see what has been assumed so far as the best move for White, please follow this link: [ see variation ] |
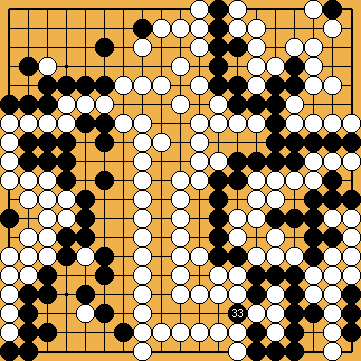 Figure 133: B 133 |
B 133: As shown before, Black has to capture the White group in the bottom right corner. |
 Figure 134: W 134 - W 138 |
W 134: A very important placement. As mentioned already at the end of the variation for Black 99, White would be one move behind, should she continue to take liberties of the Black top right group with 134. Here Black loses some points of territory through the White throw-in. [ see variation ] Update 2011: Cheng Xiaoliu 6p used this placement in his 2010 book "Research on Weiqi Fayanglun". 136, 138: The White moves in this figure are all Sente. |
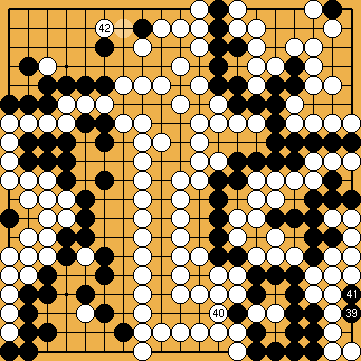 Figure 139: B 139 - W 142 |
W 140: Sente, too. W 142: This Tsuke has been found by Yamada Shinji 4p. It gives White a better result in the top left corner than the Atari one point to the right that has been used so far for this move. [ see variation ] |
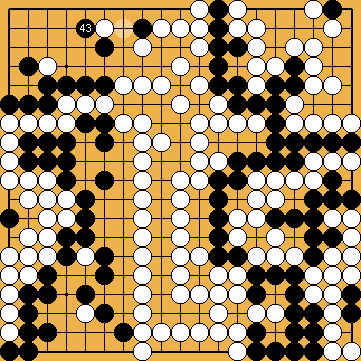 Figure 143: B 143 |
B 143: Black is unable to resist [ see variation ] Please note that the variation contains a Seki. Thus the sequence of Yamada Sensei is only possible when it is guaranteed that White's group on the left side securely lives (e. g. after Black's centre string has been captured). Update 2011: White can play Yamada's Tsuke immediately after Black's last Oki 131 on the left. [ to the highlights 2011. ] |
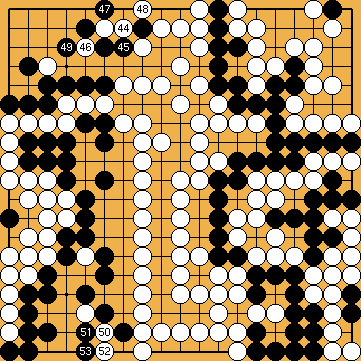 Figure 144: W 144 - B 153 |
|
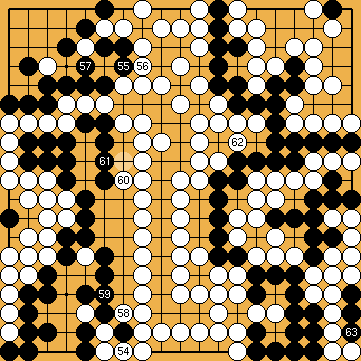 Figure 154: W 154 - B 163 |
B 155: The order of moves is really important here. It would be unfavourable for Black to connect his one stone that is in Atari. [ see variation ] W 160: Is Sente and prevents Black activities in the open space in the centre. [ see variation ] W 162: White has Sente to take the last valuable point. |
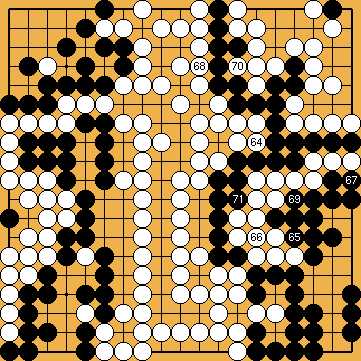 Figure 164: W 164 - B 171 |
B 171: Eventually Black has to take the White stones on the right off the board. |
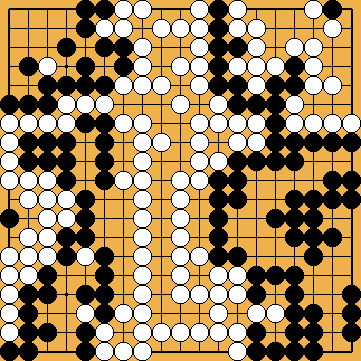 Figure "The End" |
The board position after Black 171. |
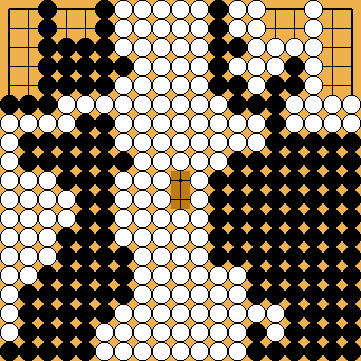 Figure "The Score" |
Arrangement of territories for counting. White wins by two points. |

|