Variations of Our Solution (Ib)
KataGo's 2021 Solution
VAR  (.1)
(.1)
|
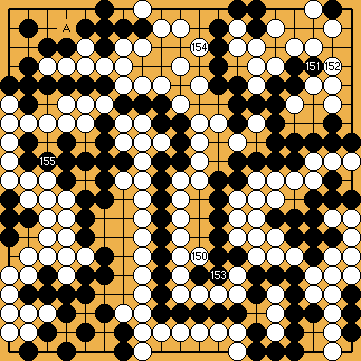
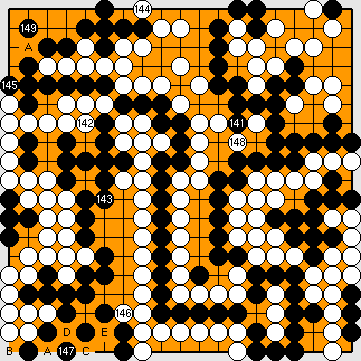
We inserted this alternative move manually. The sequence below shows KataGo's favoured continuation (in "Analysis Mode"). |
|
KataGo also considered
KataGo also considered
KataGo also considered
KataGo also considered |
|
KataGo also considered (Referenced by
|
|
KataGo also considered
KataGo also considered
KataGo also considered |
|
KataGo also considered
KataGo also considered
KataGo also considered
KataGo also considered
KataGo also considered
KataGo also considered
KataGo also considered
KataGo also considered
|
|
KataGo also considered
KataGo also considered
If Black occupied White's liberties at |
|
Black plays 3/3 reductions. Before the end of the game, Black will have to e.g. connect at |
|
Capture Variation: Compared to the superordinate variation, ...
In total, gains and losses compensate for each other. White + 2 => White + 2 |
|
Semeai Variation: Compared to the superordinate variation, ...
In total, gains and losses compensate for each other. Black + 4 => Black + 4 |
|
 58aa
58aa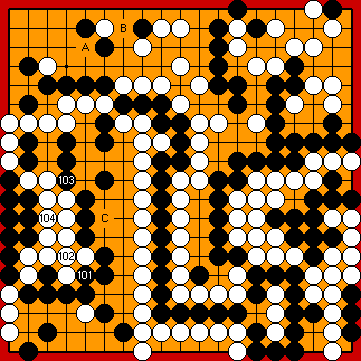
 :
: , which would torpedo Joachim's idea of giving atari at
  , if White continued with the crosscut of
  immediately.
 :
: (CHITOOM), capturing the nakade as early as possible.
 for defending his weakness in the left centre.
 :
: :
: :
: (both CHITOOM).
 58aa
58aa :
:
 :
: (CHITOOM).
 :
: :
:
 :
: (CHITOOM).
 :
: (CHITOOM).
 :
: and
and  :
: (CHITOOM).
 :
: .
. :
:
 :
: :
: :
: :
: (CHITOOM).
 :
: and
and  (CHITOOM).
 :
: would threaten a double snap-back (at
  and
and  ).
).