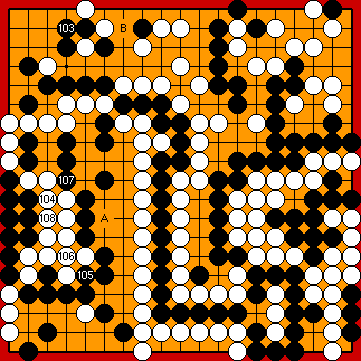
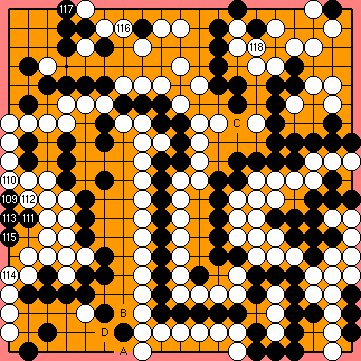
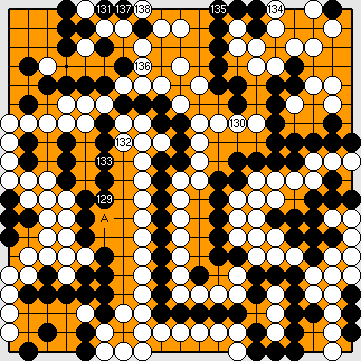
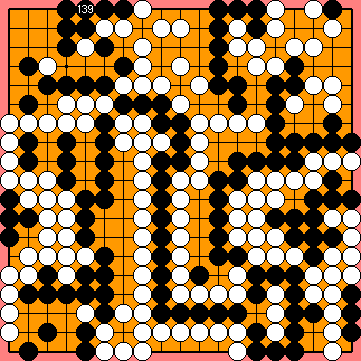
Variations of Our Solution (Ib)
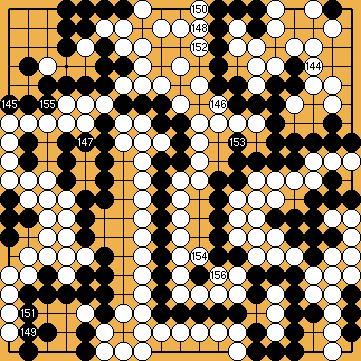
KataGo's 2021 Solution
Main Line
|
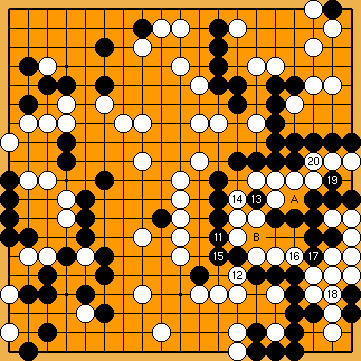
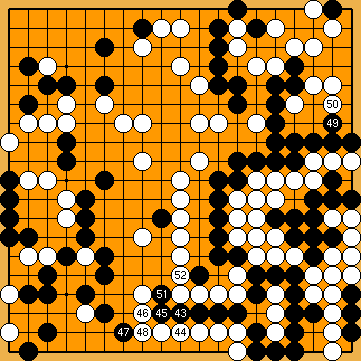
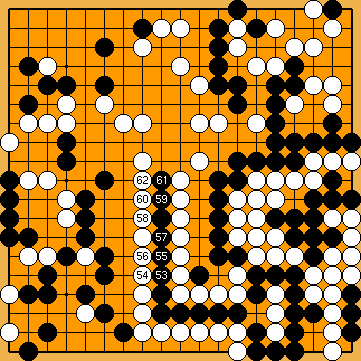
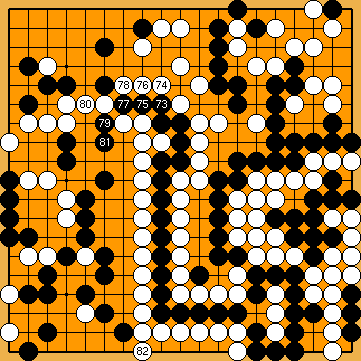
As the main variation here, we will display KataGo's favoured solution to the problem, i.e. the sequence of moves with the highest win rates in KataGo's "Analysis Mode".
Alternative option (with a slightly less winrate) is the jump to
Alternative option (CHITOOM) is the atari at
Alternative options (CHITOOM) are
Alternative option (CHITOOM) is
Alternative option (CHITOOM) is
Alternative option (CHITOOM) is
Alternative options (CHITOOM) are
|
|
Alternative options (CHITOOM) are
Alternative option (CHITOOM) is
Alternative options (CHITOOM) are
Alternative option (CHITOOM) is
Please note that Black loses a potential ko-threat here. Alternative option (CHITOOM) is
|
|
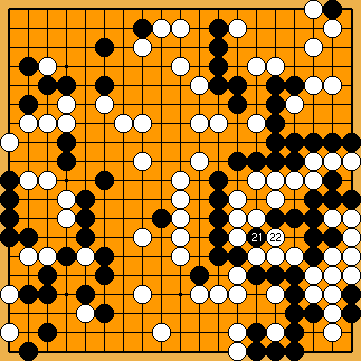
Please note that we played this kikashi before the throw-in above in Our Solution.
|
|
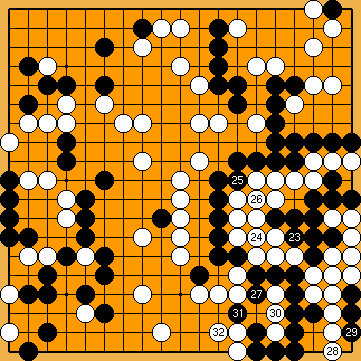
Please note that this move loses another potential ko-threat for Black.
|
|
Alternative options (CHITOOM) are
Alternative option is the jump to the second line with
Alternative option (CHITOOM) is
|
|
Alternative option is playing the guzumi early with
Alternative option (CHITOOM) is
Alternative option (CHITOOM) is
|
|
... |
|
Alternative option (CHITOOM) is |
|
|
|
|
|
Alternative option (CHITOOM) is
Alternative options (CHITOOM) are
Alternative options (CHITOOM) are
Alternative options (CHITOOM) are
Playing the atari Played otherwise - after this connection - it would result in the same final scores as here. See this subvariation (
Alternative option (CHITOOM) is |
|
Alternative option (CHITOOM) is
Please note that White lost two tempi in the Main Semeai by this move.
Alternative option (CHITOOM) is The crosscut in the upper left corner has been played already, so this move in the centre would be really no mistake, contrary to one of KataGo's selfplay games (
Alternative option (CHITOOM) is |
|
Alternative option (CHITOOM) is
Black will be worse in the Semeai Variation, if he defends with If Black gets to play
Alternative option (CHITOOM) is |
|
|
|
Alternative option is
Alternative option (CHITOOM) is
|
|
This move ends the playback of KataGo's sequence of moves. |
|
|
|
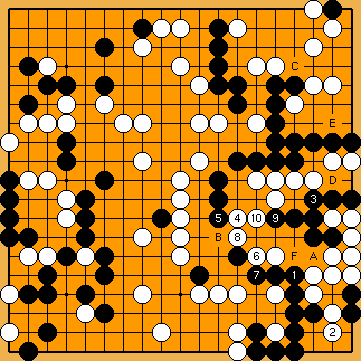
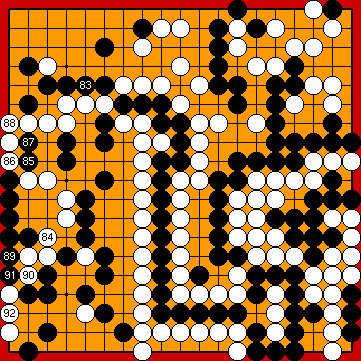
Black plays 1/1 reduction. |
|
Capture Variation: Compared to Our Solution (2020), ...
In total, gains and losses compensate for each other. White + 2 => White + 2 |
|
Semeai Variation: Compared to Our Solution (2020), ...
In total, gains and losses compensate for each other. Black + 4 => Black + 4 |
|

 :
: :
: , threatening to break through to her centre group. It will result a change in the order of moves (= "CHITOOM").
 :
: .
. :
: ,
,  ,
,  and
and  .
. :
: .
. :
: .
. .
. :
:
 :
: and
and  .
. :
: .
. and
and  :
: :
: :
: as a ko-threat later (or as a means for gaining one point in the Semeai Variation).
 :
:
 :
: :
:
 :
: :
: :
: :
: :
: :
: :
:
 :
: :
: :
: and
and  : (40
: (40  58ab
58ab .
. :
: :
: :
: :
:
 :
: :
: : (49
: (49  .
. (CHITOOM) is favoured by KataGo, but a move at
  is also considered, resulting in a completely different game that eventually will also end with a White win by two points.
 :
: .
.

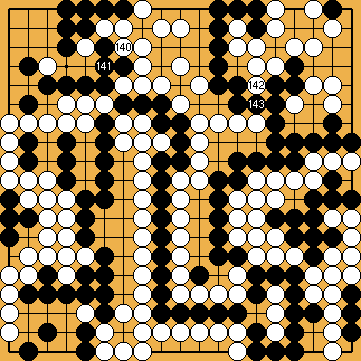
 :
: .
.
 :
:
 :
: :
: .
. :
:
 :
: :
: : (100
  ,
,  (giving Black no chance for playing Joachim's atari at the second line) and
  (but which can be considered a technical mistake if unnecessarily played so early).
 ,
,  and
and  : (E
: (E  58ef
58ef :
:
 :
: :
: .
. :
: :
:
 :
: .
. :
: :
:
 :
: :
: :
:
 :
: :
: :
: .
. :
:
 :
:
 :
: