Variations of Our Solution (Ib)
KataGo's 2021 Solution
VAR 
 (.3)
(.3)  (.3)
(.3) 
|
(Referenced by
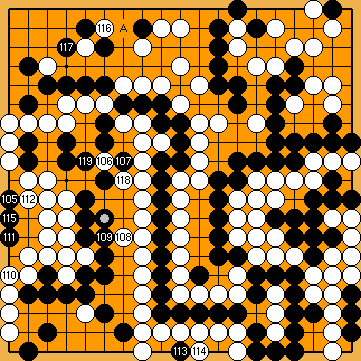
However, this move is the game-deciding mistake here (correct continuation below provided), compensating for White's earlier mistake of having connected at Black's defensive move in the left centre does not occupy a liberty of White's left-hand group, and so loses one decisive tempo in the Main Semeai. Contrary to a subvariation discussed later ( |
|
|
|
Playing the outside atari of |
|
(Referenced by
Please remember that this choice benefits White by four points in the Semeai Variation (correct continuation below provided), while not affecting the overall result of the game.
|
|
This move will increase the susceptibility to errors in the following course of the game unncessarily, and so can be considered to be a technical mistake in the timing of moves. White should play the wedge in the right centre first, in sente.
If he played at the left side of the board, instead, it would result a change in the order of moves with the previous subvariation. |
|
In order to defend her potential territory in the upper right, White needed four moves ( Black needed five moves ( It's White's turn, so after all defensive moves were played in order, there would remain one hole in the encirclement of Black's territories. Please note that both sides already played one protective move each in the upper right. Please also note that Black is unable to connect his stone |
|
White has five territory-destroying moves at the left side of the board ( Black would be able to destroy four points of White's territory in the upper right, and has the connection of This implies that White must never start the mutual reduction of opponent's territory. |
|
White must continue e.g. with White's mistake seems to be similar to another line, where White mistakenly did not capture Black's stone in the lower left corner, but thoughtlessly occupied one of Black's liberties at the right.
|
|
Black must not play any reduction. |
|
Capture Variation: Compared to the superordinate variation, ...
In total, gains and losses compensate for each other. White + 1 => White + 1 |
|
Semeai Variation: Compared to the superordinate variation, ...
In total, White gained eight points. Black + 7 => White + 1 |
|

 58aa
58aa : (
: ( 58bb
58bb too early.
 :
:
 :
: :
: ;
;  :
: :
: : (A
: (A  58cu
58cu , instead, would be a mistake here, due to Black's earlier move at
  in the centre that cost him a decisive tempo in the Main Semeai.
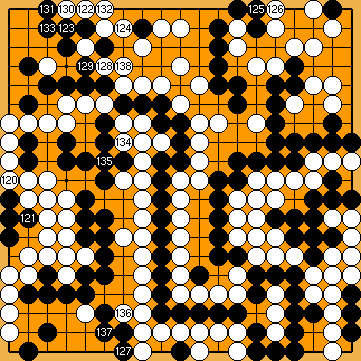
 :
: :
: :
: , doing the same with the upper left corner.
 :
: :
:
 :
: : (
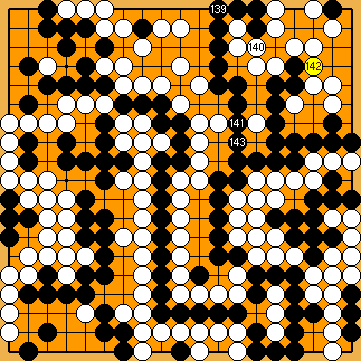
: ( 143
143  :
:
 ).
). ) to accomplish the same task at the left side of the board.
 in the lower right, as this would lose two tempi in the Main Semeai - but he has none to spend.
 in the lower right at his hands, which is worth two points.
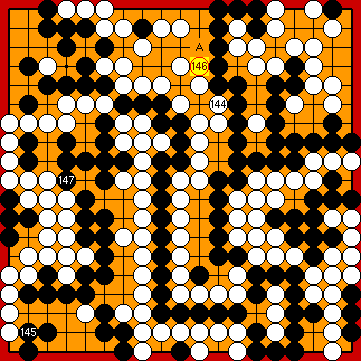
 :
: :
: : (
: ( , instead.
 :
: