: ( 228)
Black cuts in the centre of White's eye shape.
:
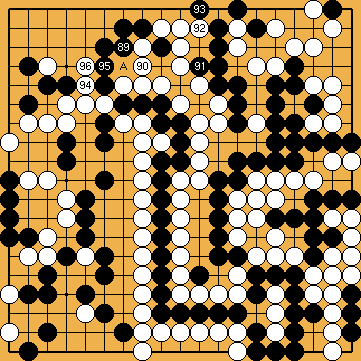
We think that White should block from the right to pre-empt Black's forcing moves here, which also take important liberties.
: (90 299)
Here, Black does not revert to the main line of this variation, with a move at , but establishes a more solid shape for his stones in the upper left. This is also shown in the theory chapter as FLAG 7a ( 1028).
As we know now ( 309), , instead, would be a mistake, because White would answer with a move at , turning Black's cut at into a lost move.
Also, Black cannot give atari with a move at , instead.
:
Black blocks directly with this move, so trying to pre-empt potential White ko-threats in the top left corner, and to take White's group below a liberty. If Black gains a move in the semeai on the right, he can afford to sacrifice his stones on the left.
:
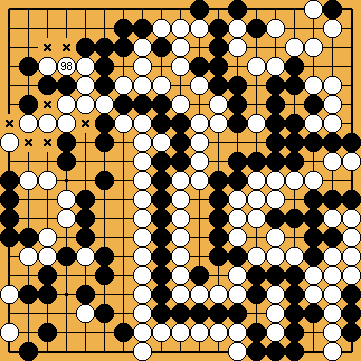
White simply connects her single stone. Her partial group in the top left corner has seven liberties () now, so there are no Black ko-threats in this area any more.
:
Black brings his -group in the upper left to life.
As far as the right side of the board is concerned, we have a change in the order of moves of a position that is explained in detail later ( 340), with White winning the game.
 (C)
(C)  (B)
(B)  (B)
(B)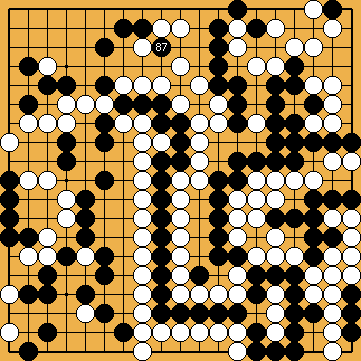
 228
228
 :
:
 : (90
: (90  299
299 , but establishes a more solid shape for his stones in the upper left. This is also shown in the theory chapter as FLAG 7a (
 1028
1028 , turning Black's cut at
  , instead.
 :
:
 :
: ) now, so there are no Black ko-threats in this area any more.
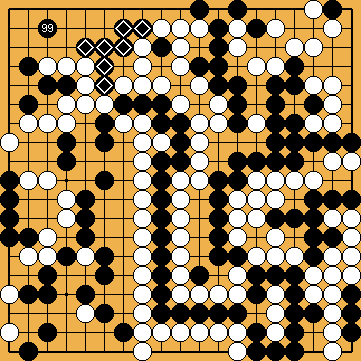
 :
: -group in the upper left to life.
