Variations of Our Solution (II)
VAR  (C)
(C)  (B)
(B)
|
(Referenced by
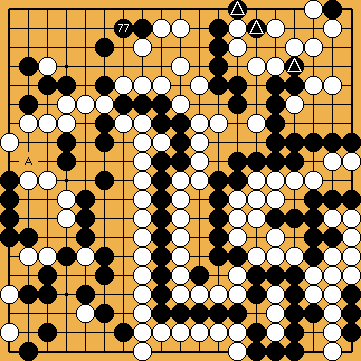
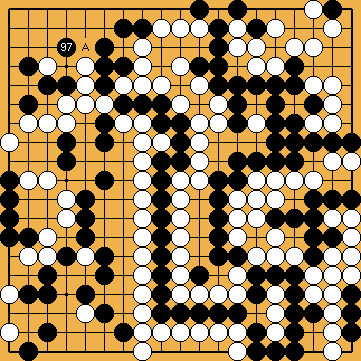
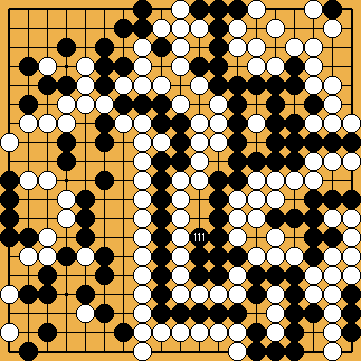
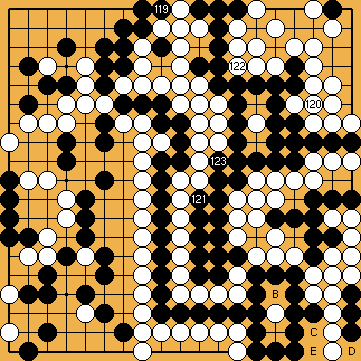
In 2014, we finished our theoretical analysis, whether Black could successfully use the three kikashi in the top left corner ( An exemplary application case can also be found earlier in this book ( |
|
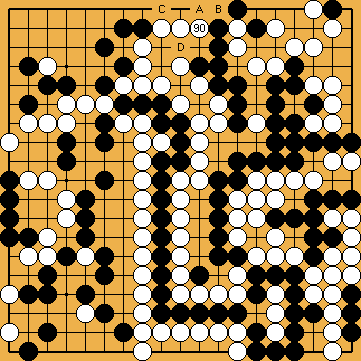
If White wanted to pre-empt Black from forcing her to start the forthcoming ko-semeai on the right side "early", she would have to insert the kikashi in the top left corner first, starting with the atari of |
|
In the middle of 2013, when analysing the consequences of Michael Redmond's kikashi in the bamboo joint ( |
|
|
|
White can neither avoid the ko with moves at |
|
(Referenced by
It is also too late now to close the top left corner, with a move at |
|
|
|
This throw-in creates another false eye for White, so Black gains one move, compared to the exchange of
|
|
Cutting immediately at
|
|
|
|
|
|
White could get more shared liberties with playing at |
|
However, Black will get a similar result, if he does completely without this kikashi. |
|
|
|
Playing |
|
(Referenced by
White could successfully start the ko on the right side "early", with a move at White could also do without these kikashi in the top left corner, which we had thought of as a kind of precautionary measure in the very beginning of our investigation of Joachim's Ko-Semeai. As we ultimately understood in 2014 (late, but not too late), there is really no need for White to play preparatory moves in the top left corner, in order to create potential for own ko-threats in this area. |
|
|
|
|
|
|
|
|
|
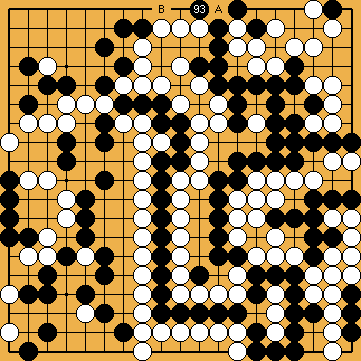
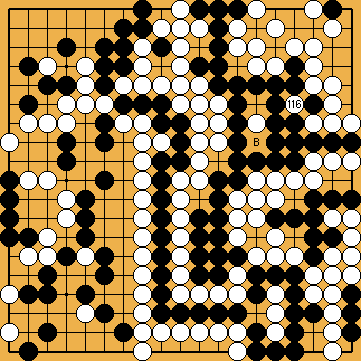
Please note that the exchange of |
|
We have chosen this move for technical reasons, with regard to potential ko-threats. If Black connected at |
|
|
|
|
|
|
|
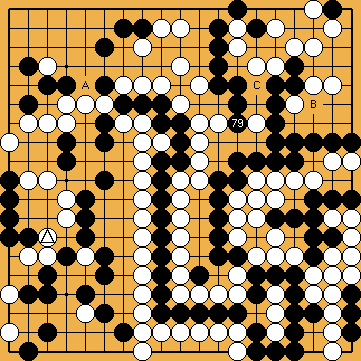
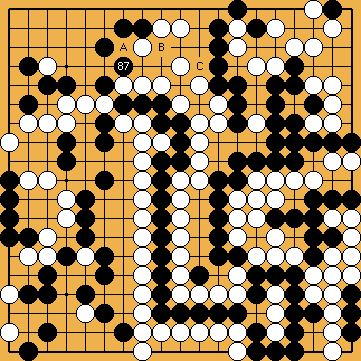
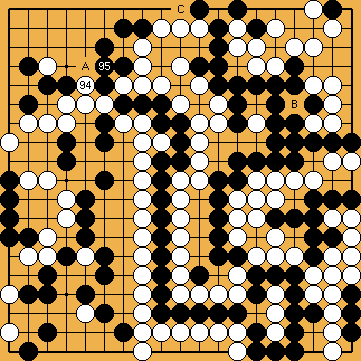
White could also start the ko, with a move at |
|
As a matter of course, Black is unable to eliminate his weaknesses in the upper left corner with a move at |
|
Again, White should not occupy an outside liberty, forcing Black to connect the hanezeki's tail. |
|
|
|
(Referenced by
As already mentioned above, it will not prove advantageous for White to occupy another direct liberty, for example at |
|
Here, Black connects the hanezeki's tail, and so captures White's three stones, because his top right group has only seven liberties left. Otherwise, White would capture Black's centre group with a move at Alternatively, Black could use his local ko-threat in the hanezeki, at |
|
(Referenced by
White's group has five liberties, three shared liberties ( Black's group in the lower right has five liberties, too, four direct liberties ( Black's group in the upper right has seven liberties, three shared liberties ( |
|
|
|
|
|
 77
77 219
219 . The results of our analysis of Joachim's second idea can be found later (
 ; which have been played here already) as ko-threats, when he keeps them in reserve. Following our final conclusion (
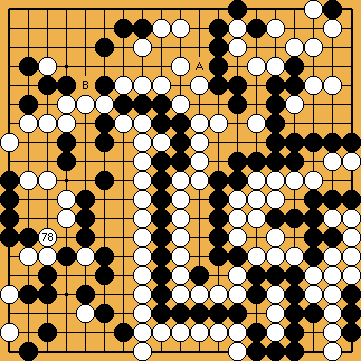
 : (A
: (A  236
236 .
. - this will stop Black from taking that point later (
 ;
; 
 : (A
: (A  , instead, Black might also achieve a ko. However, Black gains a small territorial advantage here by the immediate capture of White's stone, should White reject the ko offer.
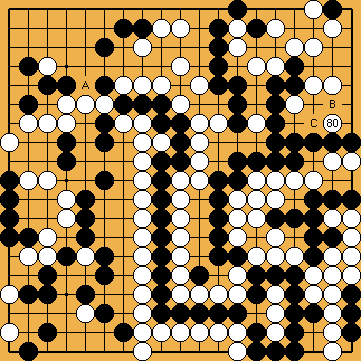
 : (A
: (A  . Then Black will play at
  , and get an extra liberty (the "guzumi effect"), winning him the Semeai Variation. But choosing the Capture Variation (by taking the hanezeki's tail) is no valid option for White either, because she will not get enough points on the left side, to win.
 : (A
: (A 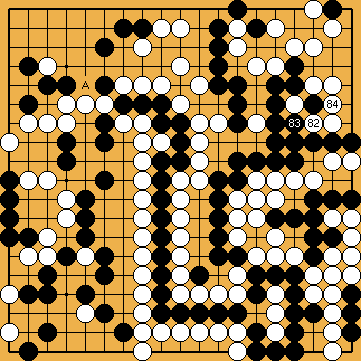
 : (A
: (A 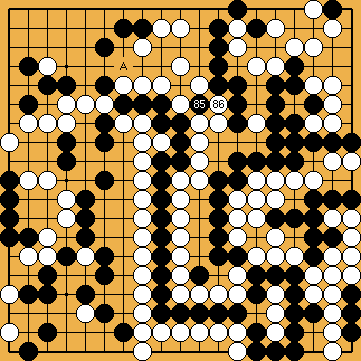
 : (86
: (86  ,
,  .
.
 : (A
: (A 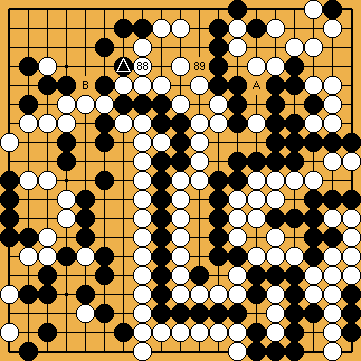
 : (89
: (89  , instead, would lead to an equivalent result.
 :
:
 :
: , instead. We did not investigate this thoroughly, but we suppose that there will be no decisive effect on the main line of this sub-variation.
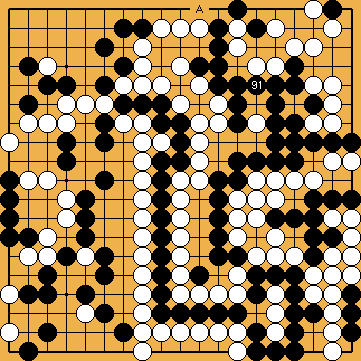
 : (A
: (A 
 :
:
 :
:
 : (B
: (B 
 :
:
 : (A
: (A 
 : (A
: (A  , or at
  .
.
 :
:
 : (A
: (A  has been played already, as a mandatory requirement for White's current move.
 -stones in the lower left corner. However, White will need ko-threats of her own in the top left corner, so this cannot be called technically as good as the main line here.
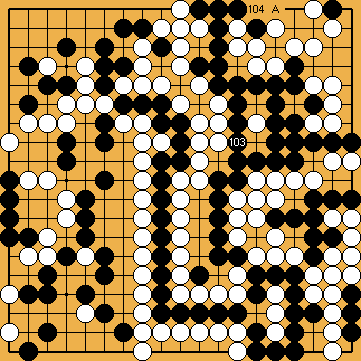
 :
: , instead, he would lose the potential ko-threat of the atari at
  , destroying another potential Black ko-threat (capturing two White stone inside his eye). Please note that here, in the main line, these potential Black ko-threats will not come into play.
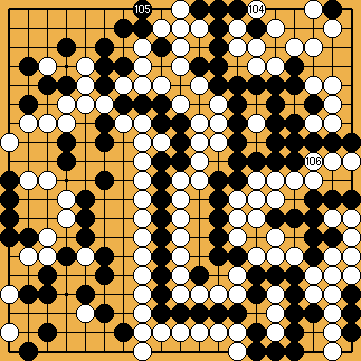
 :
: , instead, does not benefit White in the case Black has got the larger eye in the centre (
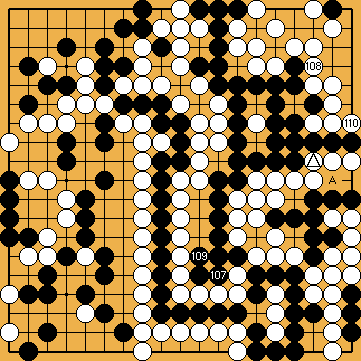
 :
:
 :
:
 : (A
: (A 
 : (A
: (A  below (
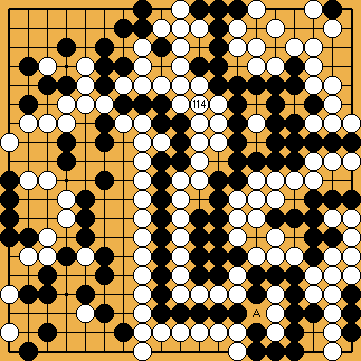

 :
:
 : (B
: (B 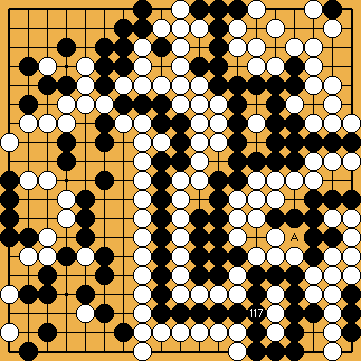
 : (A
: (A  herself, thereafter winning the Punishment Semeai (
 :
: ) with Black's group in the upper right, and two direct liberties (
 ).
). ), and one approach-move liberty (
 ).
). ), and one approach-move liberty (
 ).
).
 :
: , instead, White will win the semeai with Black's group in the lower right, using the moves from
  . Both groups have five liberties, so White is better off, because she starts the semeai.
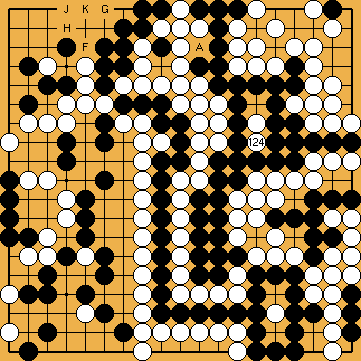
 :
: -
-  ) unused in the top left corner that could become ko-threats. However - White loses a liberty of her group in the top left corner with
