Variations of Our Solution (IIIb)
Dany's Ko: Joachim's No-Ko-Threats
VAR  (.1)
(.1) 
|
We will explain below that neither Please remember that we played of |
|
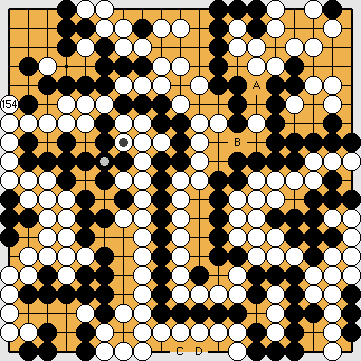
KataGo (2021i) favours the connection in the right centre with
However, KataGo (2020) found a way to generate an additional ko threat - the fourth one - in the upper left corner, which will benefit White decisively.
Playing this atari from the outside, at
KataGo (2021i), however, ends the ko fight just now, keeping Black's final two territory-destroying moves in the upper right - which could be utilised as ko threats - in reserve.
However, this would have been the last moment to terminate the ko fight by connecting at
Joachim found that Black could ignore any of White's moves In the very beginning, White could have inserted her kikashi of |
|
He would gain two points in the Capture Variation, if he connected in the right centre, instead, but still be unable to affect the result of the Semeai Variation.
Enlarging his territory in the right centre, instead, will not affect the final scores of the game any longer. |
|
Black is unable to connect at
|
|
Capture Variation: Compared to the superordinate variation, there are no changes. White + 2 => White + 2 |
|
Semeai Variation: Compared to the superordinate variation, there are no changes. White + 2 => White + 2 |
|
 648mk
648mk , nor
, nor  , in the upper right include a sufficient threat, which would enforce an immediate local reply by Black.
 ,
,  in the left centre too early in 2019. Therefore, this exchange was still available as a ko threat for White. We will utilise the exchange of
  ,
,  at the lower edge as a replacement in the sequences below (if necessary).
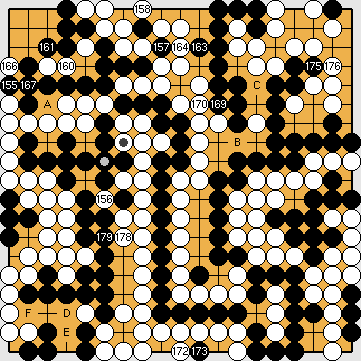

 ;
;  ;
;  ;
;  ;
;  ;
;  ;
; 

 : (B
: (B  648qb
648qb just now, which implies that KataGo (2021i) wants to play this move as early as possible.
 : (161
  : (A
: (A  : (
: ( B
B  ;
;  :
: : (
: ( : (C
: (C  ,
,  in the lower left corner.
 , but which she must not utilise.
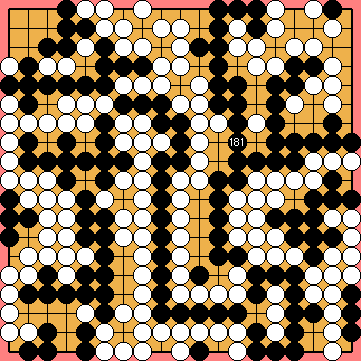
 : (
: ( :
: : (184
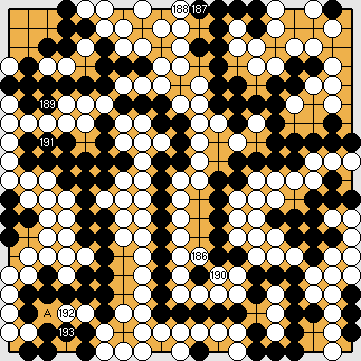
 : (187
  by occupying this point herself.
 (this would cost him one liberty too many); therefore he is bound to realise his aim at the upper edge. If he did not succeed, White would benefit by one point in the Capture Variation.
 :
: before the end of the game.