Variations of Our Solution (IIIb)
Tricking KataGo (Triple-Ko)
VAR  (C)
(C)  (A)
(A) 
 (.2)
(.2) 

 (.2)
(.2)  (.2)
(.2)
 (.2)
(.2)
|
|
|
If Black kept this move in reserve, and played it later as a ko threat, White would ignore it.
Connecting at
Please note that Black loses a tempo in the Main Semeai by this move. However, it is badly needed to keep Black's chances in the semeai with White's centre group. |
|
Immediately pushing with
Again, Black sacrifices a tempo in the Main Semeai for keeping a decisive advantage in the Central Semeai.
|
|
|
|
Please note that it was White's push with |
|
Other potential ko threats, as However, playing at
Please confirm for yourself that White must not connect at
|
|
She will win the final endgame ko in the upper left corner, and connect at White will win the game by 34 points. |
|
 222ds
222ds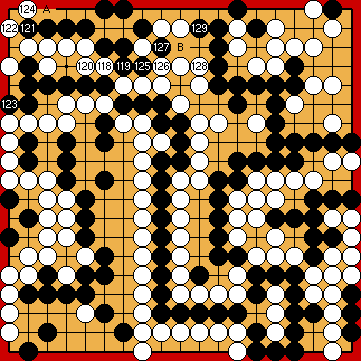
 :
: : (A
: (A  222dx
222dx in the upper left corner, instead, would be too early.
 : (B
: (B  , instead, would be mistaken.
 :
:
 : (136
  in the upper left corner, instead, would be several points worse for her.
 :
: :
:
 :
:

 :
: :
: :
: :
:
 : (
: ( E
E  ,
,  , are not available here. Choosing any of these would result in a loss of a decisive liberty at the right, resulting in White winning the Central Semeai.
 - White has a ko threat at
  , forcing Black to occupy an own liberty with
  .
. (or
(or  ) at the bottom, instead, would be a few points better for Black.
 :
: , instead, answering Black's ko threat.
 :
:
 :
:
