Variations of Our Solution (Ib)
KataGo's 2021 Solution
VAR 
 (.3)
(.3)  (.3)
(.3) 
|
|
|
In another selfplay game, KataGo did without and defended in the left centre immediately.
|
|
In another selfplay game, KataGo connected immediately at
White must never ever connect her two stones, as long as the position in the upper left corner is still open.
However, this is another move that is likely to complicate the course of the game unnecessarily (and is a genuine mistake, if played too early; |
|
|
|
Please note that this connection creates an an approach-move liberty for her left-hand group, and so does not lose any tempo in the Main Semeai.
|
|
This move was my second candidate for a potential White mistake in this subvariation. However, a closer inspection of the alternative continuation showed a simple mistake therein that I had made accidentally. Nevertheless, White should refrain from playing this move, as it loses one tempo in the Main Semeai unnecessarily (correct continuation provided).
Rather, it would have been the game-deciding mistake of this selfplay game had KataGo "seen" the correct continuation for White below.
Please note that his move is absolute sente, and Black does not have the time to continue in the upper right.
|
|
This move was my first candidate for a potential mistake in this subvariation. However, a closer inspection of the alternative continuations showed "hidden" mistakes therein, that I had made accidentally.
Alternatively, he might play KataGo's solid connection in the left centre.
It seems that KataGo did not "see" the correct continuation in the subvariation after White's correct move at e.g. However, if White has a way to win the Capture Variation by two points (as in the subvariation here), Black must have made a mistake before (so far undiscovered by us).
|
|
As long as White has the capture at |
|
We will show the ensuing semeai in connection.
Alternatively, she might capture the hanezeki's tail from now on.
White's centre group has five liberties (
|
|
|
|
|
|
|
|
Black will win the game by a large margin. |
|
 58bb
58bb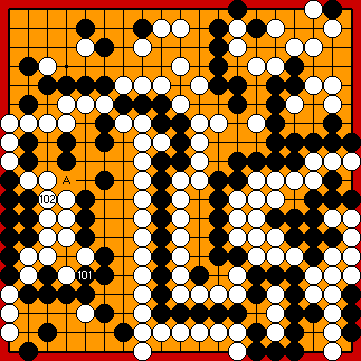
 : (A
: (A  58bd
58bd :
: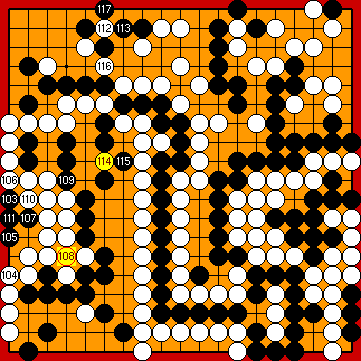
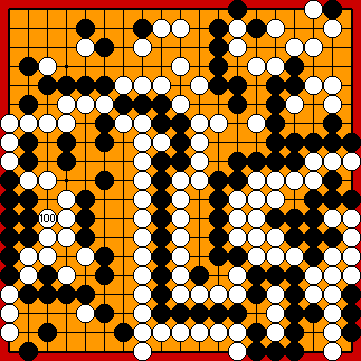
 : (108
  .
. :
: just now and play this connection after Black's (correct) reply in the upper left corner.
 :
: :
: :
: 58dr
58dr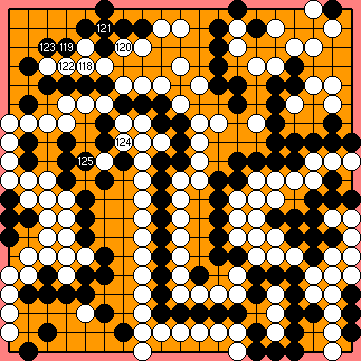
 :
: :
:
 :
: :
: :
:
 : (
: ( 139
139  : (
: ( :
: :
: :
: :
: :
: :
:
 :
: : (
: ( : (148
  : (
: ( , occupying a liberty of Black's right-hand group.
 :
:
 :
: :
: :
: :
: :
: : (
: ( at her hands, he has to occupy shared liberties, instead.
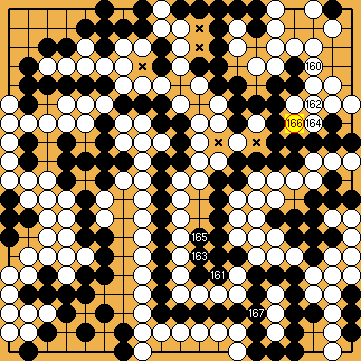
 :
: :
: : (
: ( ) left, so she has to capture the hanezeki's tail, instead.
 :
:
 ;
;  :
: ;
;  :
:

 :
: :
: :
: :
:
 :
: :
: :
: :
:
 :
: :
: :
: :
: :
: :
:
