Variations of Our Solution (Ib)
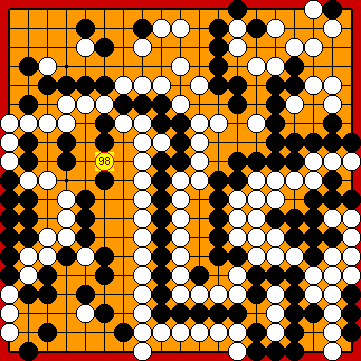
KataGo's 2021 Solution
VAR 
 (.3)
(.3)  (.5)
(.5)
|
(Referenced by
White must never ever play this wedge before an atari at Black's nakade. |
|
Giving atari from below, with a move at
|
|
However, this move will increase the susceptibility to errors in the following course of the game unnecessarily (and can be a genuine mistake;
|
|
However, an exchange of liberty occupying moves of the Main Semeai is unnecessary at the moment, and so can be considered to be a technical mistake in the timing of moves.
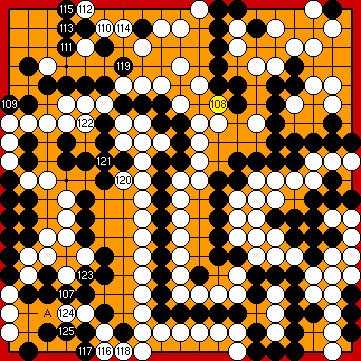
He would gain two points in the Semeai Variation, if he defended in the left centre with
He would gain two points in the Semeai Variation, if he defended in the left centre with
Please note that this move loses one tempo in the Main Semeai - in principle - as it does not contain an immediate local threat.
Please note that this kikashi is effective, only if White is able to deny Black's left-hand group any eye in the left centre.
Black does not have a sure eye in the left centre yet, but would be able to answer with the atari of |
|
This move was my first candidate for a potential mistake in this subvariation, as there are more valuable points remaining on the board. White's move prevents a Black push into her upper right corner, but which Black does not want to play so early anyway. Capturing with |
|
If Black now connects at Therefore, Black is able to capture White's single stone in the upper right with Both sides lost two tempi each in the Main Semeai, so Black is still one over par with the Punishment Semeai Liberty Level. Please note that White cannot achieve the usual benefit of one point by playing the kikashi at |
|
If Black now captures two White stones with In principle, she will use her sente to prevent a one-point-reduction of her territory in the upper right, e.g. with Additionally, White did not lose any further tempo in the Main Semeai, so Black still has one Main Semeai Liberty to spend. |
|
If White (with her move In principle, he will use his sente to destroy one point of White's territory in the upper right by capturing White's single stone with Thereafter, Black is three over par with the Punishment Semeai Libery Level, so he will be able to destroy another three points of White's territory. Please note that White cannot achieve the usual benefit of one point by playing the kikashi at |
|
Alternatively, he might consider connecting his stone in atari. The overall result of the game would not be affected, but Black would benefit by two points in the Semeai Variation.
Otherwise, she would lose her stones at the left after Black's atari at
|
|
Black must not play any reduction. After her decision point, White will connect at |
|
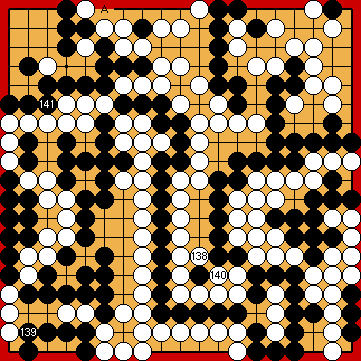
Capture Variation: Compared to the superordinate variation, ...
In total, White gained three points. Black + 2 => White + 1 |
|
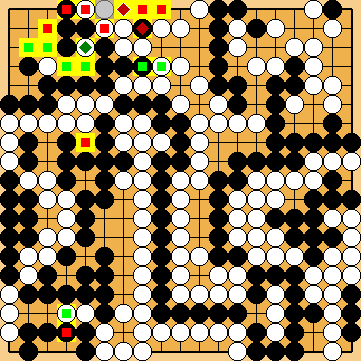
Semeai Variation: Compared to the superordinate variation, ...
In total, White gained one point. Black + 2 => Black + 1 |
|
 58ar
58ar : (
: ( 58ap
58ap
 :
: :
: , would have the same effect. It's just a matter of a change in the order of moves.
 :
: (an earlier exchange of
  for
for  assumed) is no longer a valid threat.
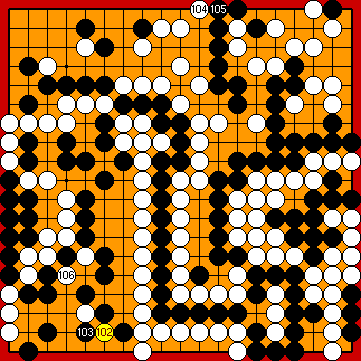
 :
: :
: :
:
 :
: : (
: ( 122
122  58ds
58ds first.
 :
: :
: :
: : (
: ( :
: :
: :
: :
: : (A
: (A  from the left here, due to White's missing atari at the nakade. He would reach the same final scores of the game as with the sequence below.
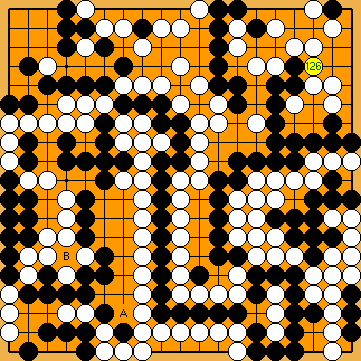
 : (A
: (A 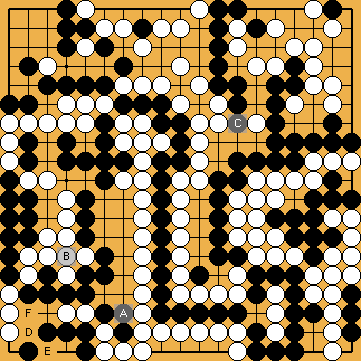
 ; Black has sente.
 , he gained one point locally.
 , usually his best reply, but simply give atari at White's corner stones with
  .
.
 , but she has sente now.
 ) captures at
  .
.
 : (
: ( :
: :
: :
: .
. :
: :
: