New Story Line 2022
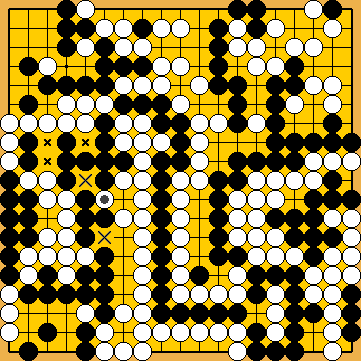
KataGo's Bad-Shape Move in the Left Centre
VAR 
 (.1)
(.1)
|
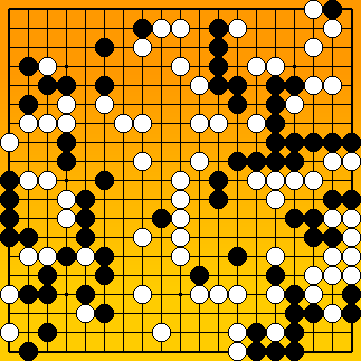
Let's enter the world of amateurs ... |
|
|
|
White's last move created an additional approach-move liberty Four Black moves are now needed for filling White's liberties in the left centre (3 x Additionally, Black must find a defense against White's cut at |
|
Black will lose the ensuing ko-fight anyway, so he might consider simplifying the issue by immediately connecting at
If she simply connected with |
|
For further details of our analysis at the time, please refer to the history of our investigations ... As already mentioned above, we intensively investigated this line in a "no-kikashi" approach, i.e. without all of Black's kikashi During the course of this investigation, KataGo found a surprising number of White ko-threats in Black's upper left corner, including On the other hand, Joachim discovered that Black's moves at |
|
In order to profit from the ko-fight in the left centre, Black must connect the ko at Black's last move |
|
|
|
White's last move did not lose a Main Semeai Liberty. In principle, |
|
If he played elsewhere, instead, White would give atari at his two stones at the left edge with
Otherwise, Black would be able to utilise his liberty-occupying moves in the Main Semeai as ko-threats at an opportune moment.
|
|
... |
|
If he fully utilised his surplus Main Semeai Liberties for 4/4 reductions, the final scores of the Main Variations would become White + 1 / White + 3. Black will have to connect at After White's decision point, Black will have to capture at |
|
Capture Variation: Compared to the superordinate variation, ...
In total, White gained one point. White + 1 => White + 2 |
|
Semeai Variation: Compared to the superordinate variation, ...
In total, White gained one point. White + 1 => White + 2 |
| |

 2039b
2039b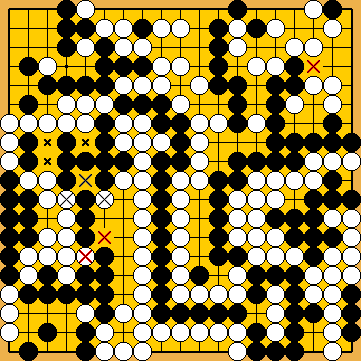
 for her left-hand group, and so does not lose a tempo in the Main Semeai.
 ; 1 x
; 1 x  ), instead of only three before (3 x
  in the upper right, so the net effect in Main Semeai Liberties is zero.
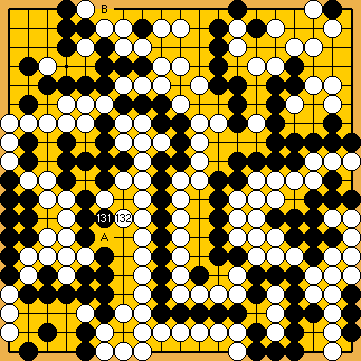
 :
: .
. :
: , instead, Black would take the opportunity to capture White's single stone at the upper edge with
  , gaining two points at the cost of one Main Semeai Liberty, an effective advantage of one point.
 :
: 648mk
648mk ,
,  played, hoping that these could be utilised as Black ko-threats ...
 and
and  .
. and
and  in the bamboo-joint (
 had been exchanged for
  much earlier) were no valid ko-threats for him, as White was able to successfully ignore these ...
 .
. will become an eye, rendering White's forthcoming tesuji
  , so the net effect would be zero.
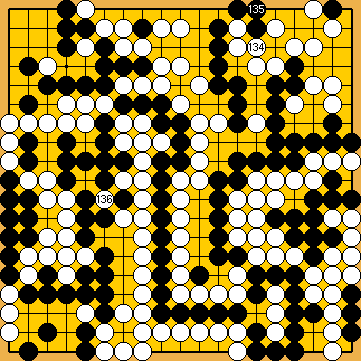
 :
: :
:
 ) in the left centre now, instead of only four points before, so the net effect is zero.
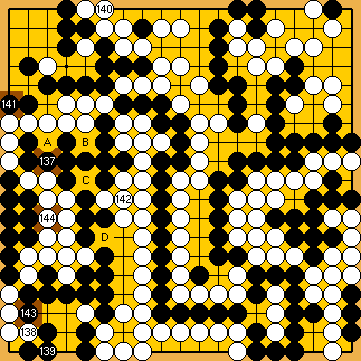

 :
: . After
  . However, this ko-fight would be too big to win, as Black could not compensate for White's ko-threats after the capture of the nakade.
 :
: :
: :
: :
: :
: :
:

 ;
;  :
:


