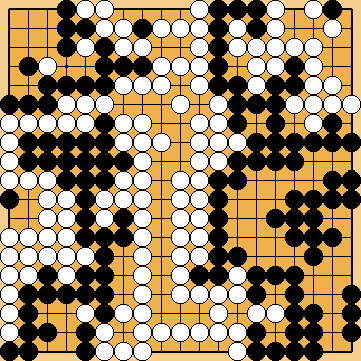
Variations of Our Solution (III)
VAR 
|
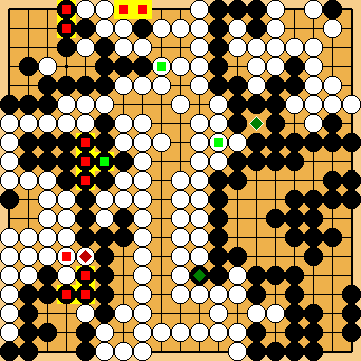
Please refer to "KataGo's Unbelievable White Atari on the Left Side" ( Please note that we inserted the Hanezeki Exchange |
|
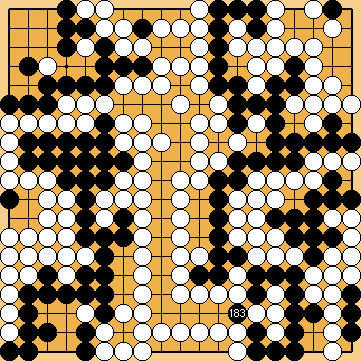
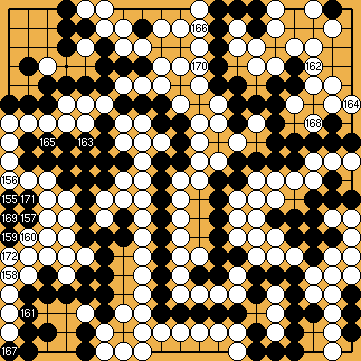
Black must not answer White's atari by capturing at Black might want to immediately complete the nakade by playing at
|
|
Preceding the move at |
|
|
|
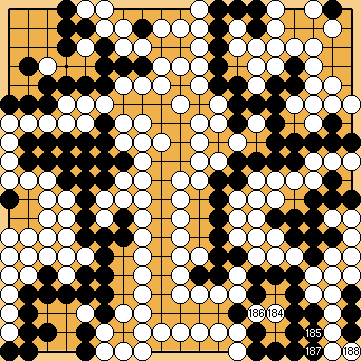
Black might want to resist more forcefully, by giving atari with Please note that Black might not be able to act as forcefully as he wants to do in the top left corner. He has to play attention to keep his ability of occupying White's marked liberties without any delay; otherwise White will choose, and win, the Punishment Semeai.
|
|
|
|
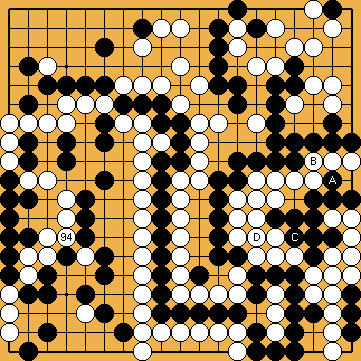
White might choose the "usual" continuation at
Black can also immediately block with KataGo preferred the solid connection at |
|
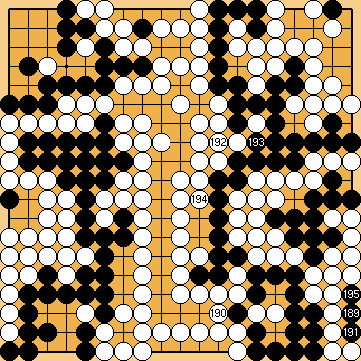
White might also push at |
|
Dany found that playing the atekomi of If White ever wanted to play the central attachment, she would have to precede it with her kikashi of
Black can also capture at
She can also play at |
|
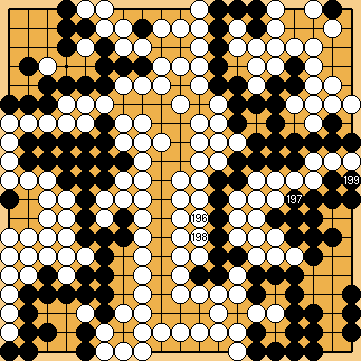
KataGo's preferred line of play uses the move at
Connecting at |
|
|
|
... |
|
... |
|
Despite the fact that White – compared to Our Solution (2017) – added four stones to her large group at the left side ( |
|
... |
|
... |
|
... |
|
... |
|
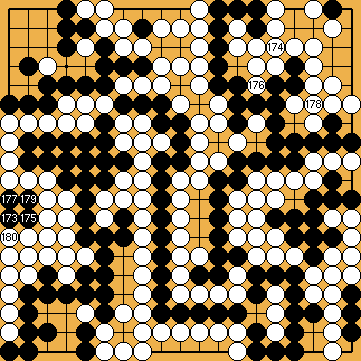
This is the final position of the Capture Variation. |
|
Capture Variation: Compared to the superordinate variation, ...
In total, White gained six points. Black + 5 => White + 1 White wins the Capture Variation by one point! |
|
 503
503 1093a
1093a -
-  (played before the Crosscut Sequence), as found in 2017 to be the correct timing for these moves.
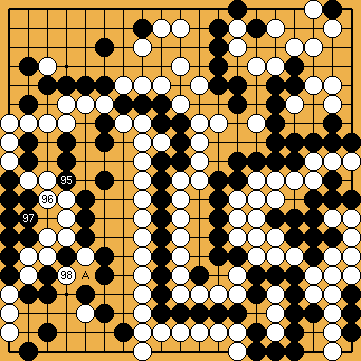
 : (A
: (A  548ka
548ka , immediately giving atari at his nakade stones.
 .
. , in order to keep his nakade stones at two liberties, but this move will result in a change in the order of moves only.
 :
:
 : (A
: (A  will not help either, as White has a surprising local response at her disposal.
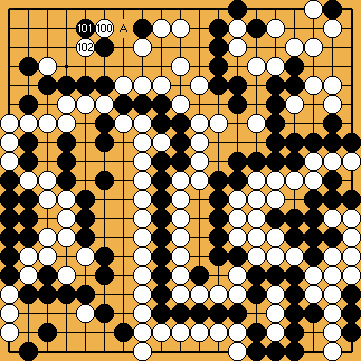
 :
: of Yamada Shinji, KataGo preferred White's crosscut of
  .
.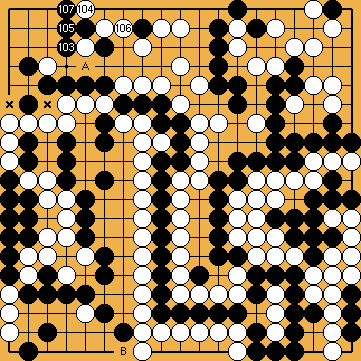
 : (106
  instead, but will suffer by one point in the final score.
 : (A
: (A  : (B
: (B 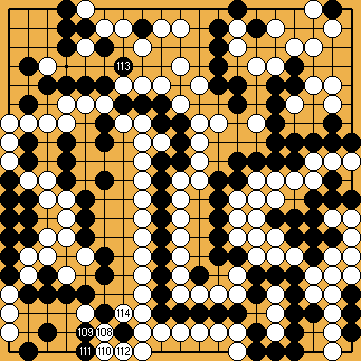
 :
: at the bottom to gain points at the top.
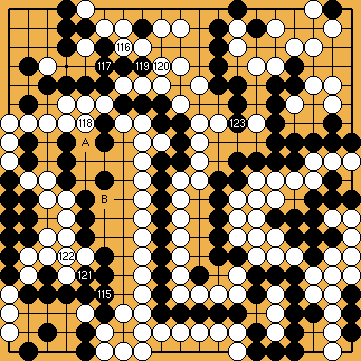
 : (123
  to reach the same final result of the game – in the Capture Variation – but she will suffer by one point in the Semeai Variation.
 :
: , so losing two Main Semeai Liberties.
 : (A
: (A 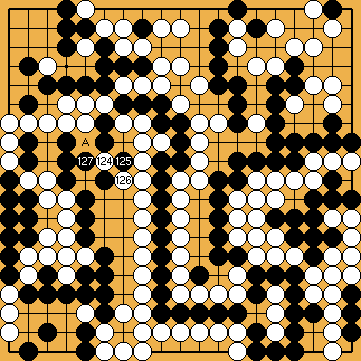
 : (A
: (A  to reach the same result of the game (in the Capture Variation), but she will suffer by one point in the Semeai Variation.
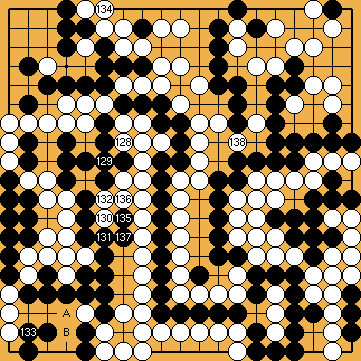
 (
( 132
132  A
A 
 , instead, will benefit White by one point in both Main Variations.
 ,
,  in the lower left corner. However, Black would be able to win the Semeai Variation in this case.
 : (134
  , instead, to reach the same final scores in both Main Variations. These two moves are miai.
 : (137
  in the centre, instead, to the same effect.
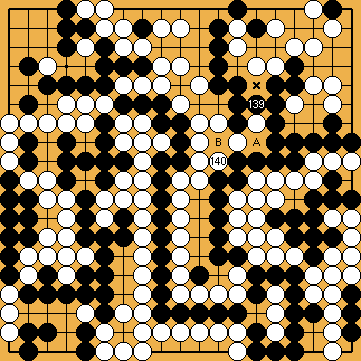
 : (A
: (A  .
. (B
(B  , instead, forcing Black to capture with
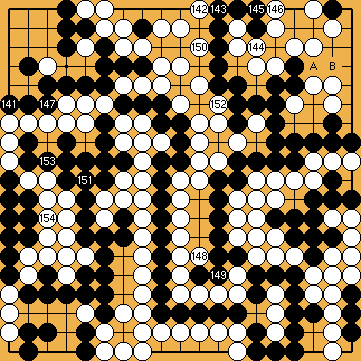
 :
: :
:

 : (A
: (A  ), but Black only two to his large group at the right (
 ), what seemed to confine White to the Capture Variation, she might also choose the Semeai Variation to get the same final result as here with the Capture Variation.