Variations of Our Solution (I)
VAR 
 (.1)
(.1)
|
(Referenced by
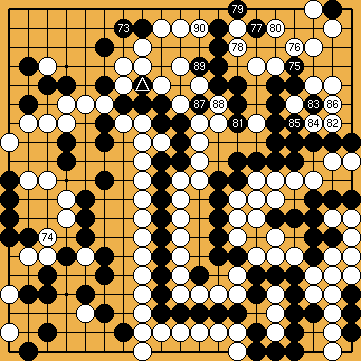
We have adjusted the course of sub-variations here according to our latest insights into this position, so that the main line includes the "correct" sequence now. |
|
|
|
|
|
|
|
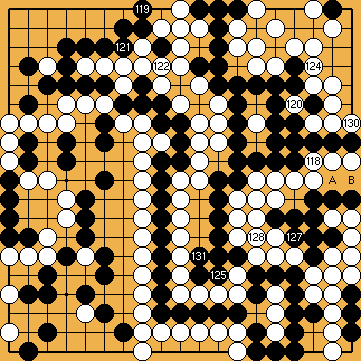
In principle, this will enable her (but only in the case of an "early" ko-semeai that is shown hereafter) to successfully make a protective move on the left side later, depriving Black of most of his ko-threats there. This will help White to shorten the sequence. Please note that White needs two moves - not only one - to erase all of Black's potential ko-threats in the nakade. Therefore, in the case of a "late" ko-semeai, White must not waste her just won liberty for a move on the left side of the board. As with the main line of Joachim's Ko-Semeai, blocking directly from above with a move at |
|
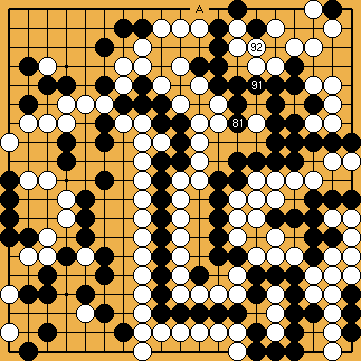
(102 (A |
|
|
Ko: |
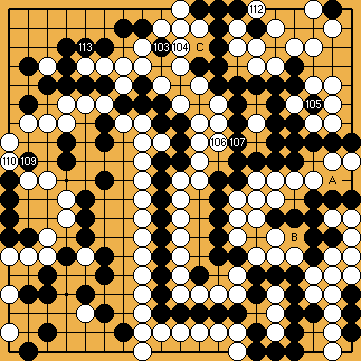
(104 Black might do without the cut at |
|
|
Ko: |
|
|
|
|
|
|
|
|
 826
826 133
133 (=
(= 
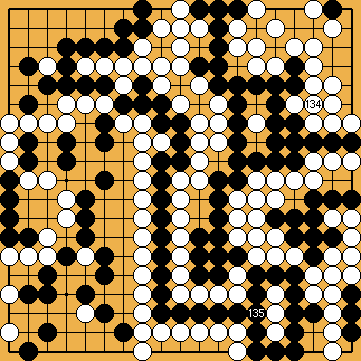
 : (A
: (A  142
142 .
.
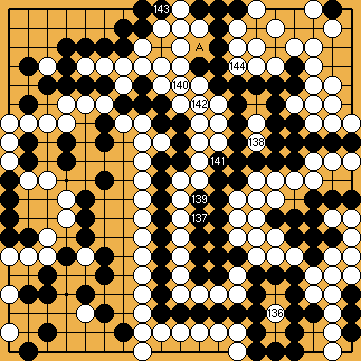
 :
: ,
,  ,
,  ,
,  ). White has four outside liberties, but there is the cutting point of
  , which allows Black to take an internal liberty in sente. This means that there are three effective outside liberties for White, so
  ,
,  ,
,  , in following the main line of Joachim's idea of a new semeai (
 :
:
 : (A
: (A  into the corner with the restrained move at
  and
and  now, instead of
  before.
 , instead, does not work for Black. There are also further sub-variations on this topic (
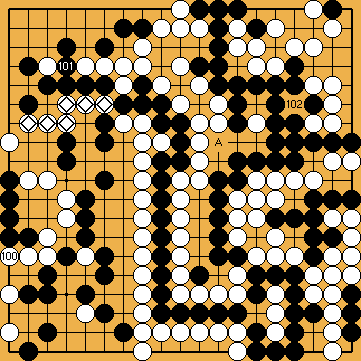
 :
: -group has been reduced to only five liberties before.
 :
:

 : (A
: (A  , instead, will become even worse. White will be forced to answer at
  . The result will not become worse for him.
 :
:
 ;
;  ;
;  ;
; 
 : (A
: (A  , in the hanezeki, achieving a similar result.
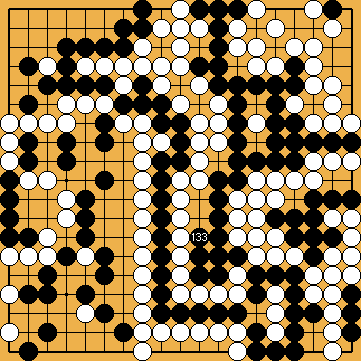
 :
:
 :
:
 :
:
